

Solana Honeypot Pro - Part 1
- 01
Install Tools You Need
This tutorial explains how to create a Solana rugpull token using Phantom Wallet, Helius, and Raydium — from setup to deployment.
We strongly recommend that you use this manual for educational purposes only.
- 02
Install Tools You Need
Download NodeJS from website
- Click on the green button that says 'Download Node.js (LTS) (Long-Term Support)'.
- Run the installer, press 'Next' until it's done. Leave everything default.
- After install, RESTART your computer.
Install VSCode (Visual Studio Code) from visualstudio
- Click on 'Download for Windows' or Mac, install with default options.
- This will be your editor for managing the Honeypot Pro script.
Install Phantom Wallet from phantom This is the most popular wallet for the Solana network
- Select your browser
- Create a new wallet and SAVE YOUR RECOVERY PHRASE in a secure place.
- Reserve at least ~0.5 SOL to unlock token creation fees (>0.1 SOL), Raydium fees (>0.23 SOL), and transfer fees (<0.1 SOL).
- 03
Create a Solana RPC Endpoint (Using Helius)
Go to Helius and create an account.
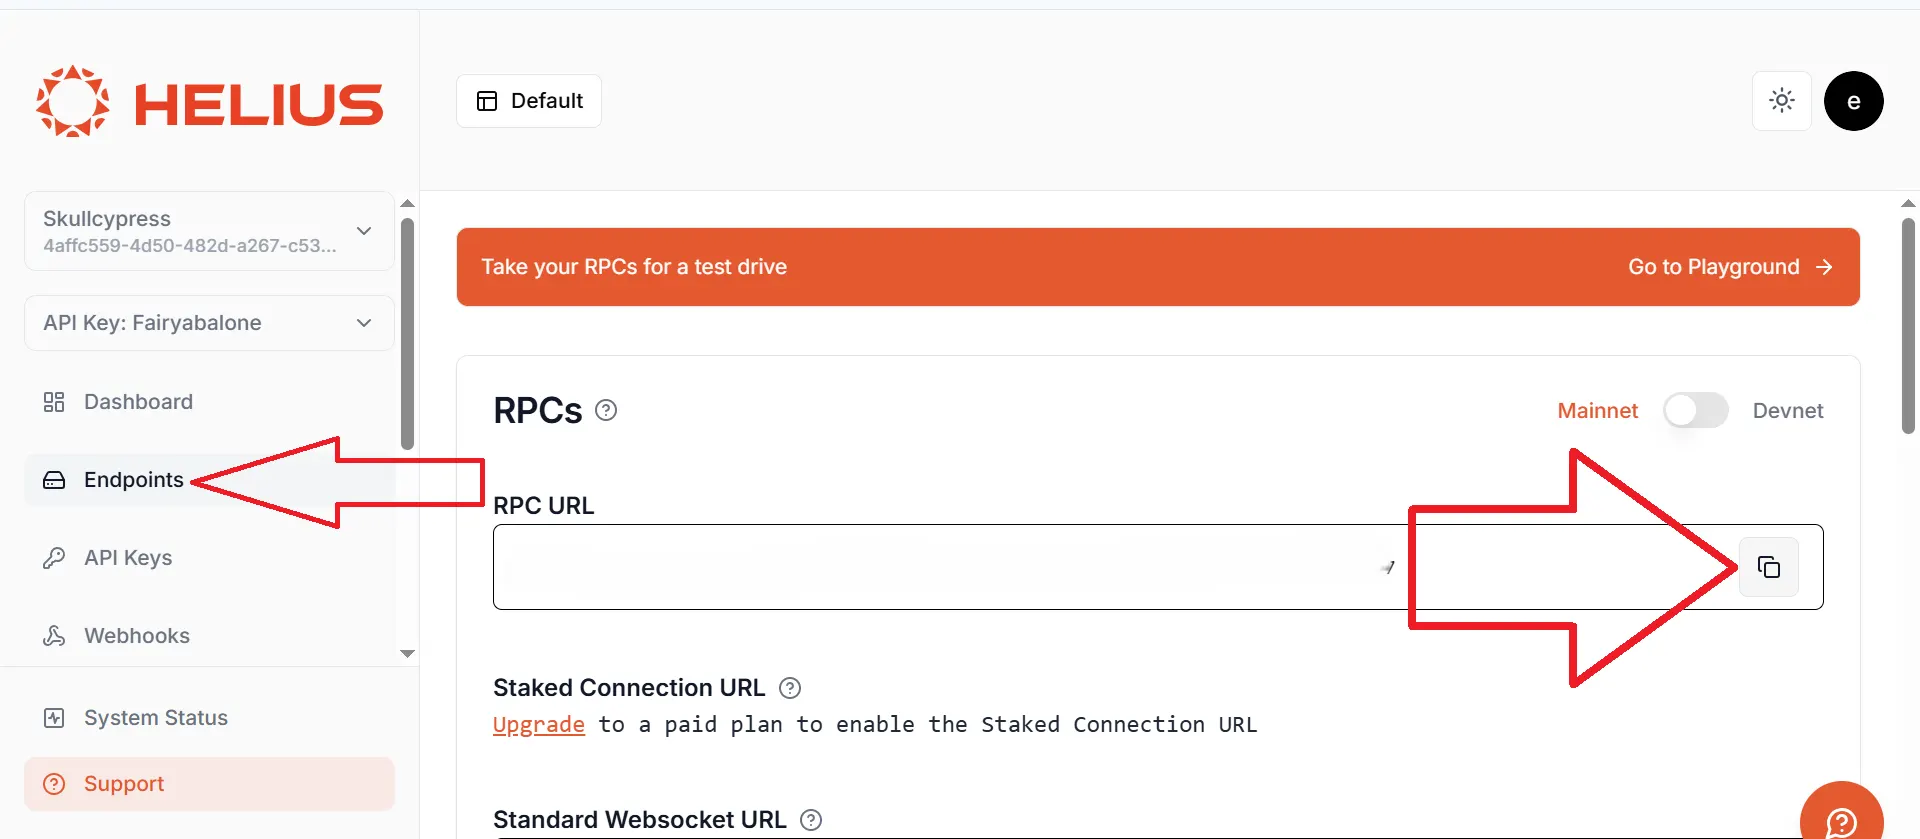
Once you're in, on the left-hand menu, click 'Endpoints'.
Copy the generated RPC URL. It will look like this: https://mainnet.helius-rpc.com/?api-key=xxxxxxxx-xxxx-xxxx-xxxx-xxxxxxxxxxxx
⚠️ This URL is private. If someone gets it, they could spam your endpoint. Don’t share it. Save your URL
📌 You’ll paste it into your script configuration file later (config.json).
- 04
Create Your Solana Token (No-Code Tool)
Visit CoinFactory
Connect your Phantom wallet
Click 'connect wallet' in the upper right corner of the site.
Select Solana Network, then your Phantom wallet will appear immediately if you have previously installed it in the browser.
Click on it, then click 'Connect'. (You will see a confirmation window for the connection).
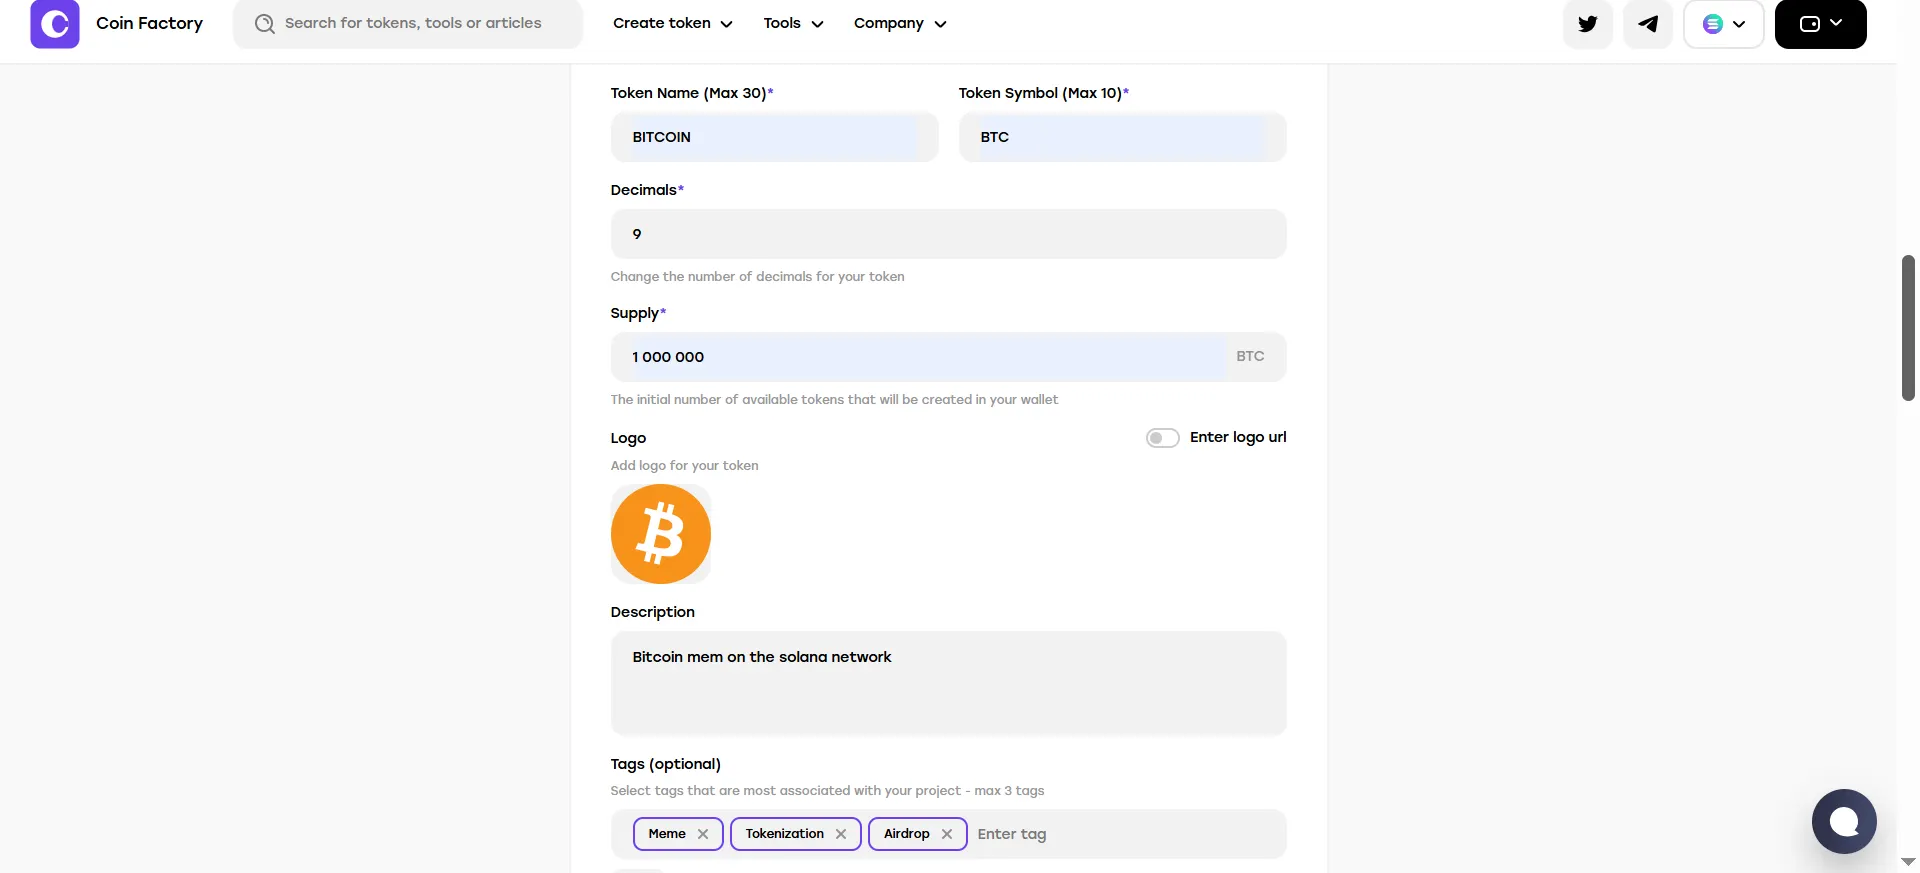
Fill out the token details:
- Name: The name of your token (e.g., DoggyDollars)
- Symbol: The ticker (e.g., DGD)
- Total Supply: Total number of tokens (e.g., 1,000,000)
- Decimals: Use 9 for most Solana tokens
- Logo URL: Optional, but recommended if you want your token to look real.
- 05
Create Your Solana Token (No-Code Tool)
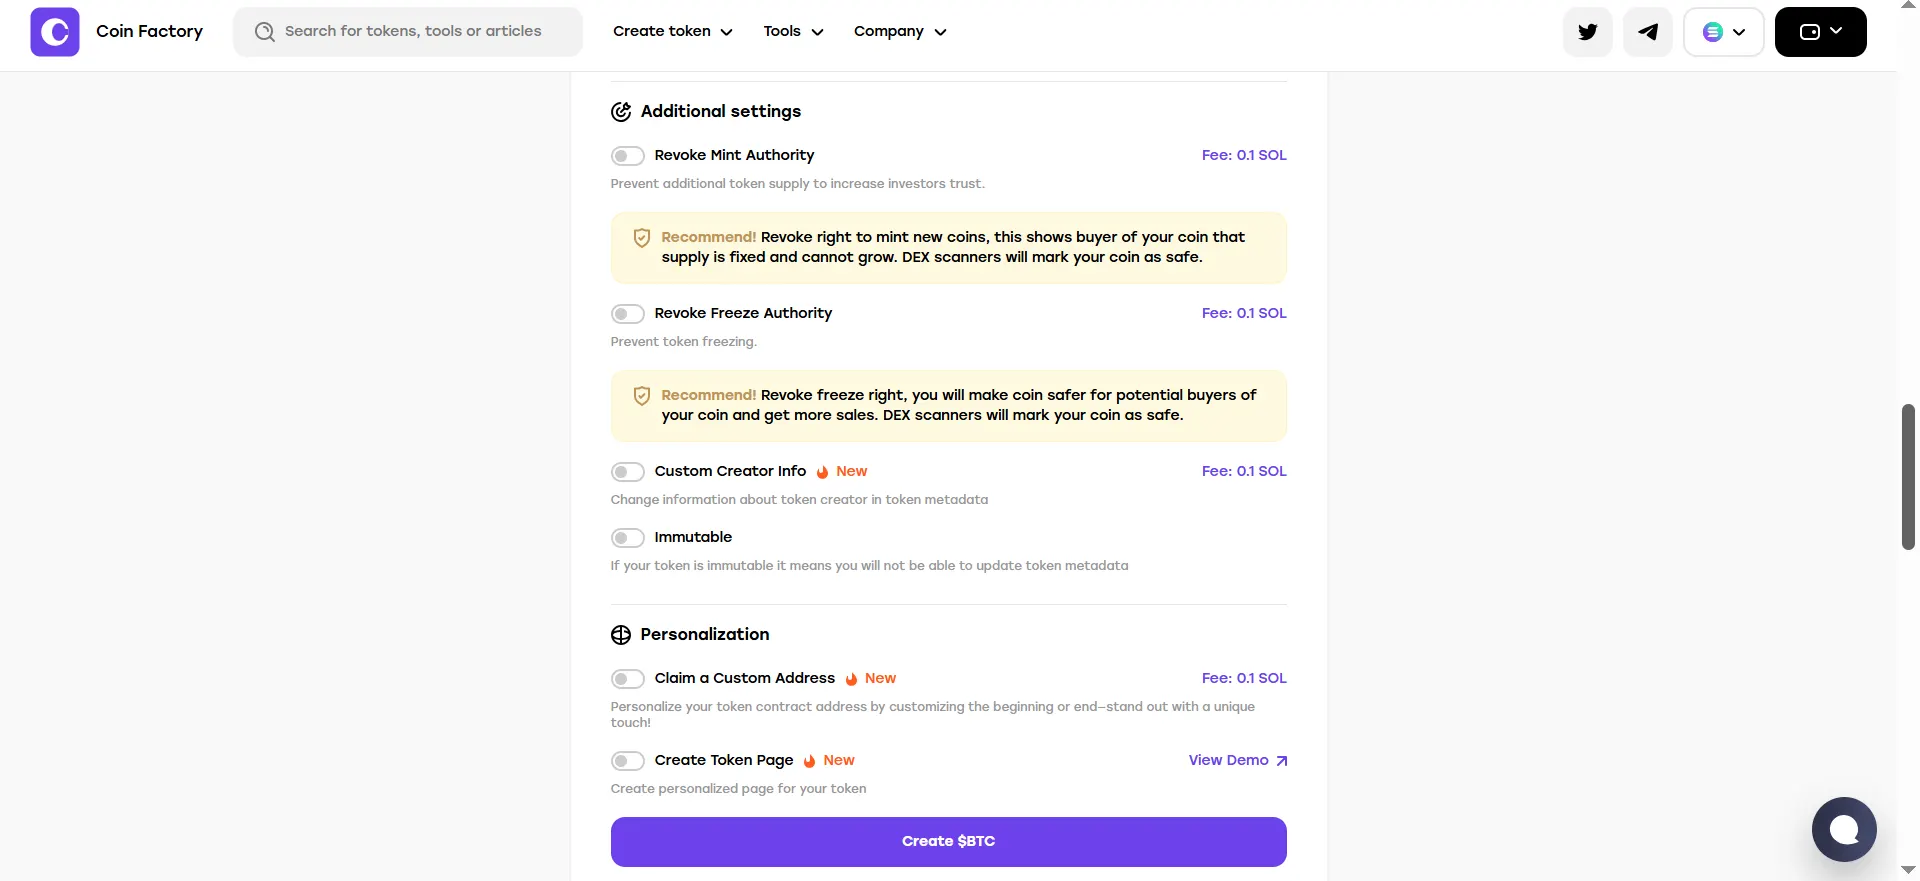
⚠️ IMPORTANT: Make sure the option 'Revoke Freeze Authority' is TURNED OFF!
Set additional settings as shown below:
- 06
Create Your Solana Token (No-Code Tool)
Click 'Create Token'. Approve the transaction in Phantom. After that, wait for the contract to be deployed.
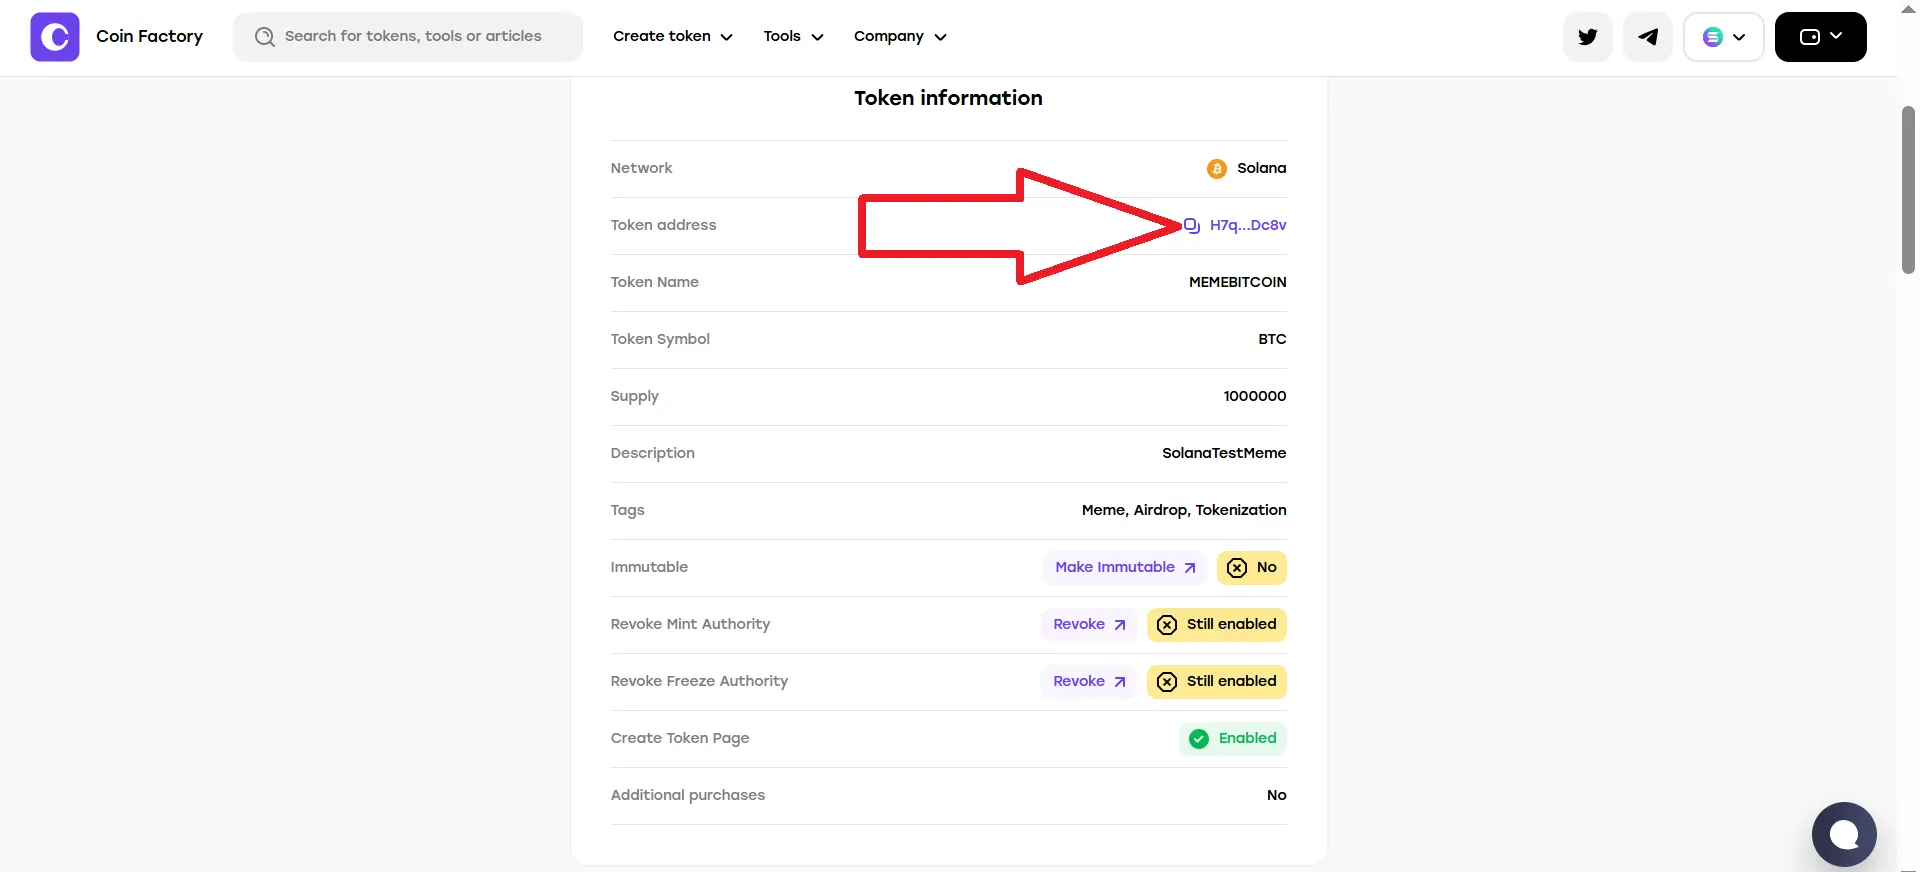
After the contract is successfully deployed, the token information will appear on your screen and you will also be able to find this token in your phantom wallet.
Copy the token address and save it.
This will be your token address that you can see on SolScan
You will need it later to set up the script
- 07
Create Your Solana Token (No-Code Tool)
This wallet (that created the token) is now the 'owner' and will control the honeypot behavior. This information can be viewed at SolScan by simply pasting your token address into the search


Solana Honeypot Pro - Part 2
- 08
Add Liquidity to Raydium
This part continues from token creation and explains how to list your token on Raydium, configure the Honeypot script, freeze/unfreeze buyers, and remove liquidity. Written in plain and simple language.
- 09
- 10
Add Liquidity to Raydium
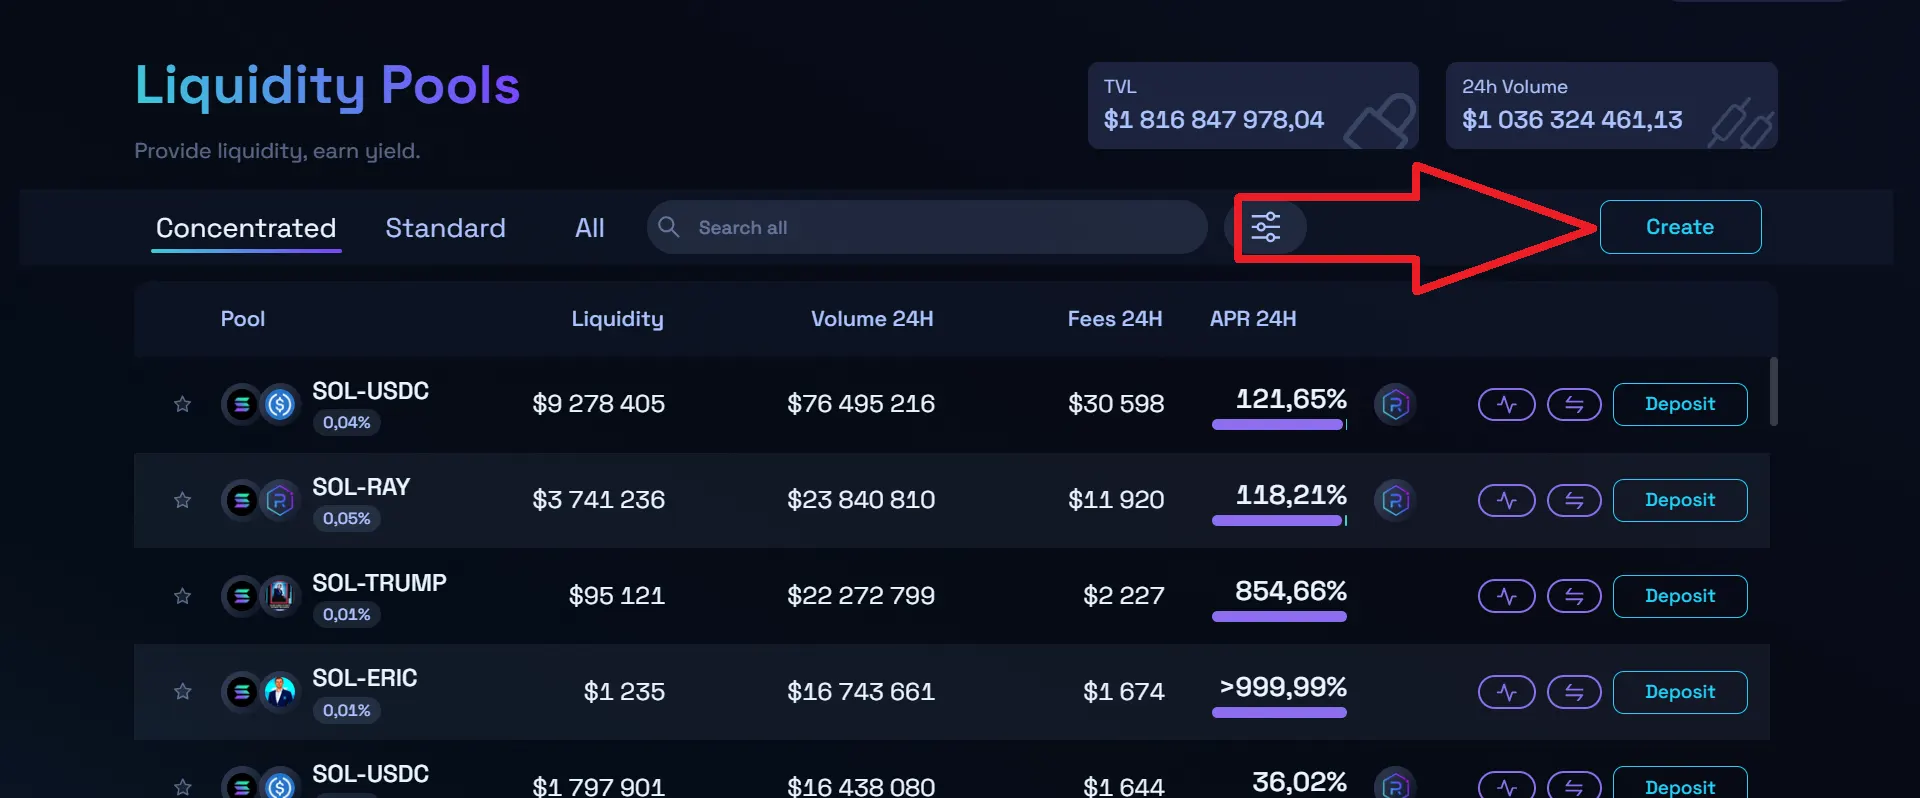
Click the 'Create' button.
- 11
Add Liquidity to Raydium
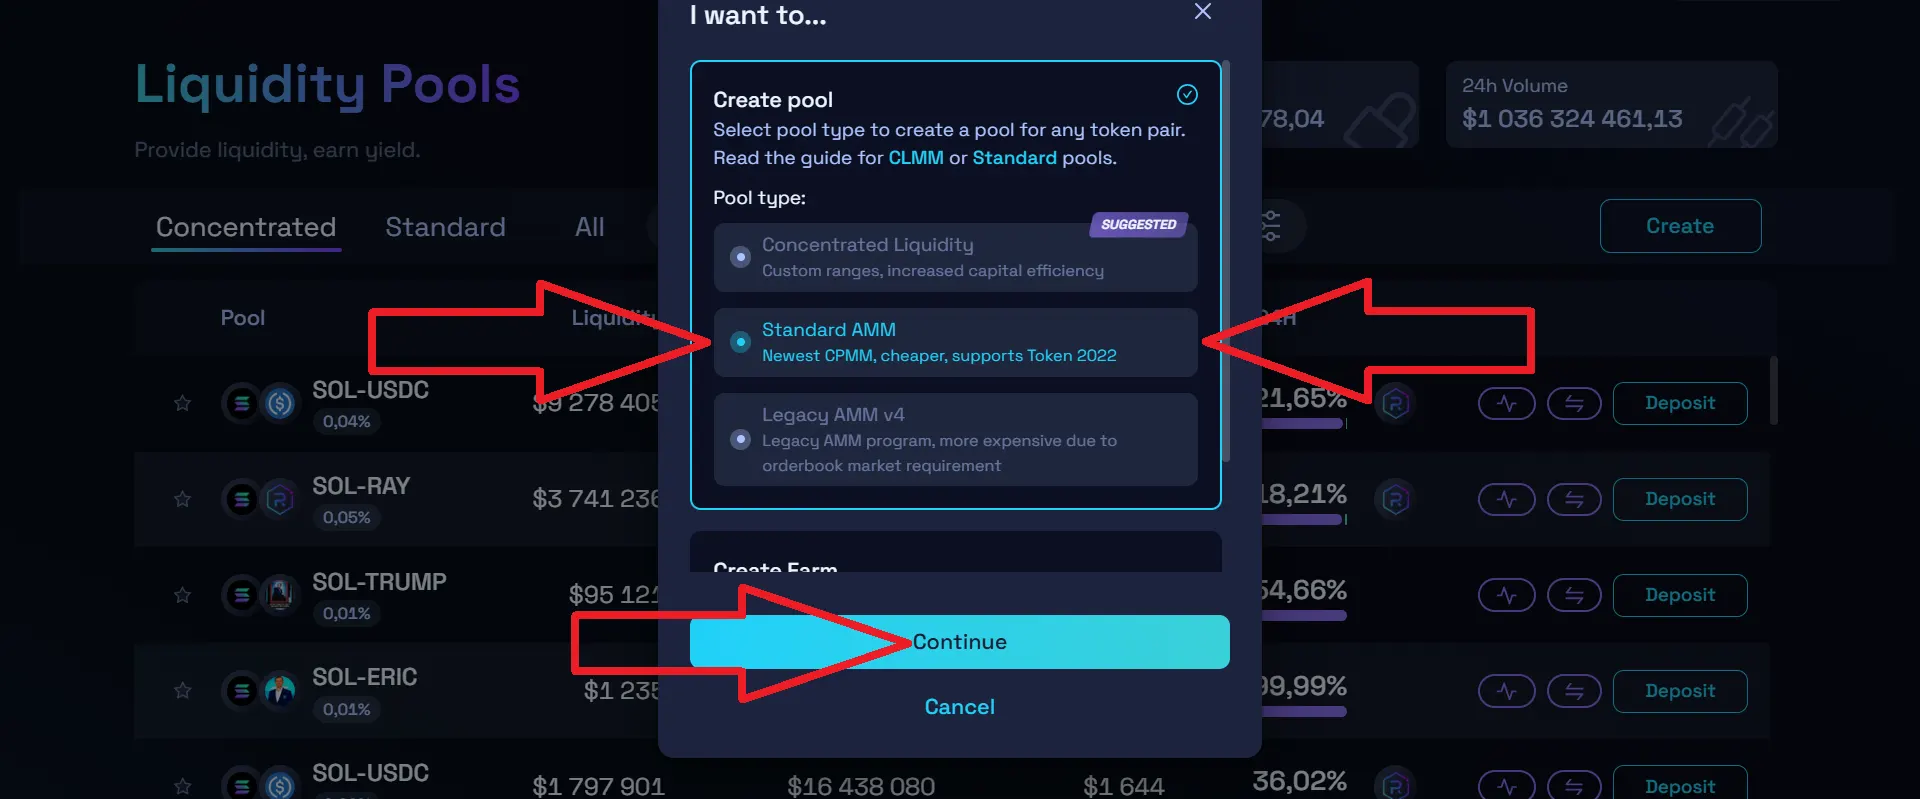
When asked, choose 'Standard AMM'. This is the simplest and cheapest option.
- 12
Add Liquidity to Raydium
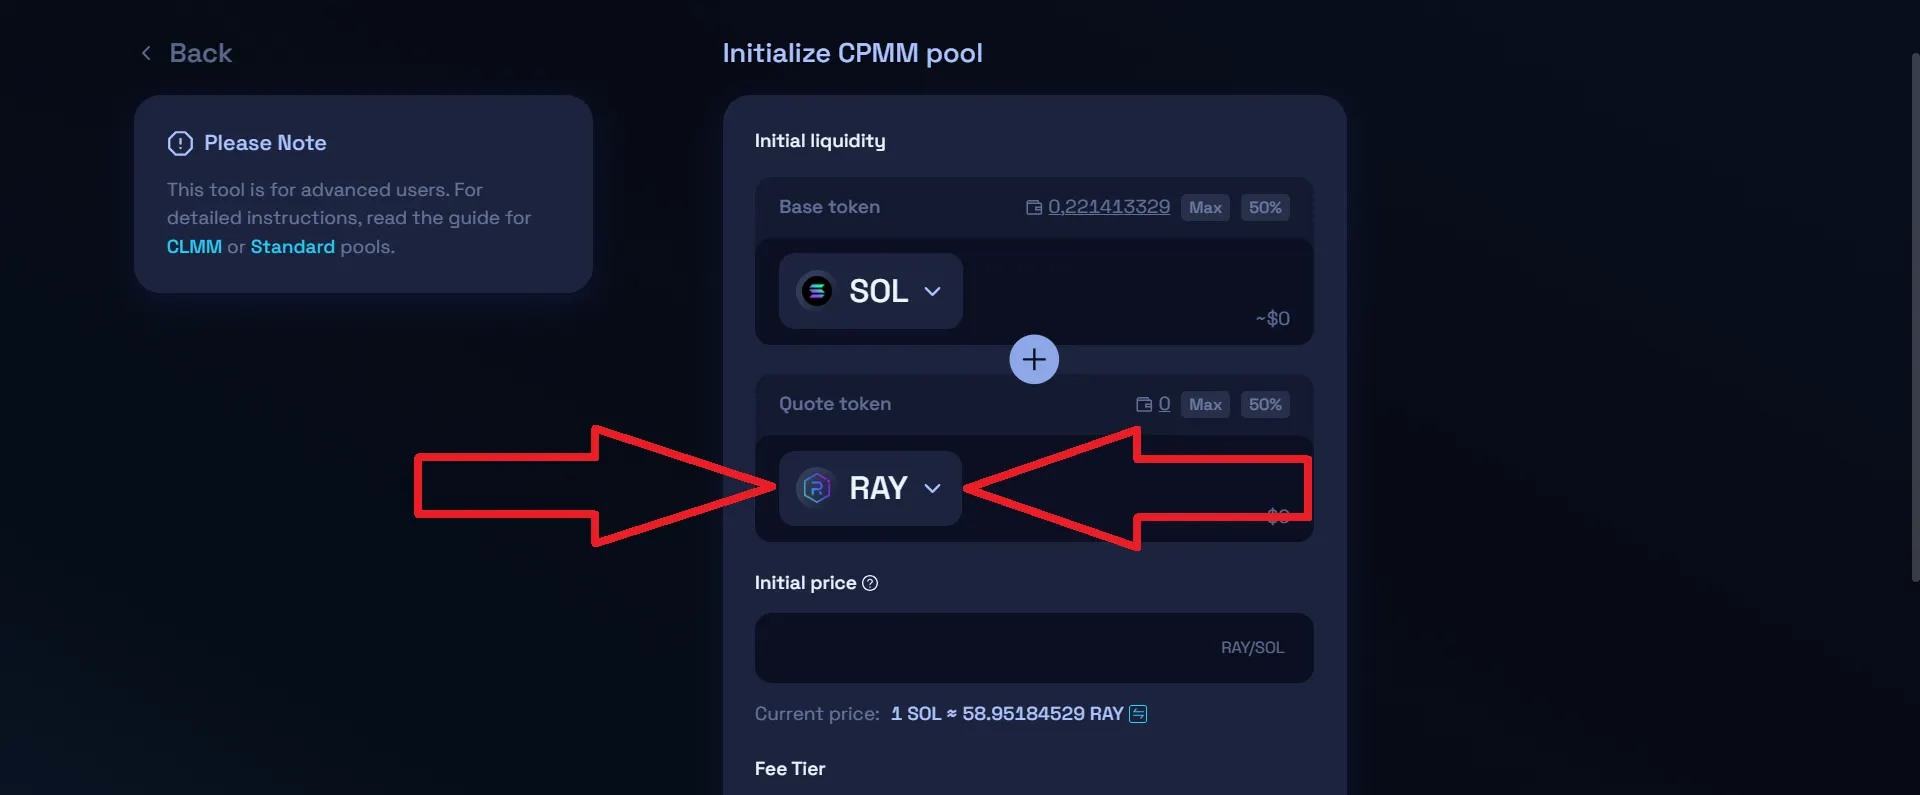
Set token pairs:
- Base Token: Choose SOL (the token people will swap from)
- Quote Token: Paste your token address that you previously saved:
- 13
Add Liquidity to Raydium
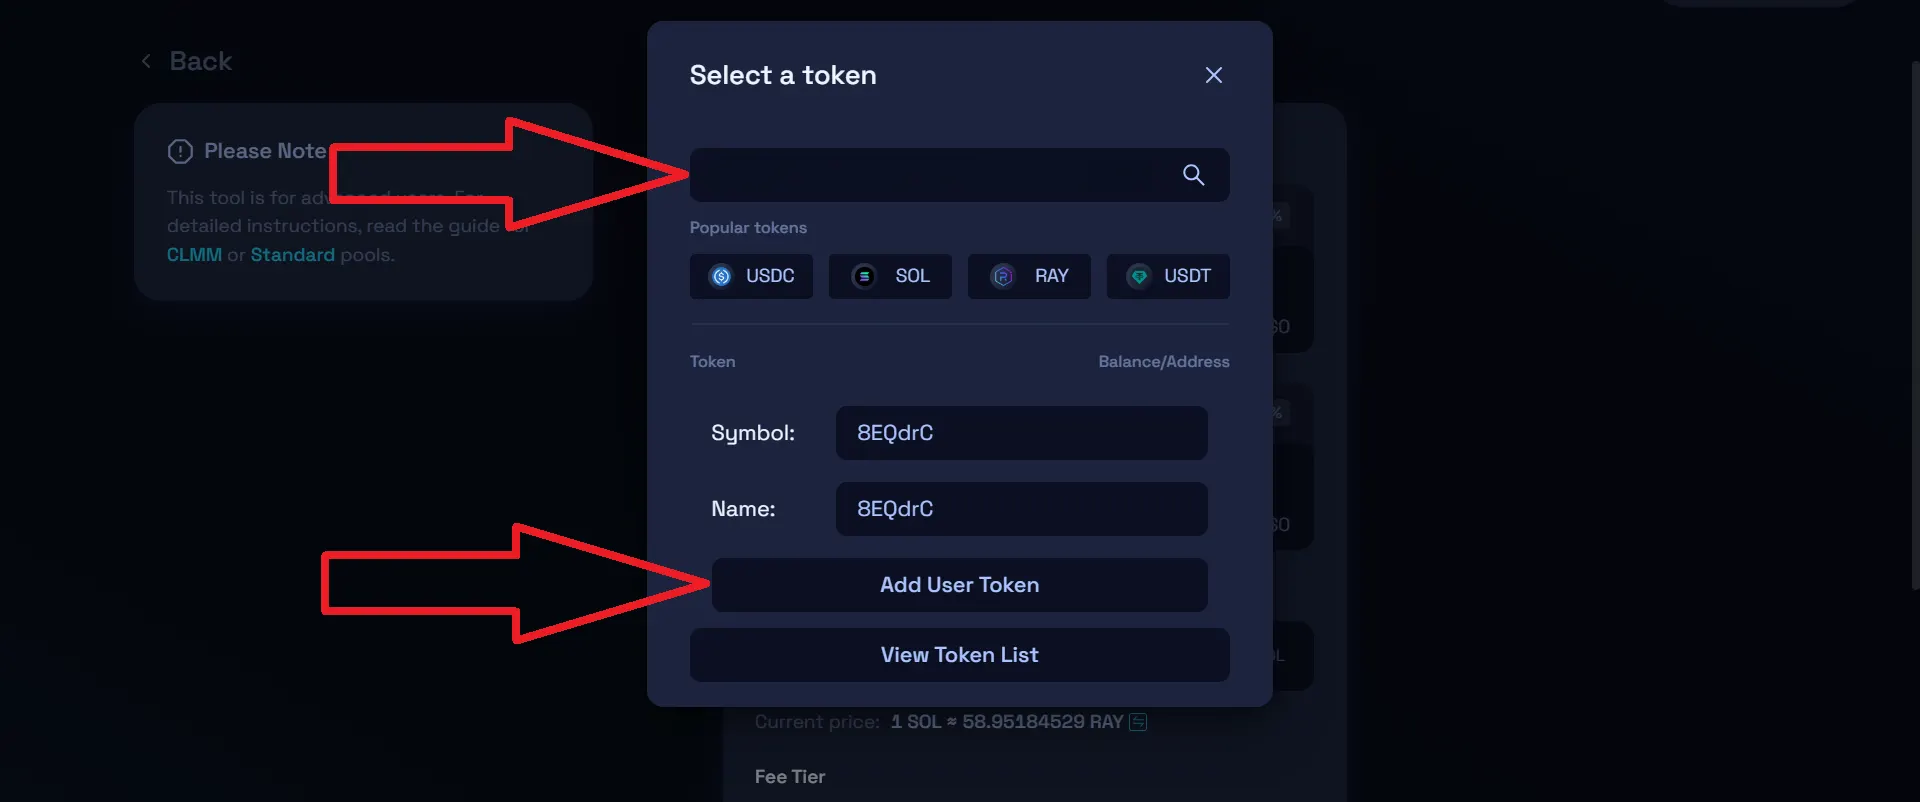
After you have pasted the token address
Enter the full token name and the token symbol, the same as you specified when creating
After that, click 'Add user token':
- 14
Add Liquidity to Raydium
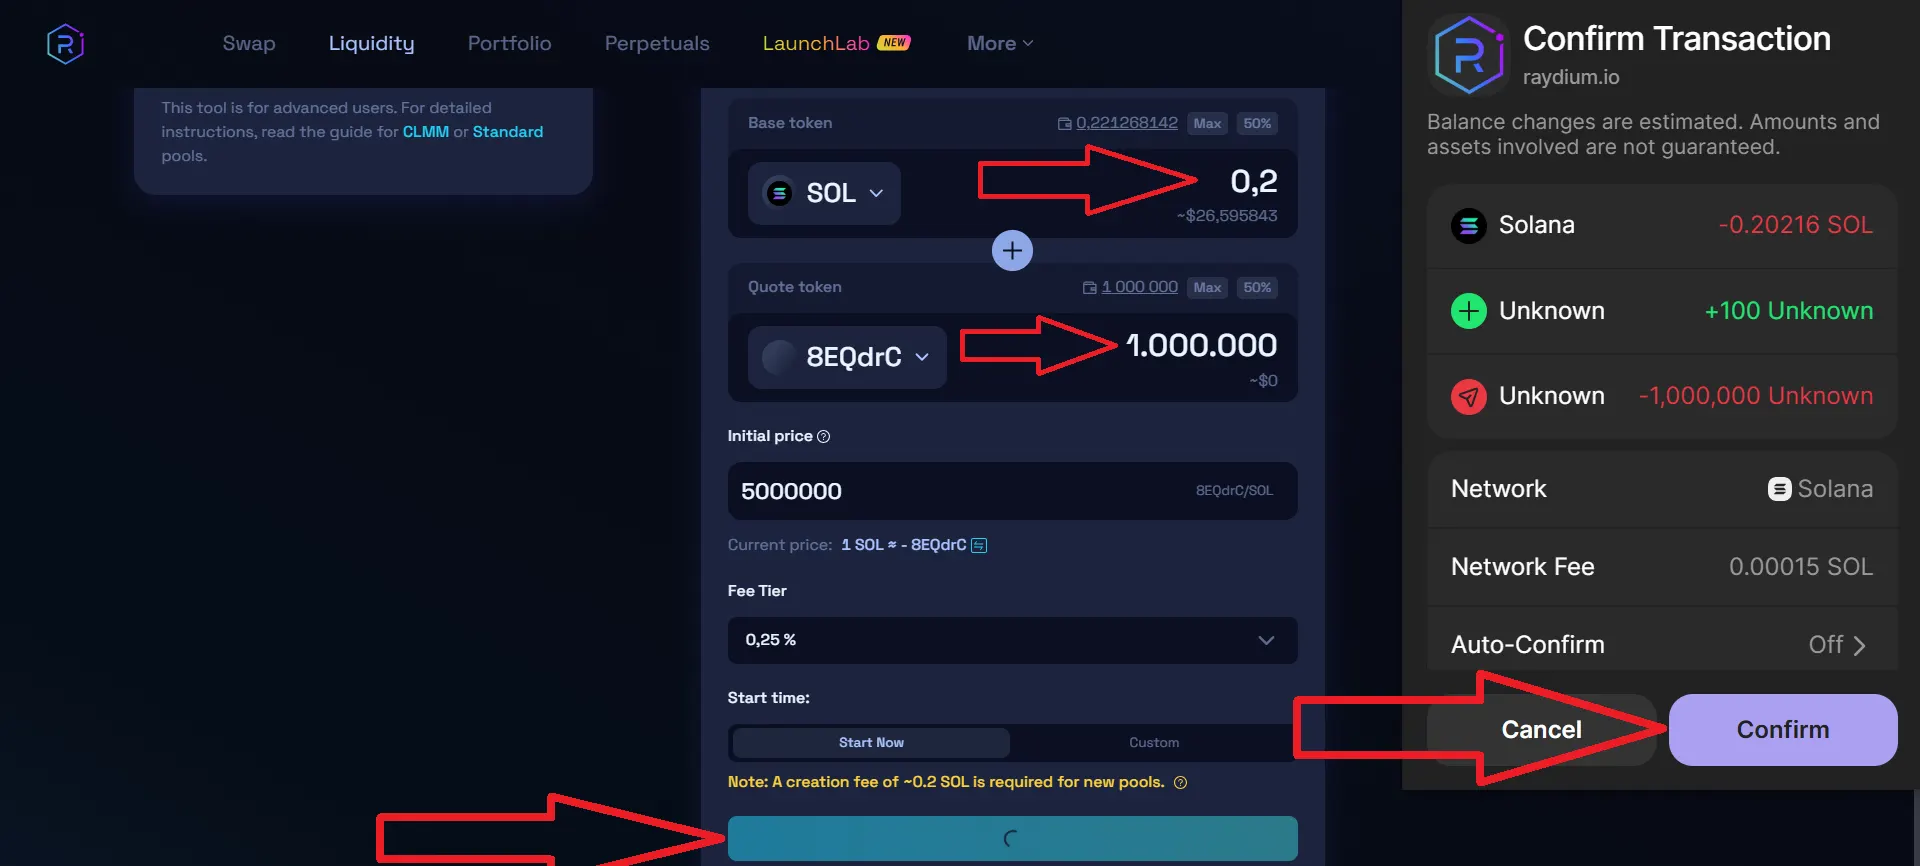
Enter the amount of each token to add to the liquidity pool (e.g. 10 SOL + 1 000 000 of your token)
Click 'Initialize Liquidity Pool'. Approve in Phantom. Note: A creation fee of ~0.2 SOL is required for new pools.
- 15
Add Liquidity to Raydium
If everything went well, you will see the notification 'Pool created successfully!' with the address of the created liquidity pool.
You can find your liquidity pool by going to Raydium first to the tab 'Portfolio' -> 'My position' -> 'Standard'
Wait a few minutes after adding liquidity until the liquidity pool appears in your portfolio
Also, if all went well, after adding liquidity you can view your token information on dextools.io by simply pasting your token address into the search bar. It will show all purchases of your token and other general information.
- 16
Creating Project Files and Folders in VSCode
Open Visual Studio Code that you previously installed.
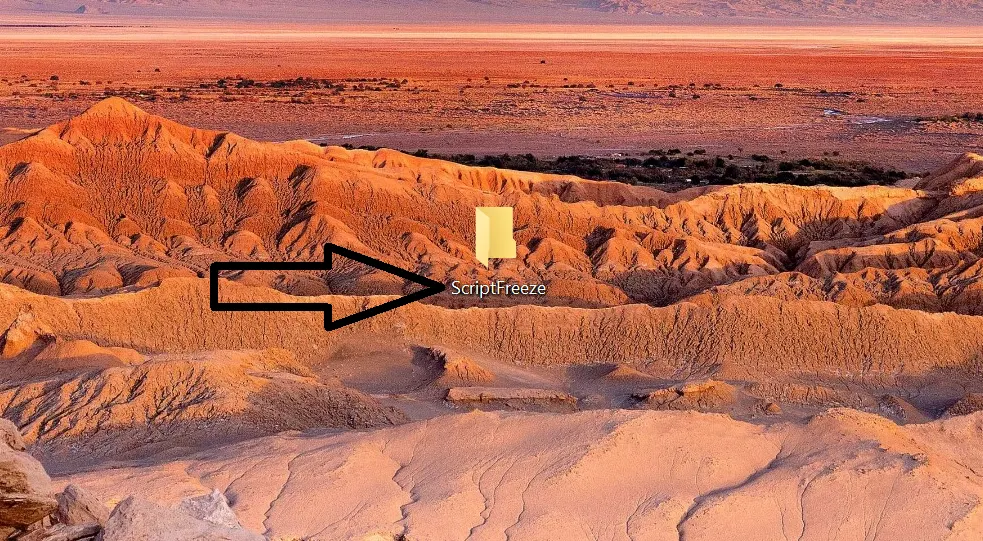
Create a new folder on your Desktop with any name, for example: ScriptFreeze.
- 17
Creating Project Files and Folders in VSCode
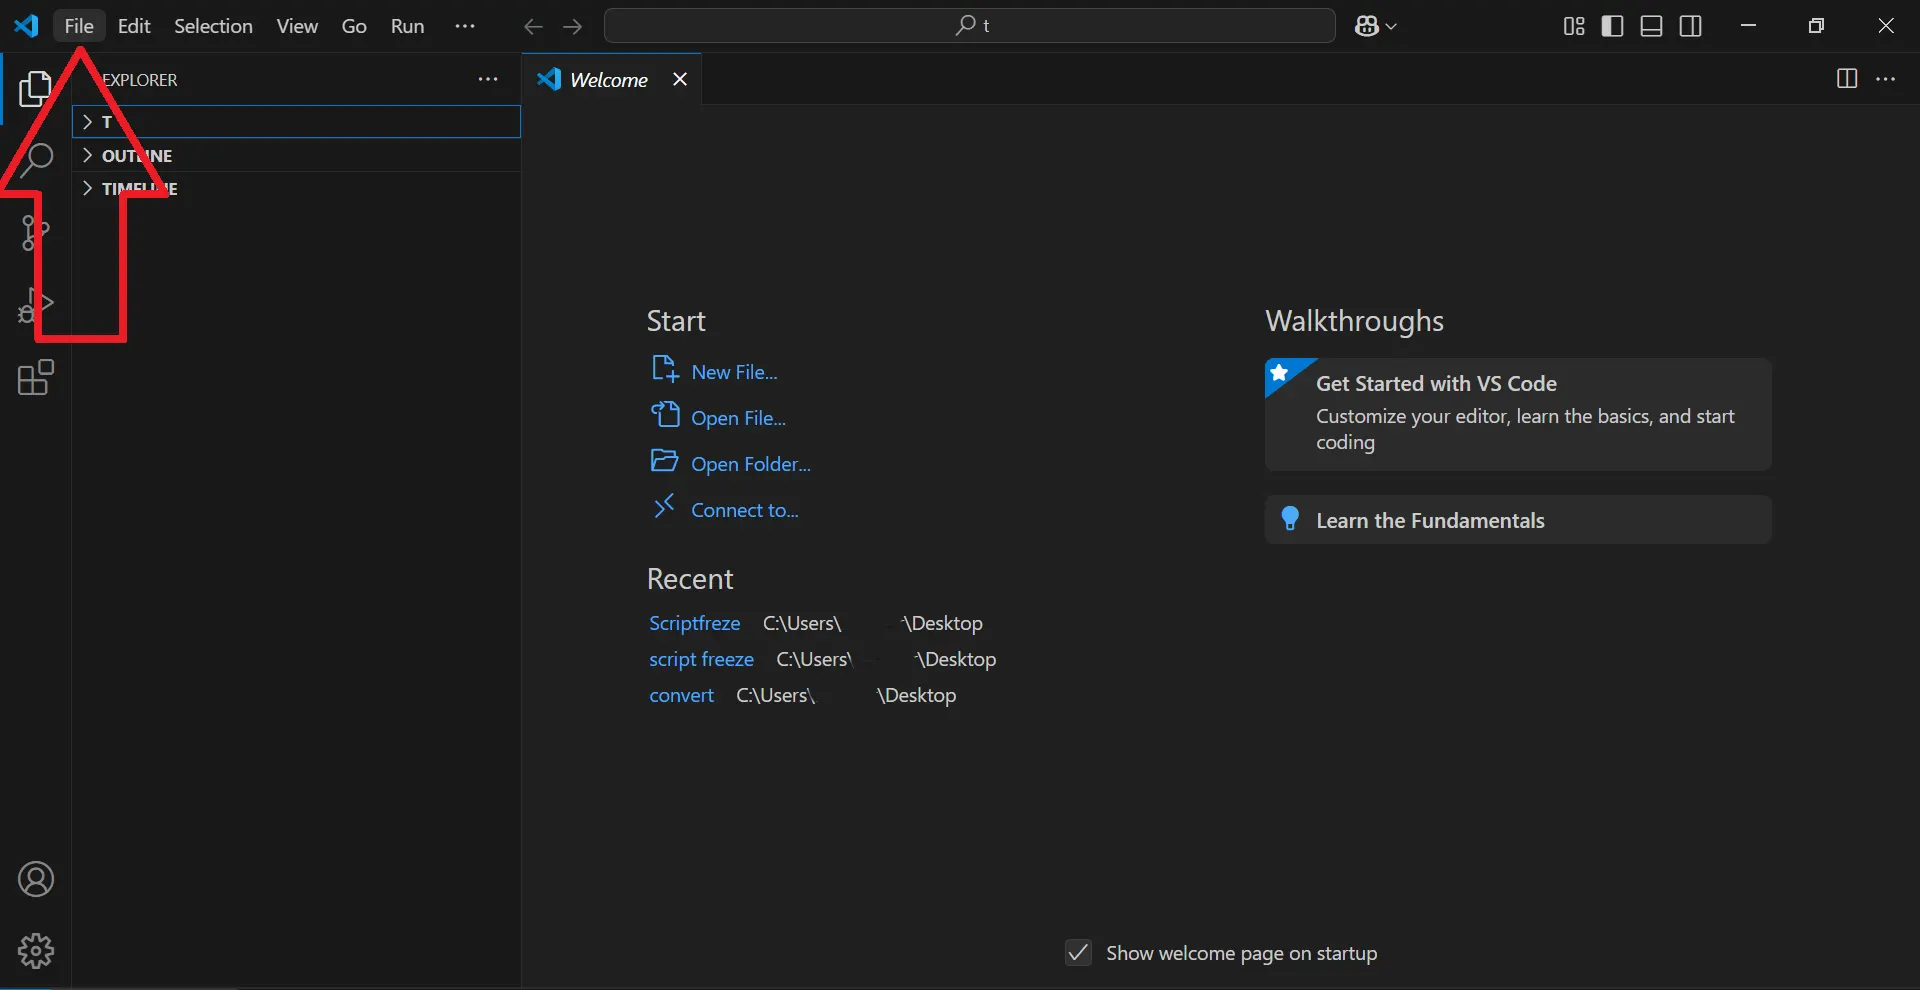
Launch Visual Studio Code.
Click on File in the top menu bar.
- 18
Creating Project Files and Folders in VSCode
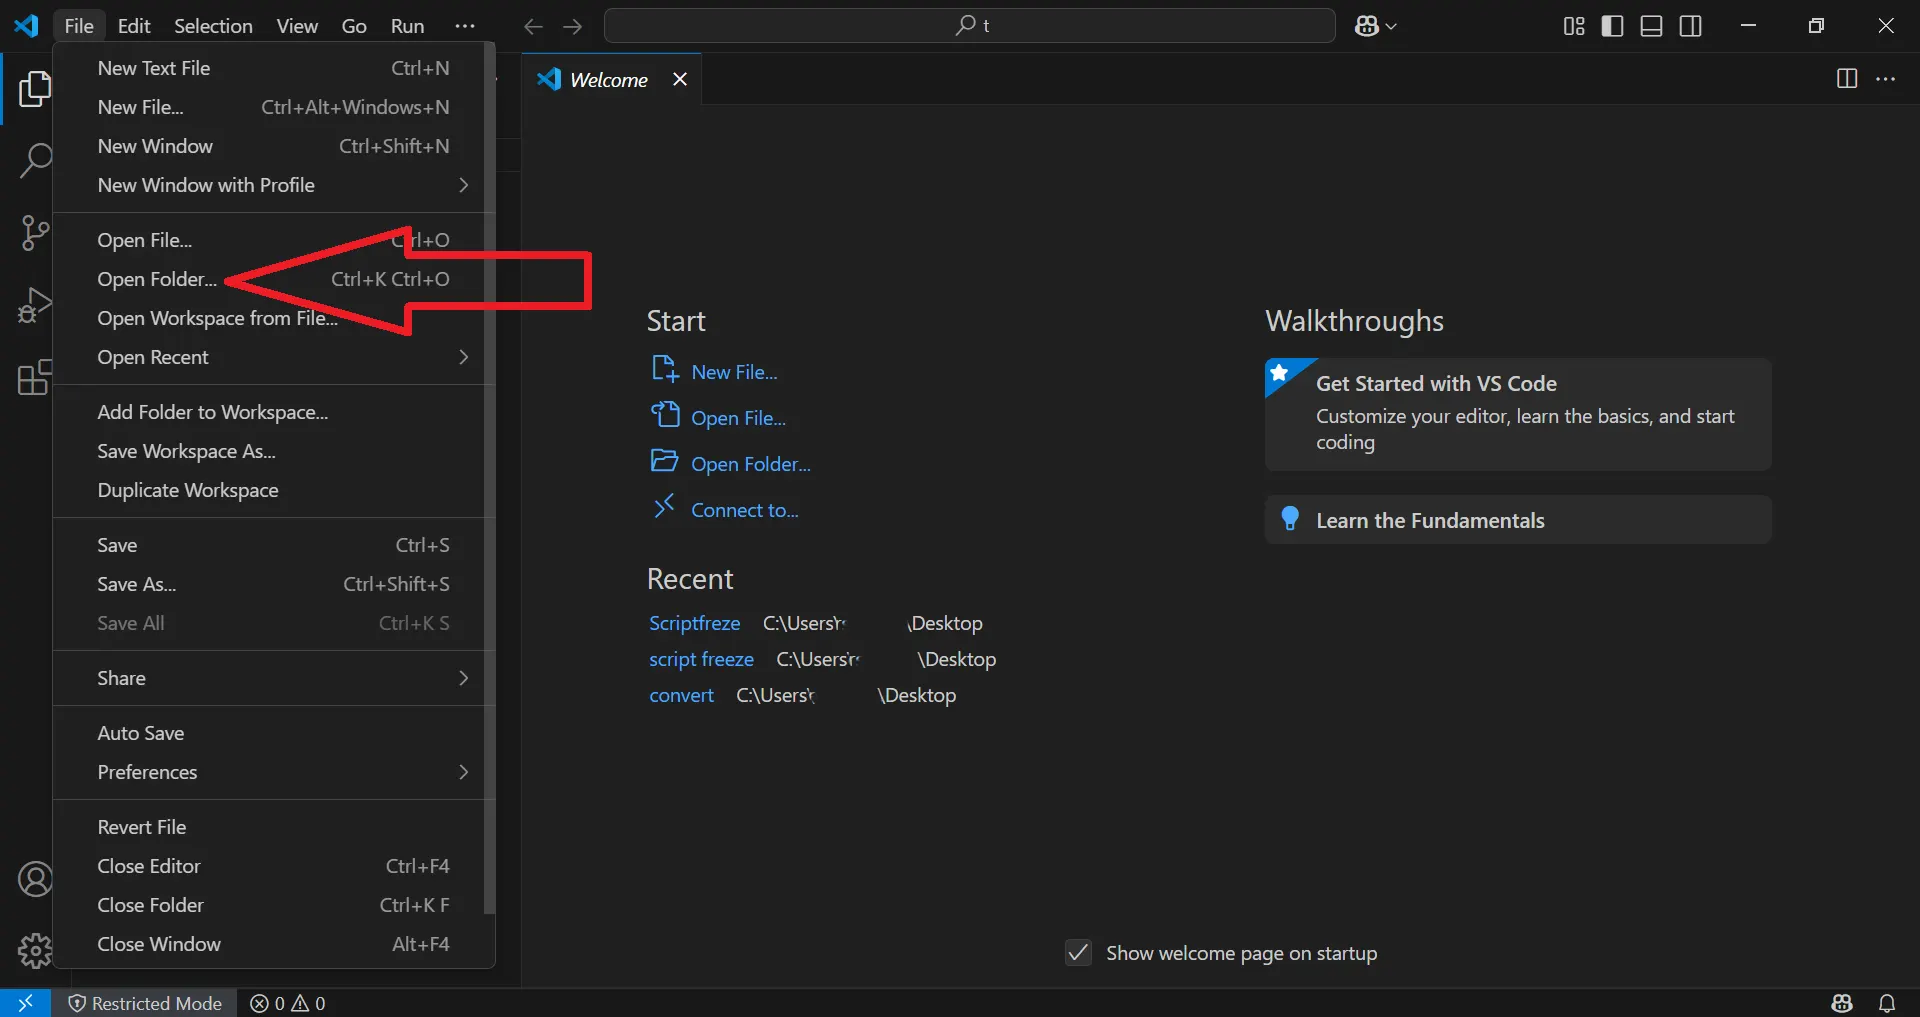
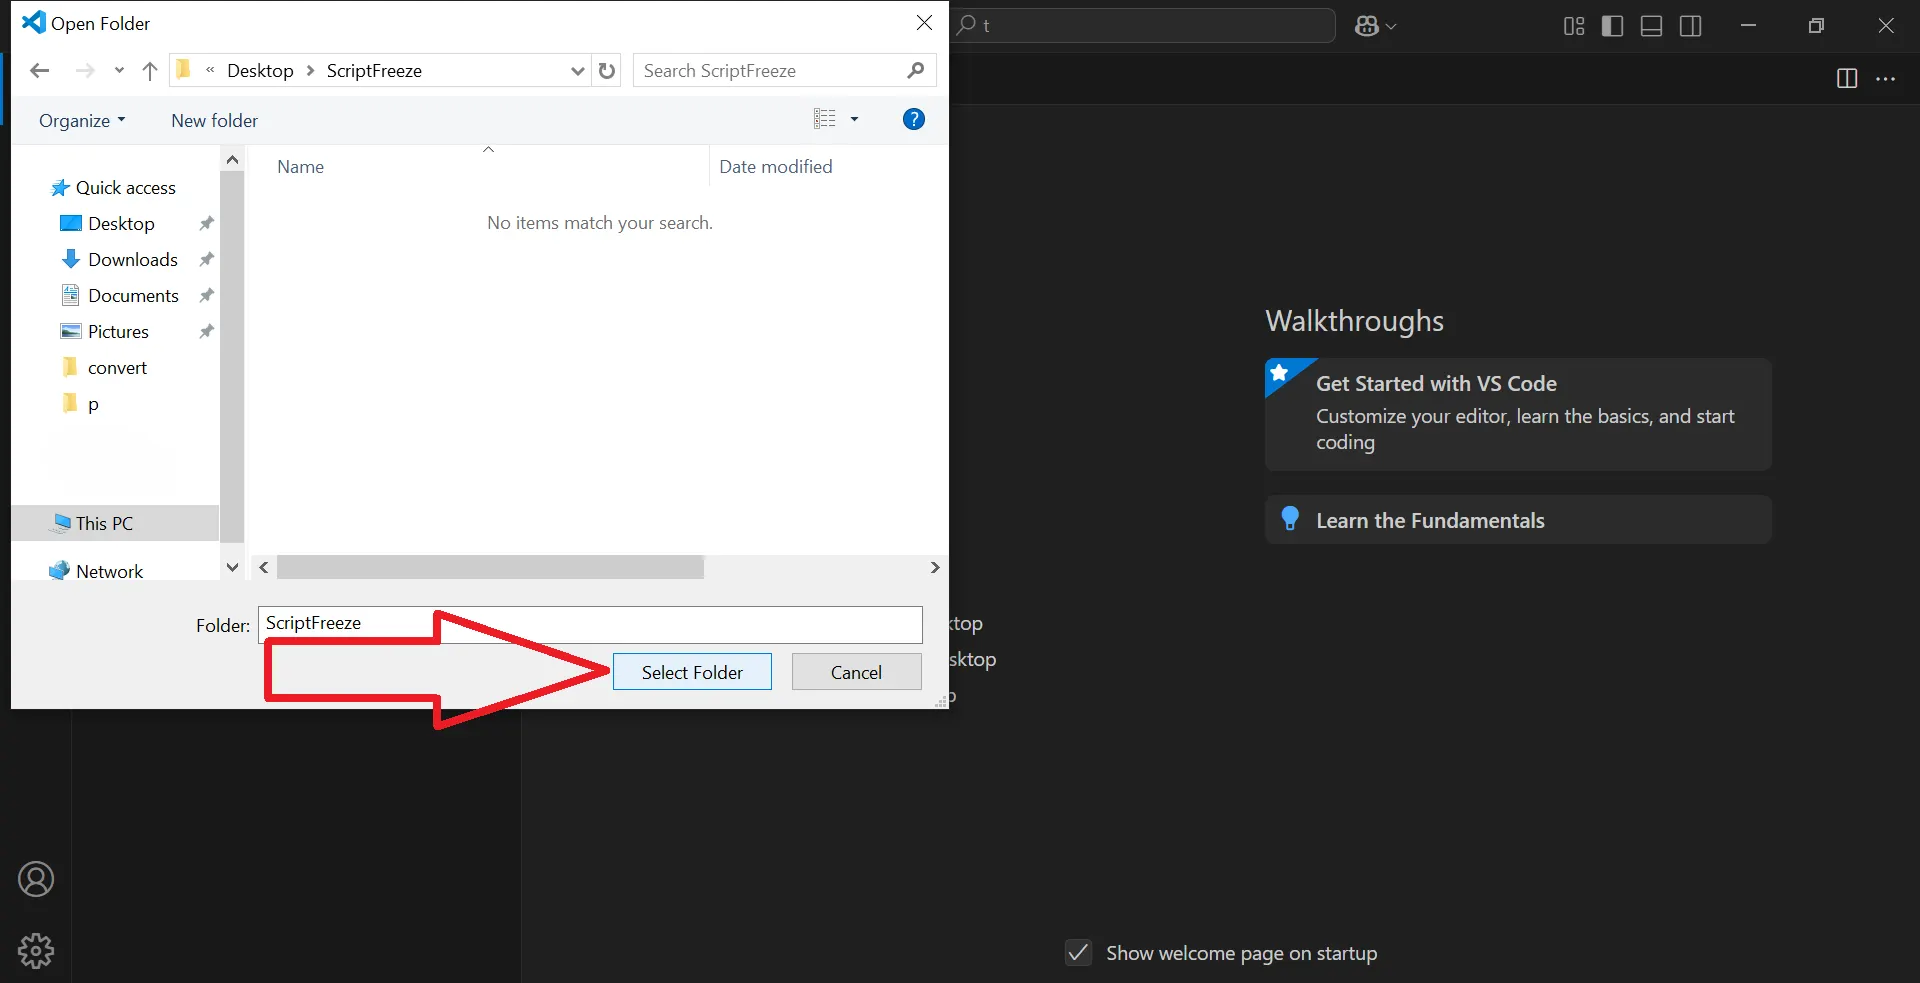
Then click on 'Open Folder' and select the folder you just created on your Desktop.
In this case, it’s ScriptFreeze. After selecting your folder, click 'Yes, I trust the authors'.
- 19
Creating Project Files and Folders in VSCode
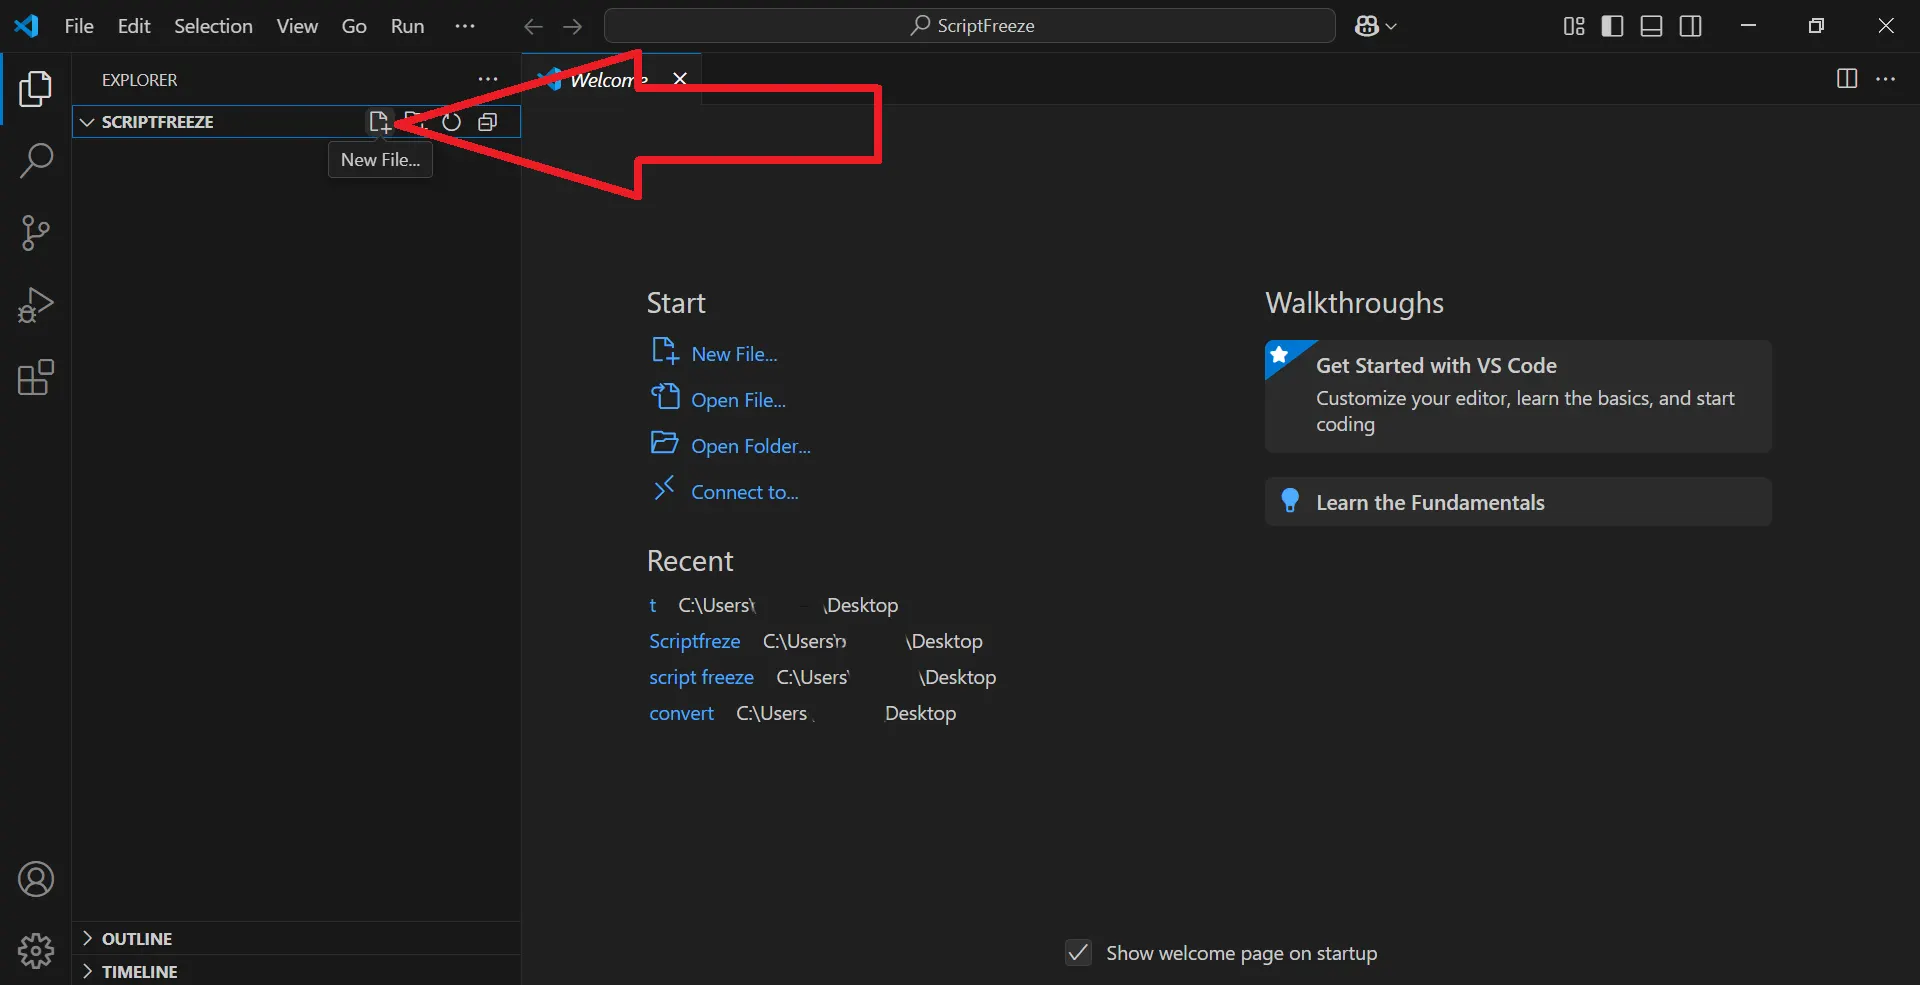
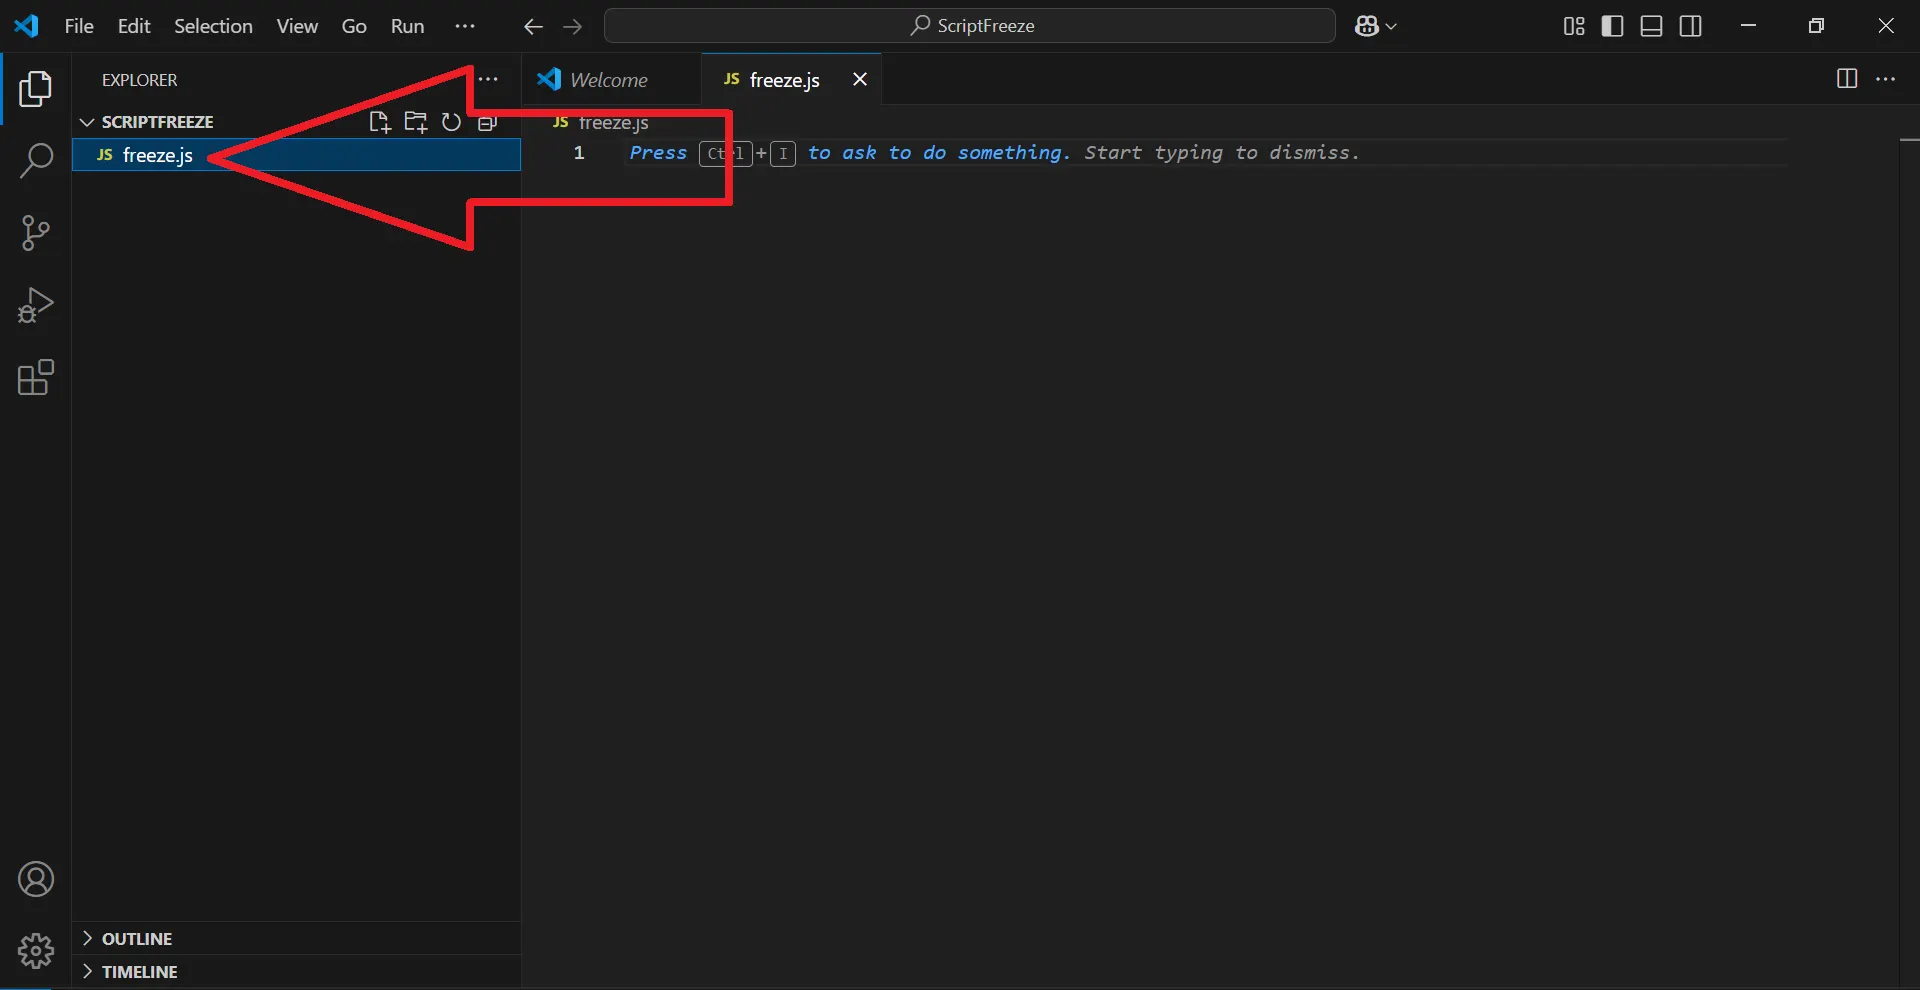
Now click on 'New File' and name the file 'freeze.js' , then press Enter.
- 20
Creating Project Files and Folders in VSCode
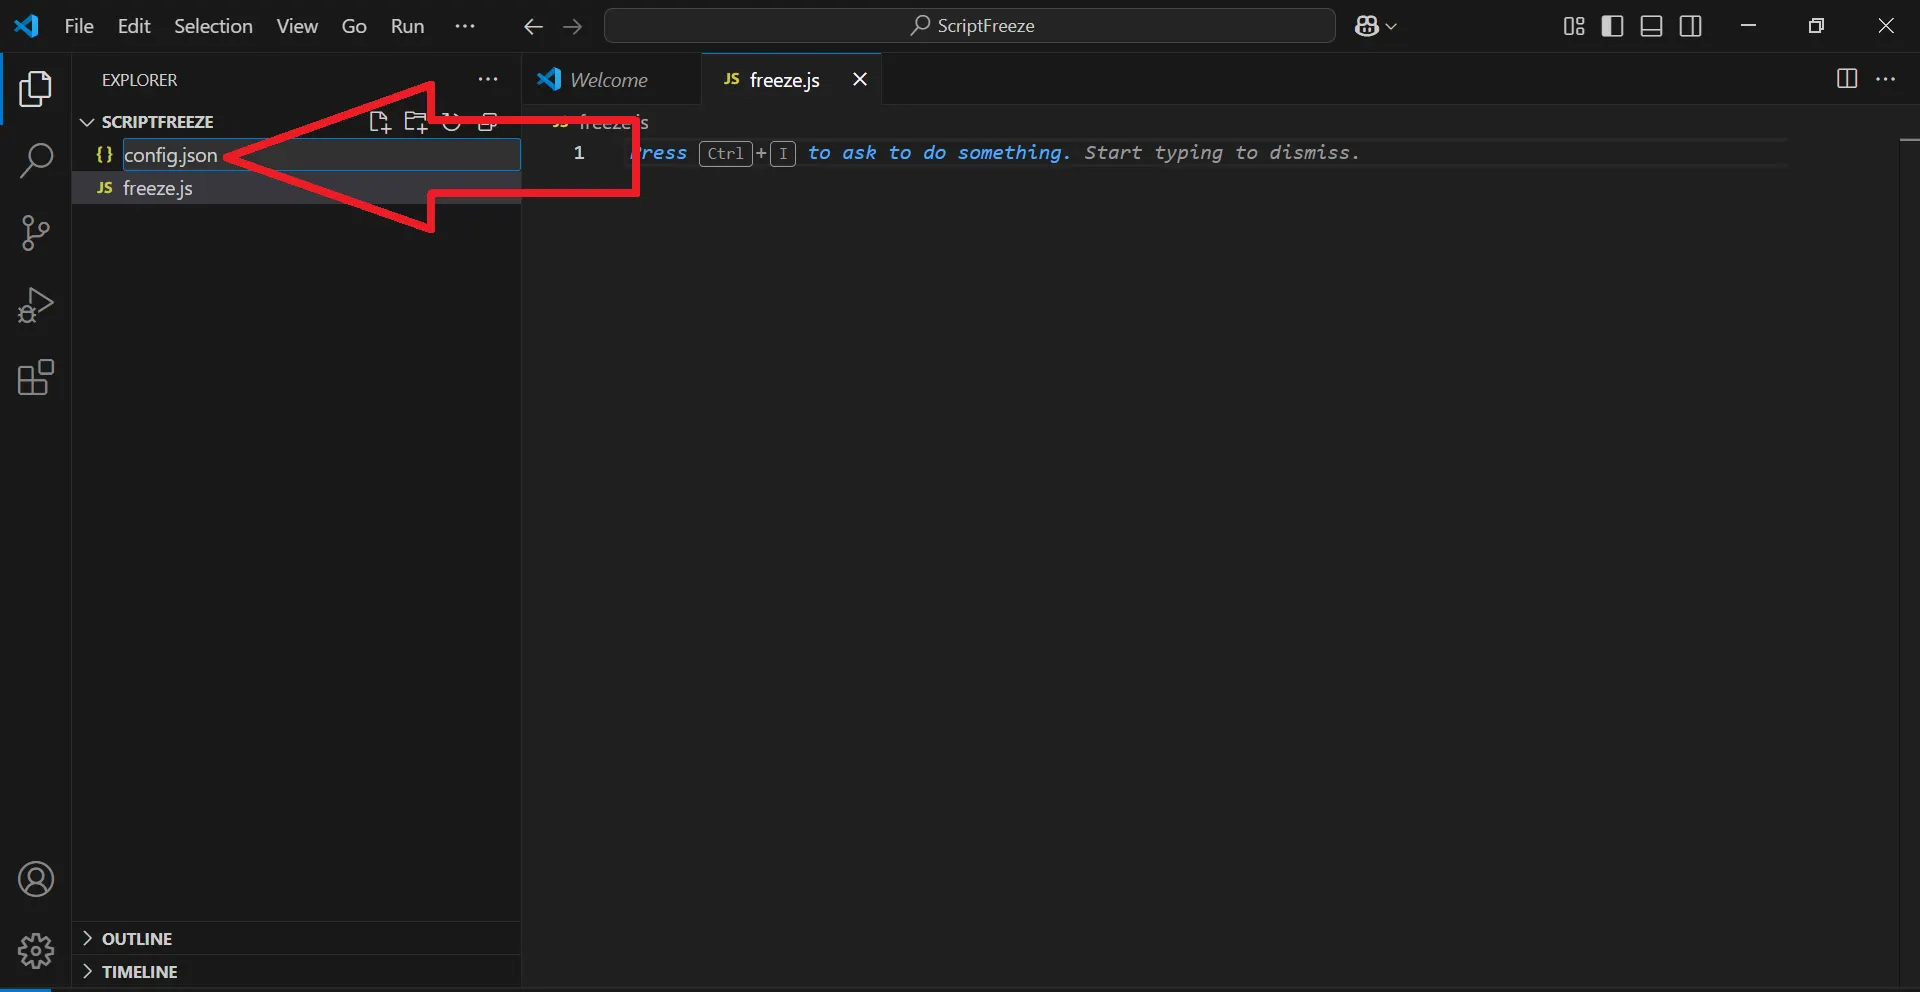
Click on 'New File' again and name it 'config.json'
- 21
Creating Project Files and Folders in VSCode
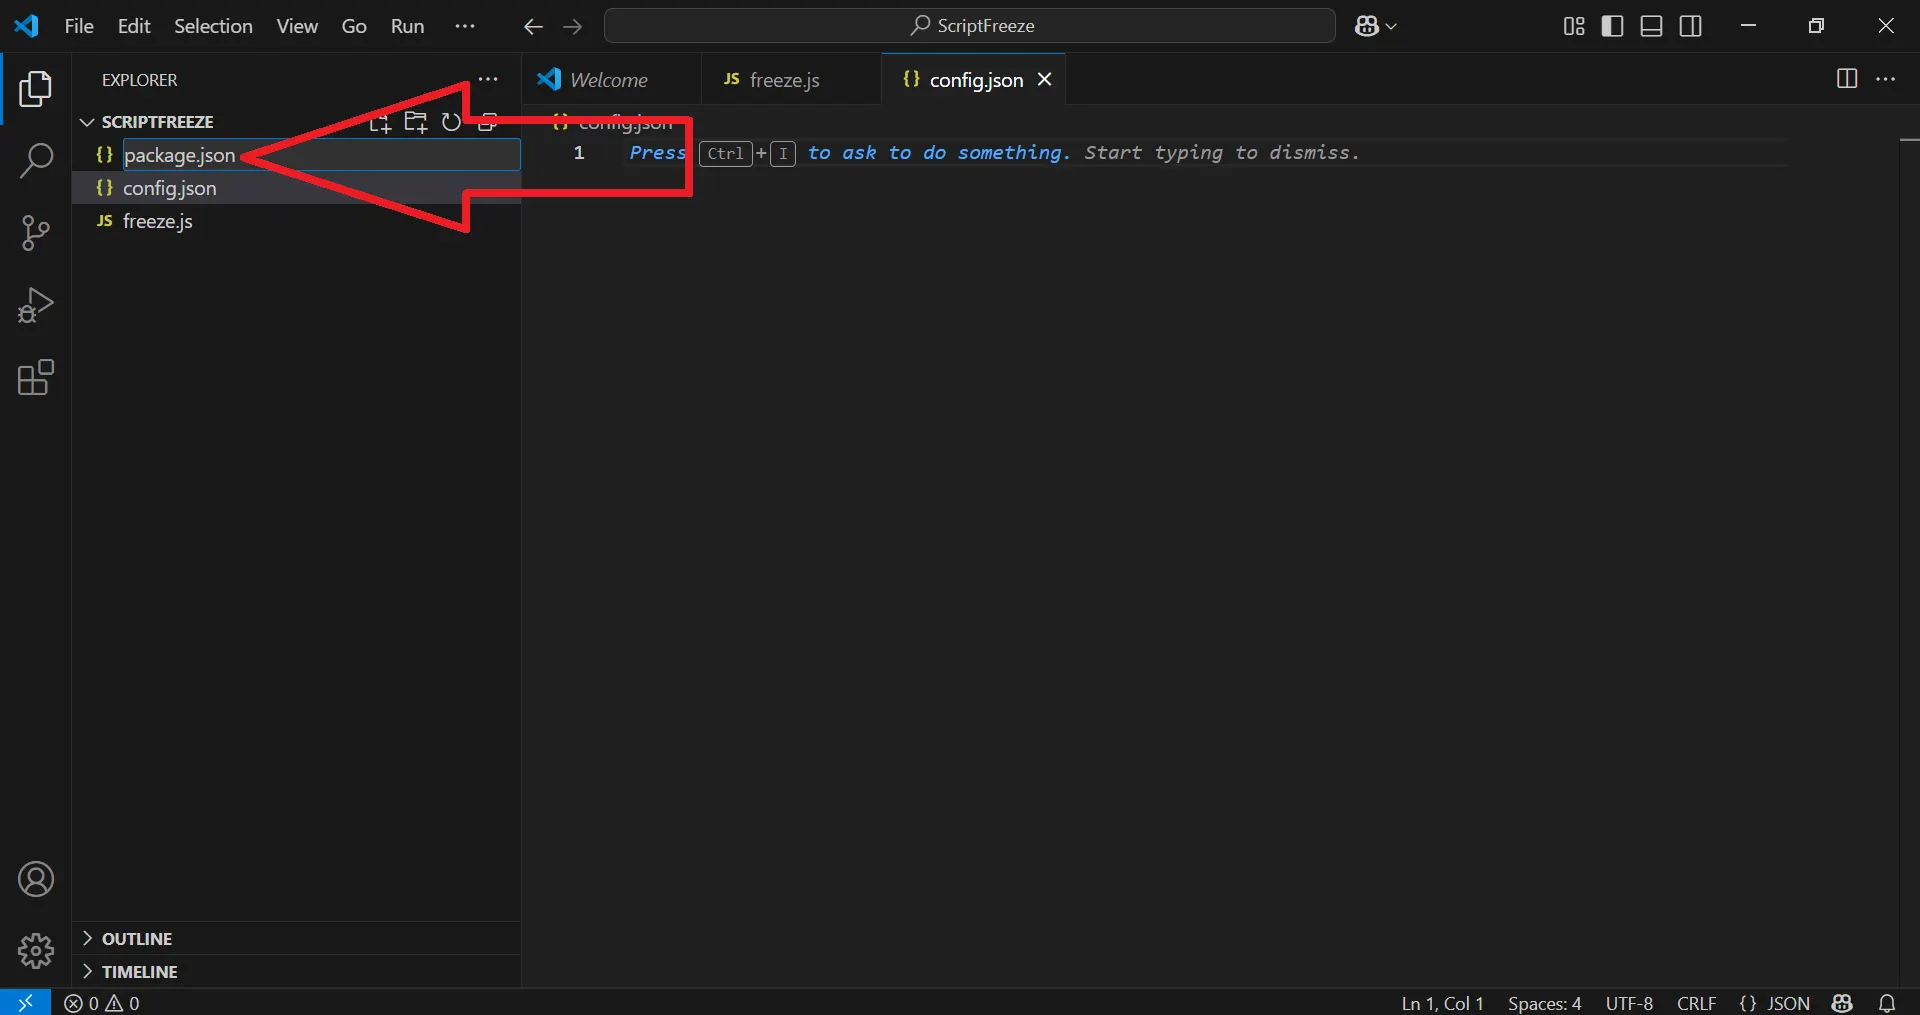
Once more, click on 'New File' and name it 'package.json'
- 22
Creating Project Files and Folders in VSCode
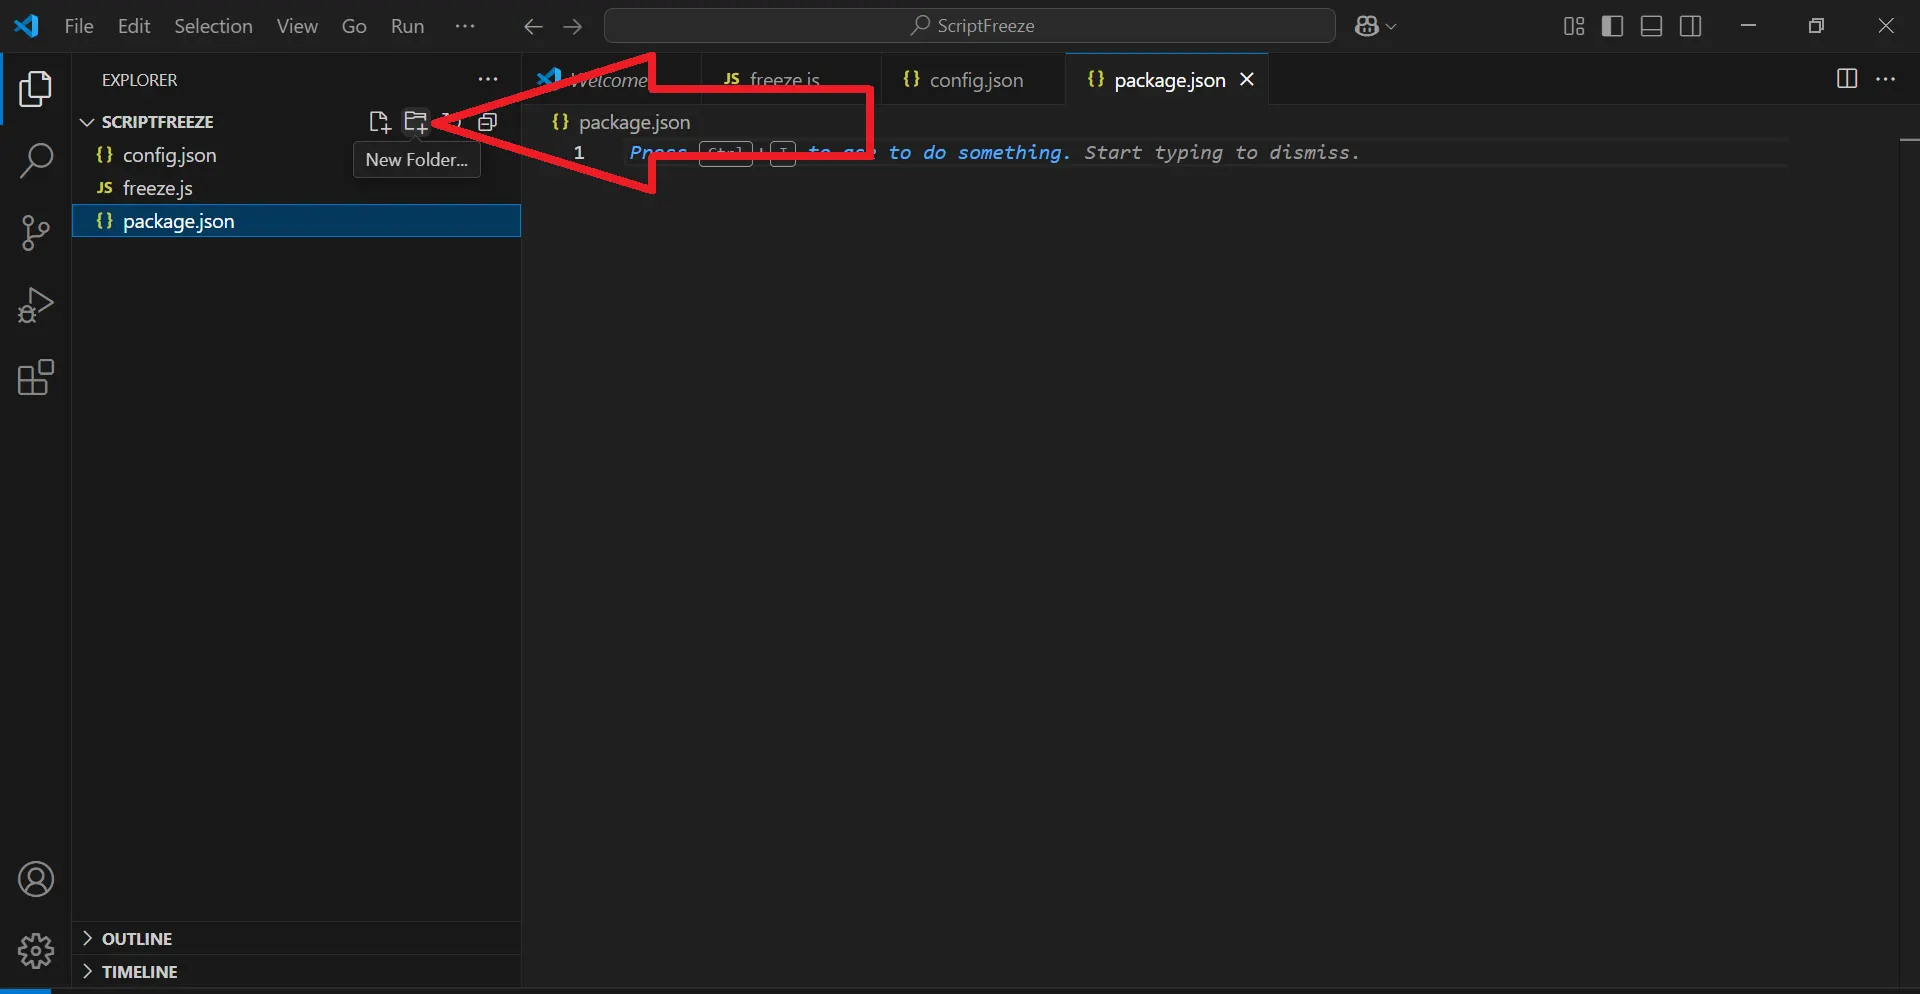
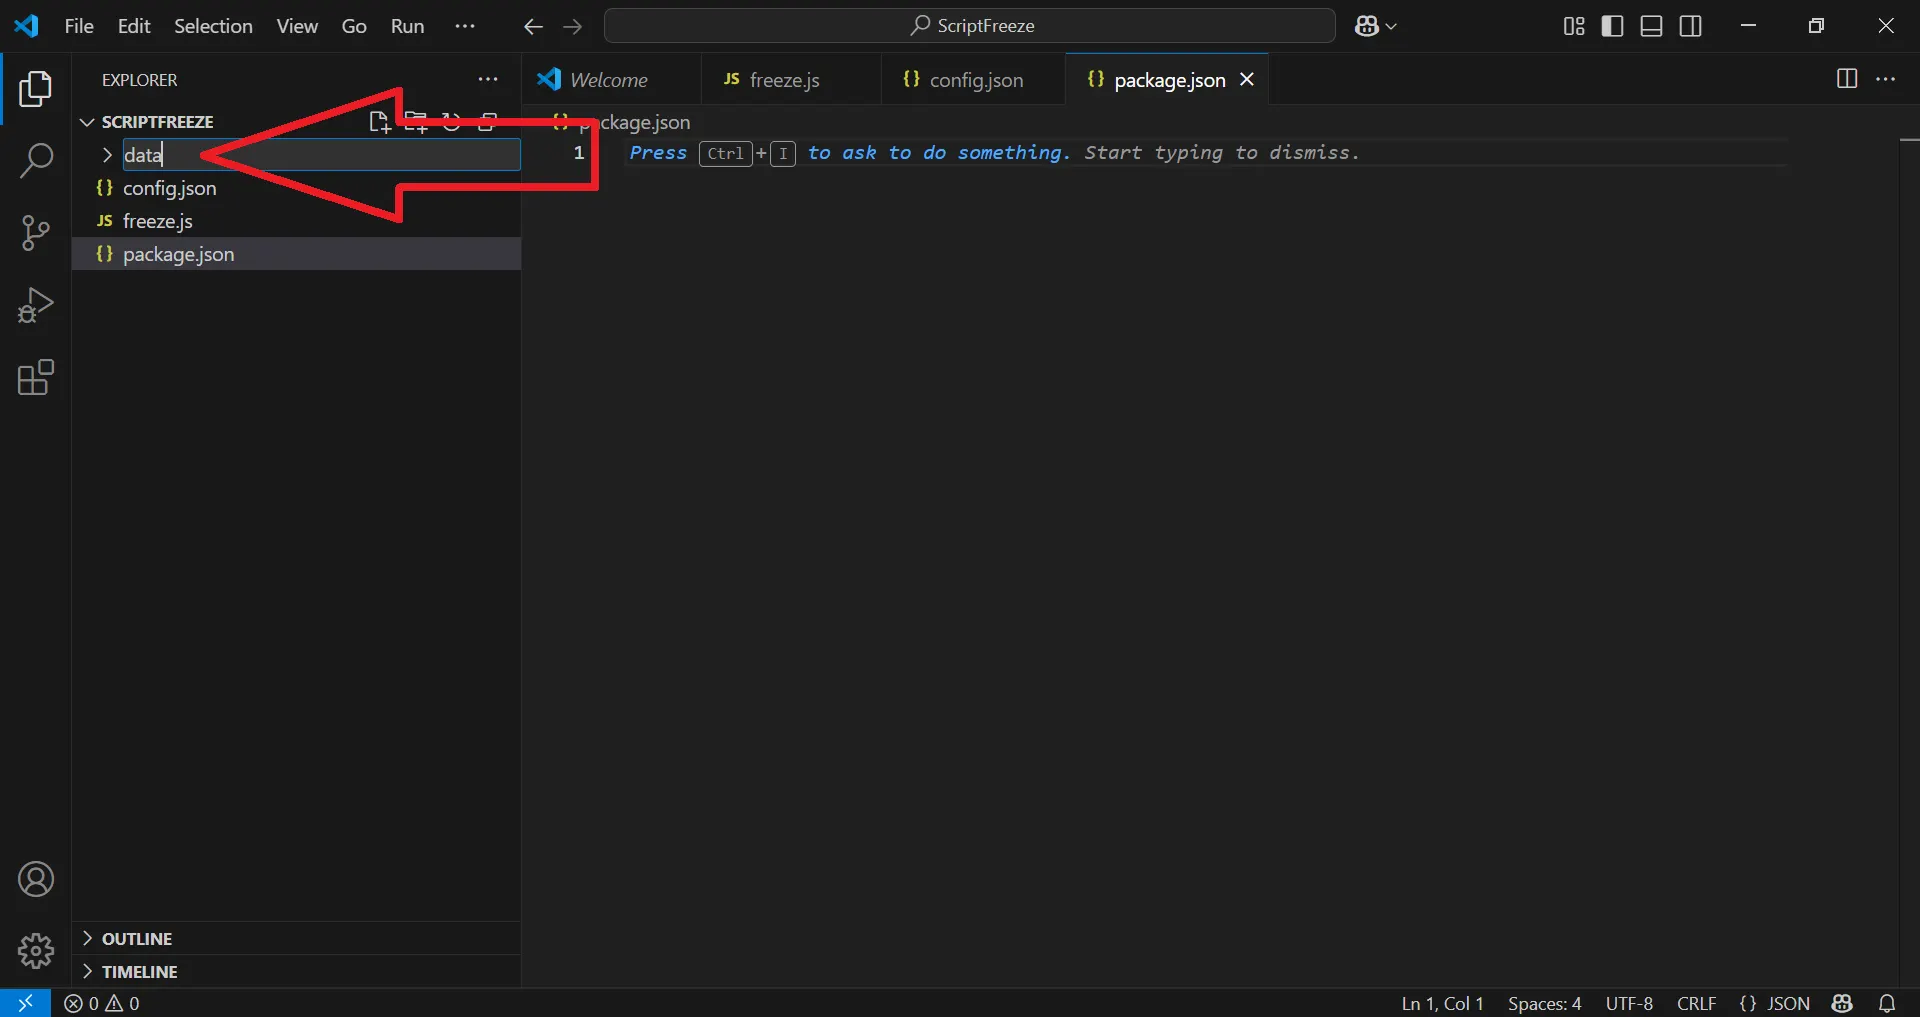
Now click on 'New Folder', name the folder 'data' and press Enter.
- 23
Creating Project Files and Folders in VSCode
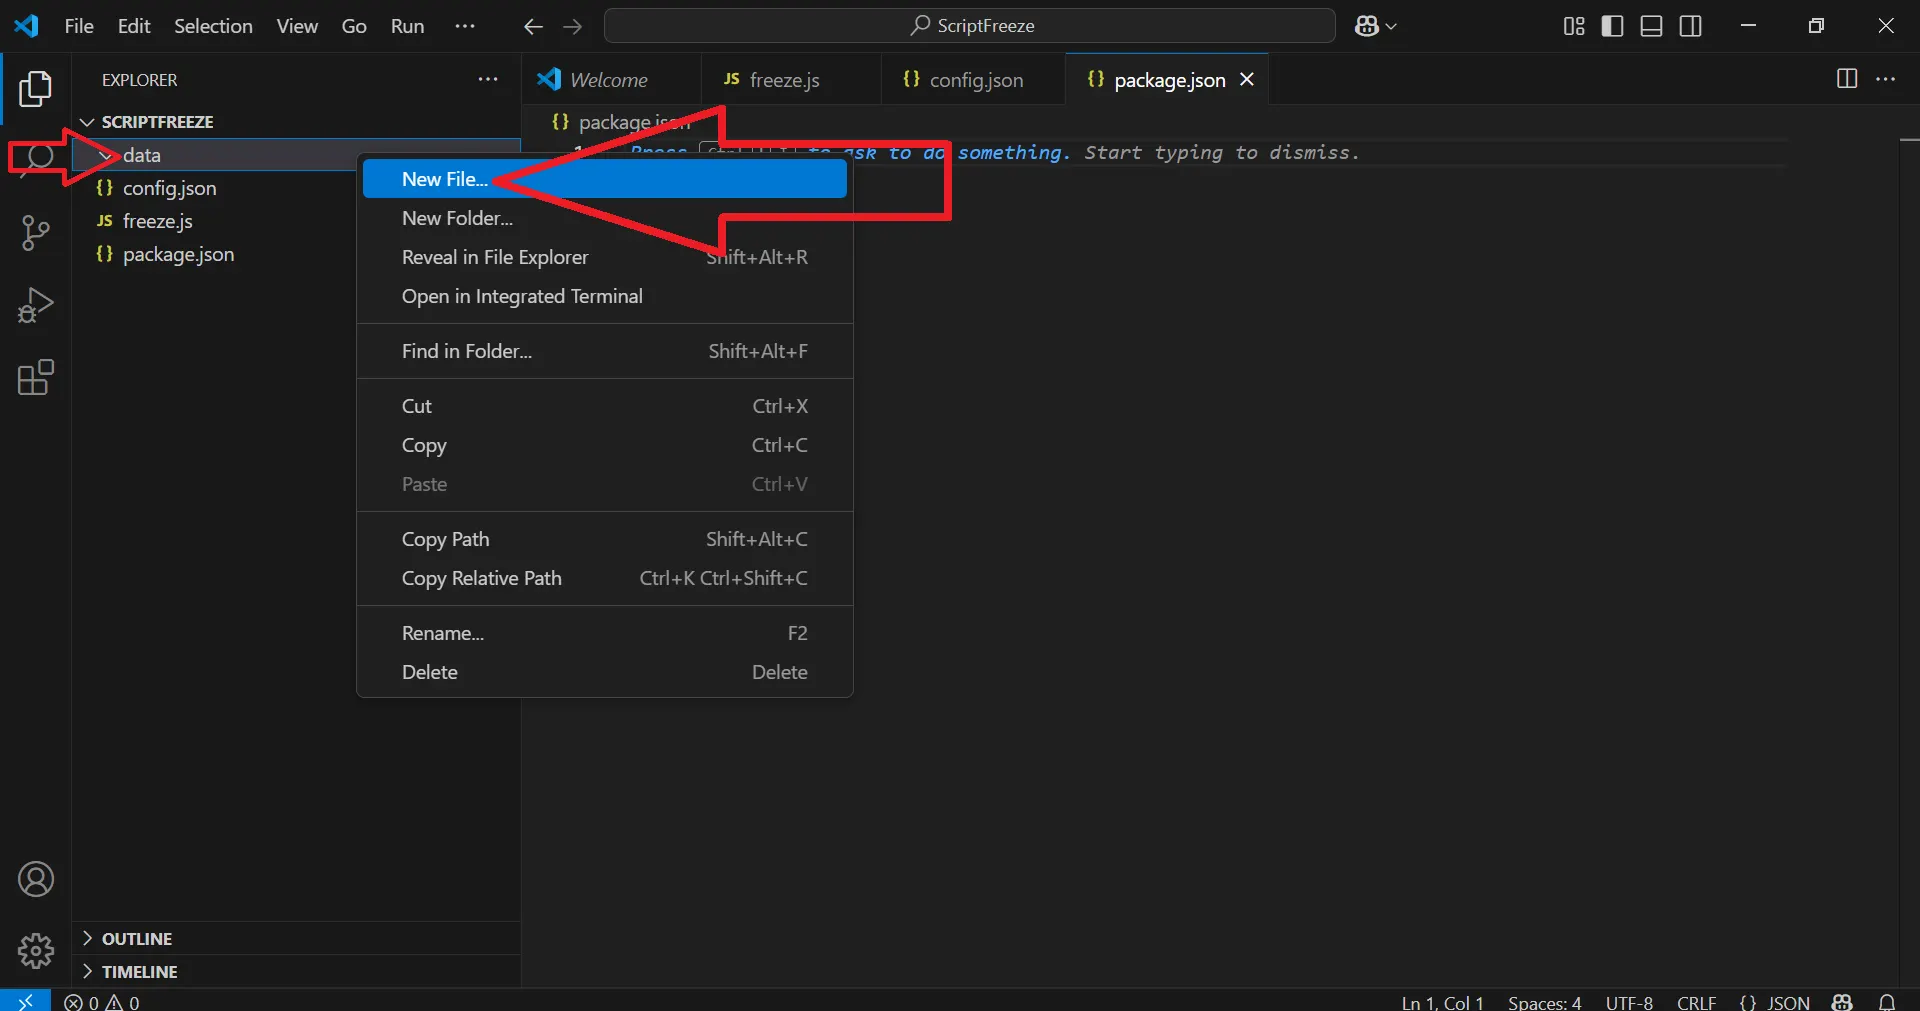
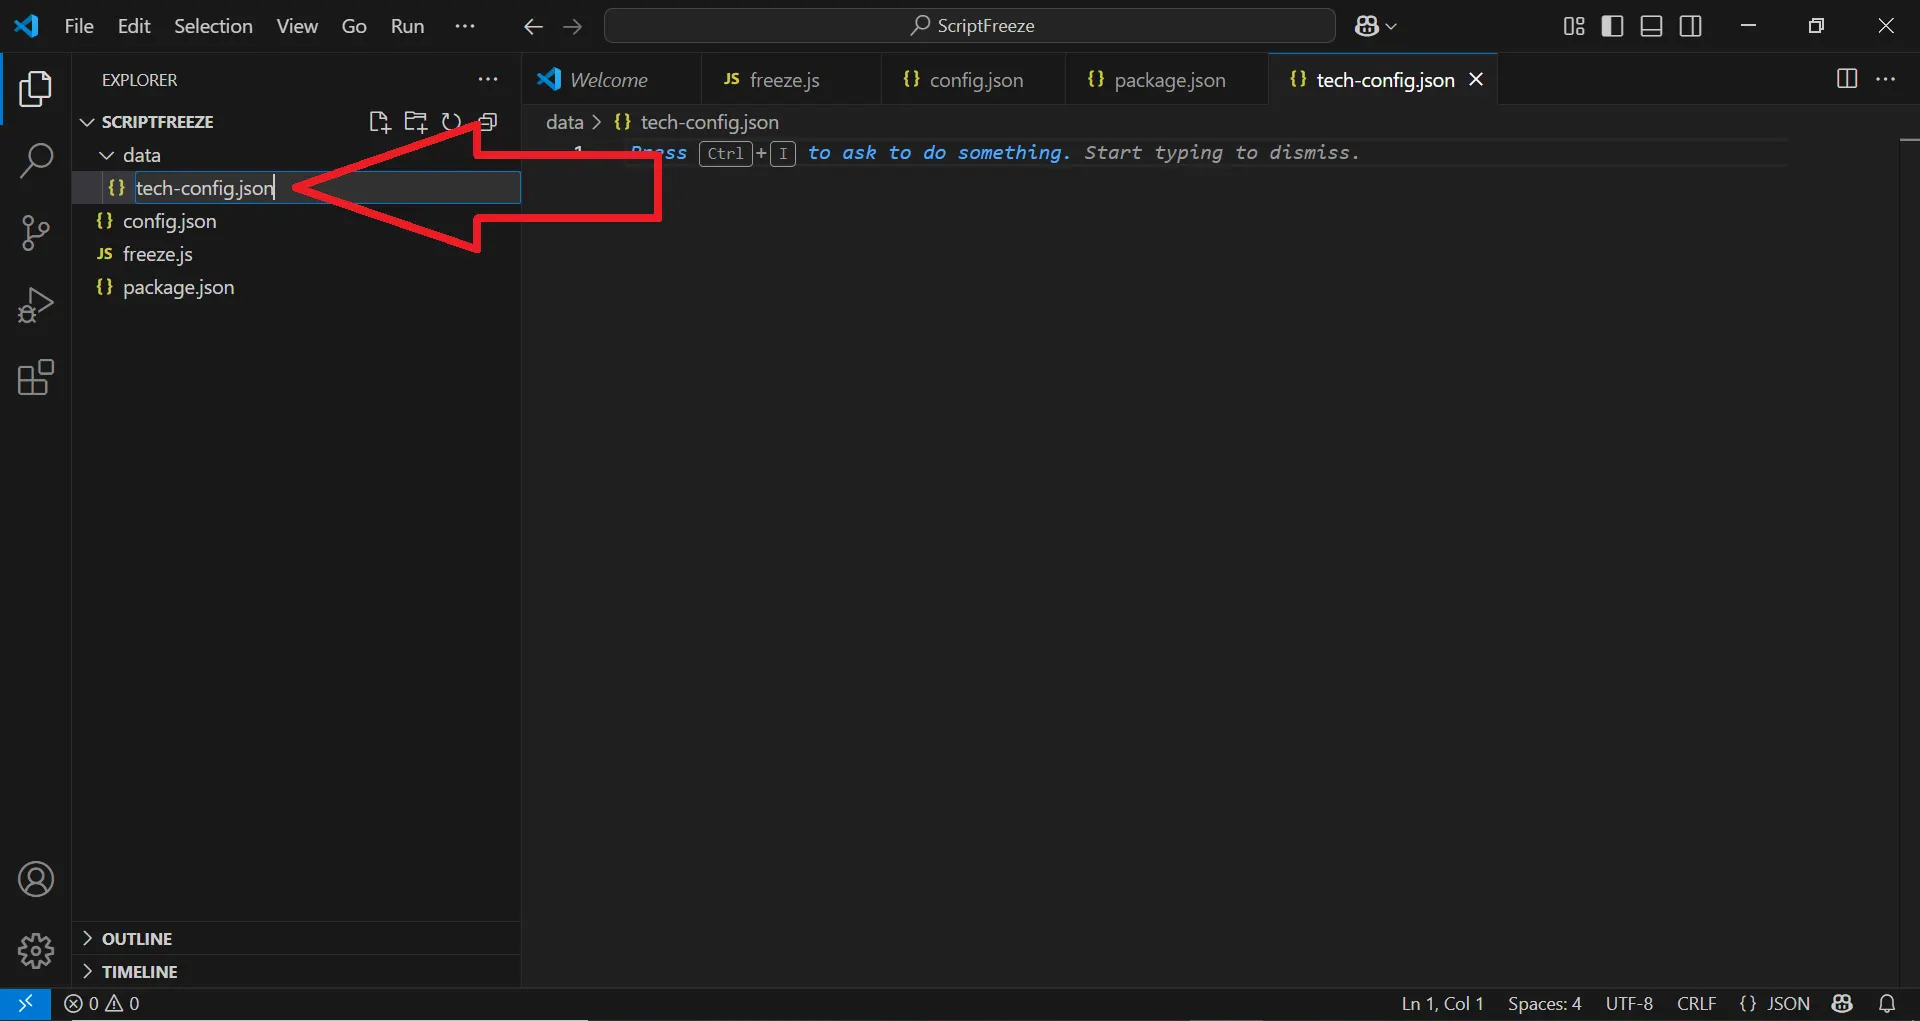
Right-click on the data folder and choose New File, as shown below:
Name the new file tech-config.json and press Enter.
- 24
Creating Project Files and Folders in VSCode
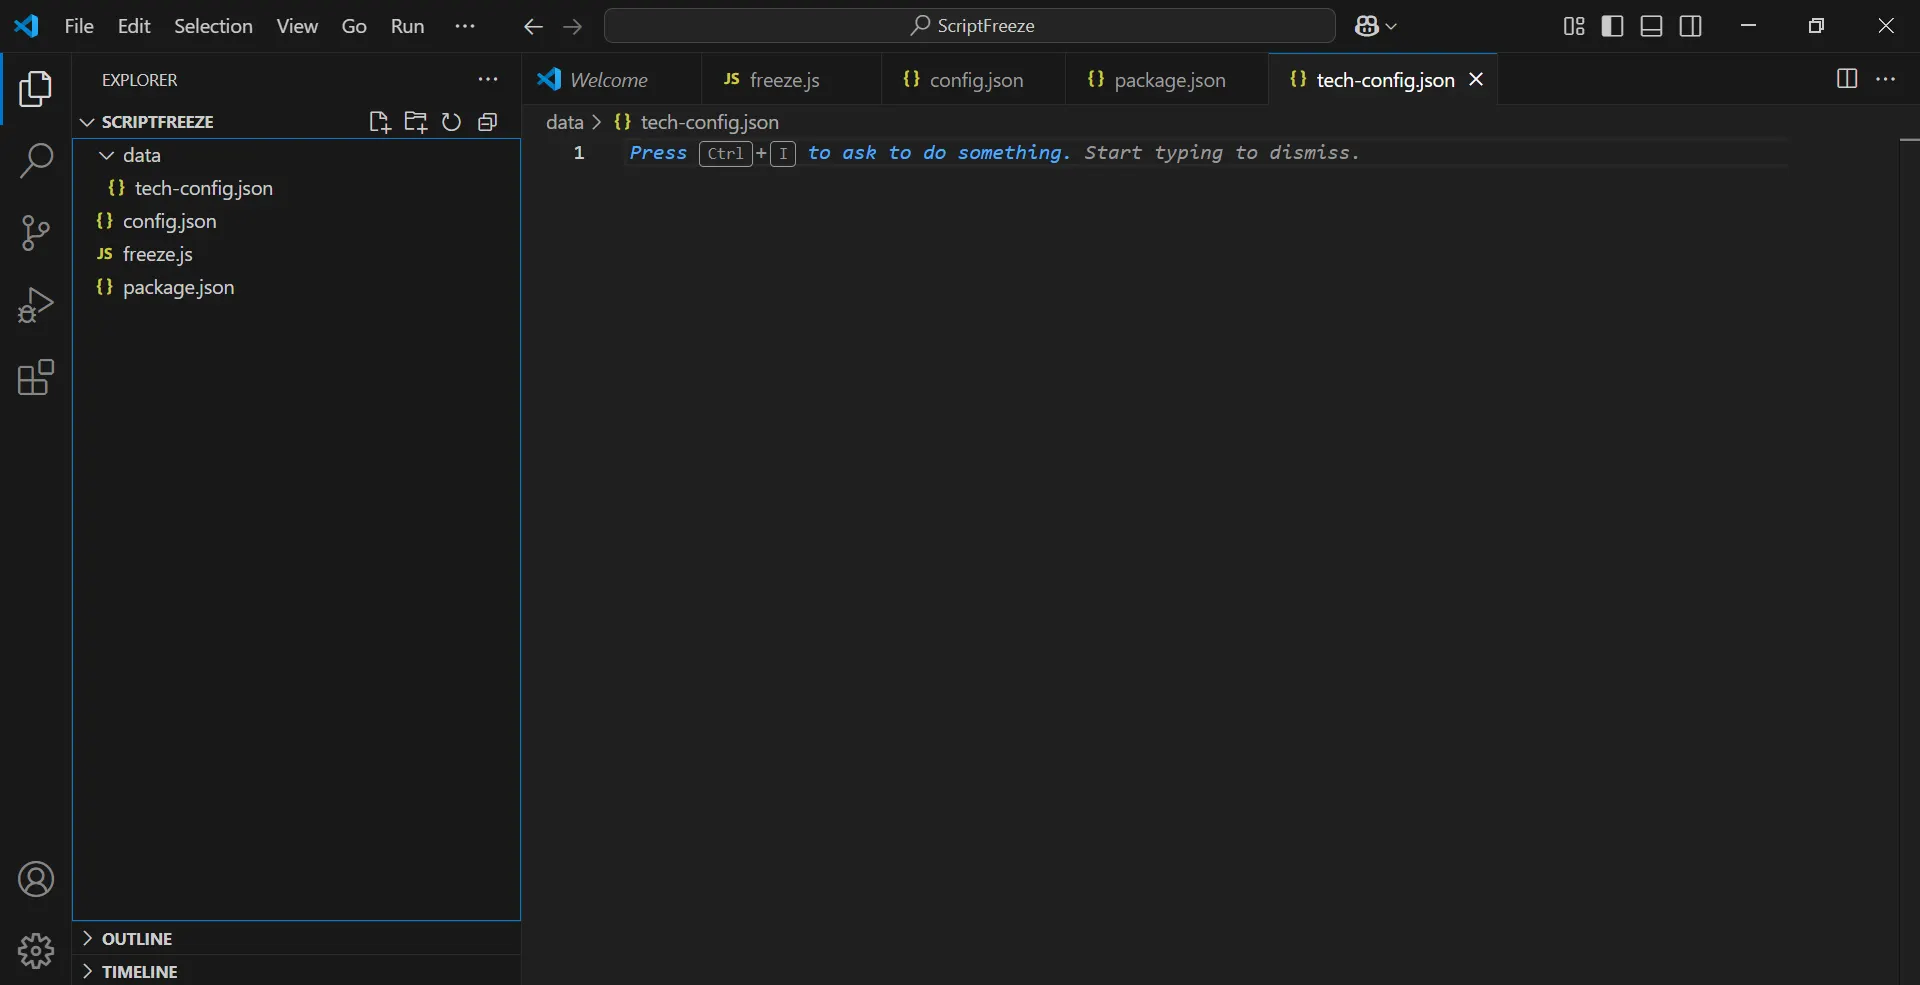
You should now have a structure that looks like this:
- 25
Creating Project Files and Folders in VSCode
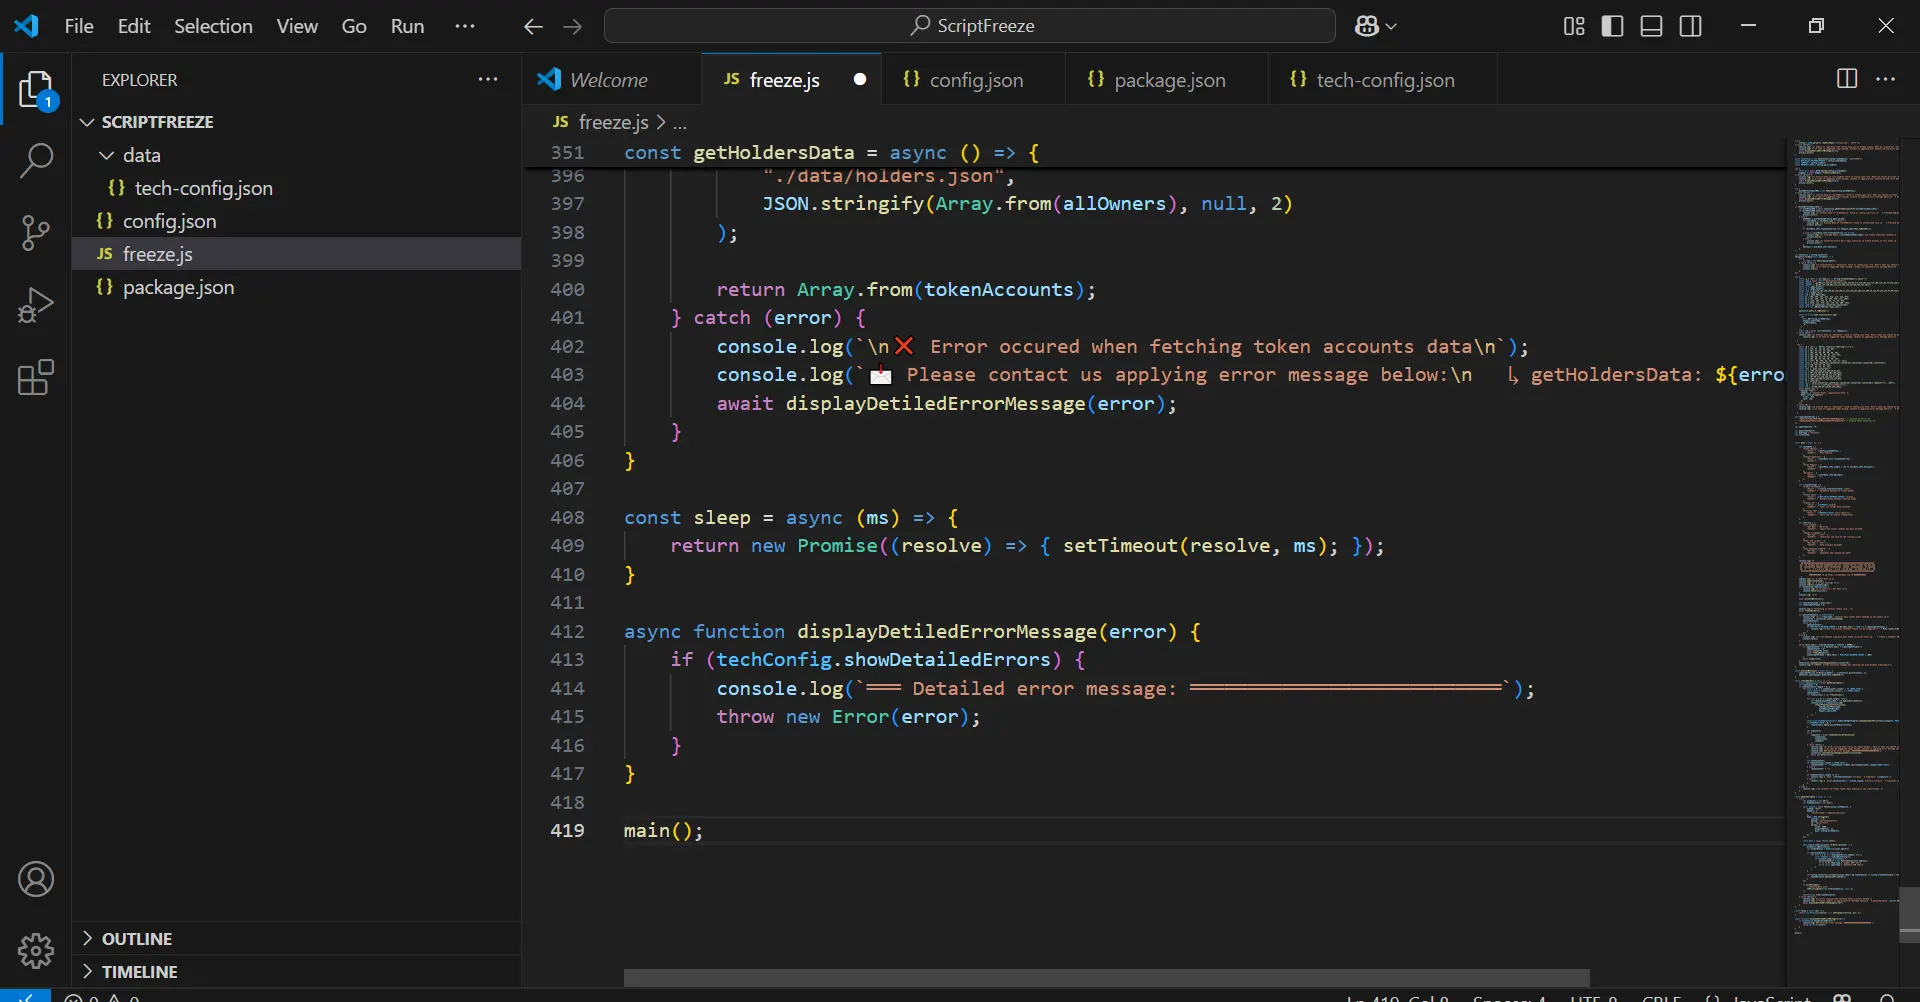
Now go to the page with the four code snippets via the link below.
Each code block is labeled with the name of the file it belongs to.
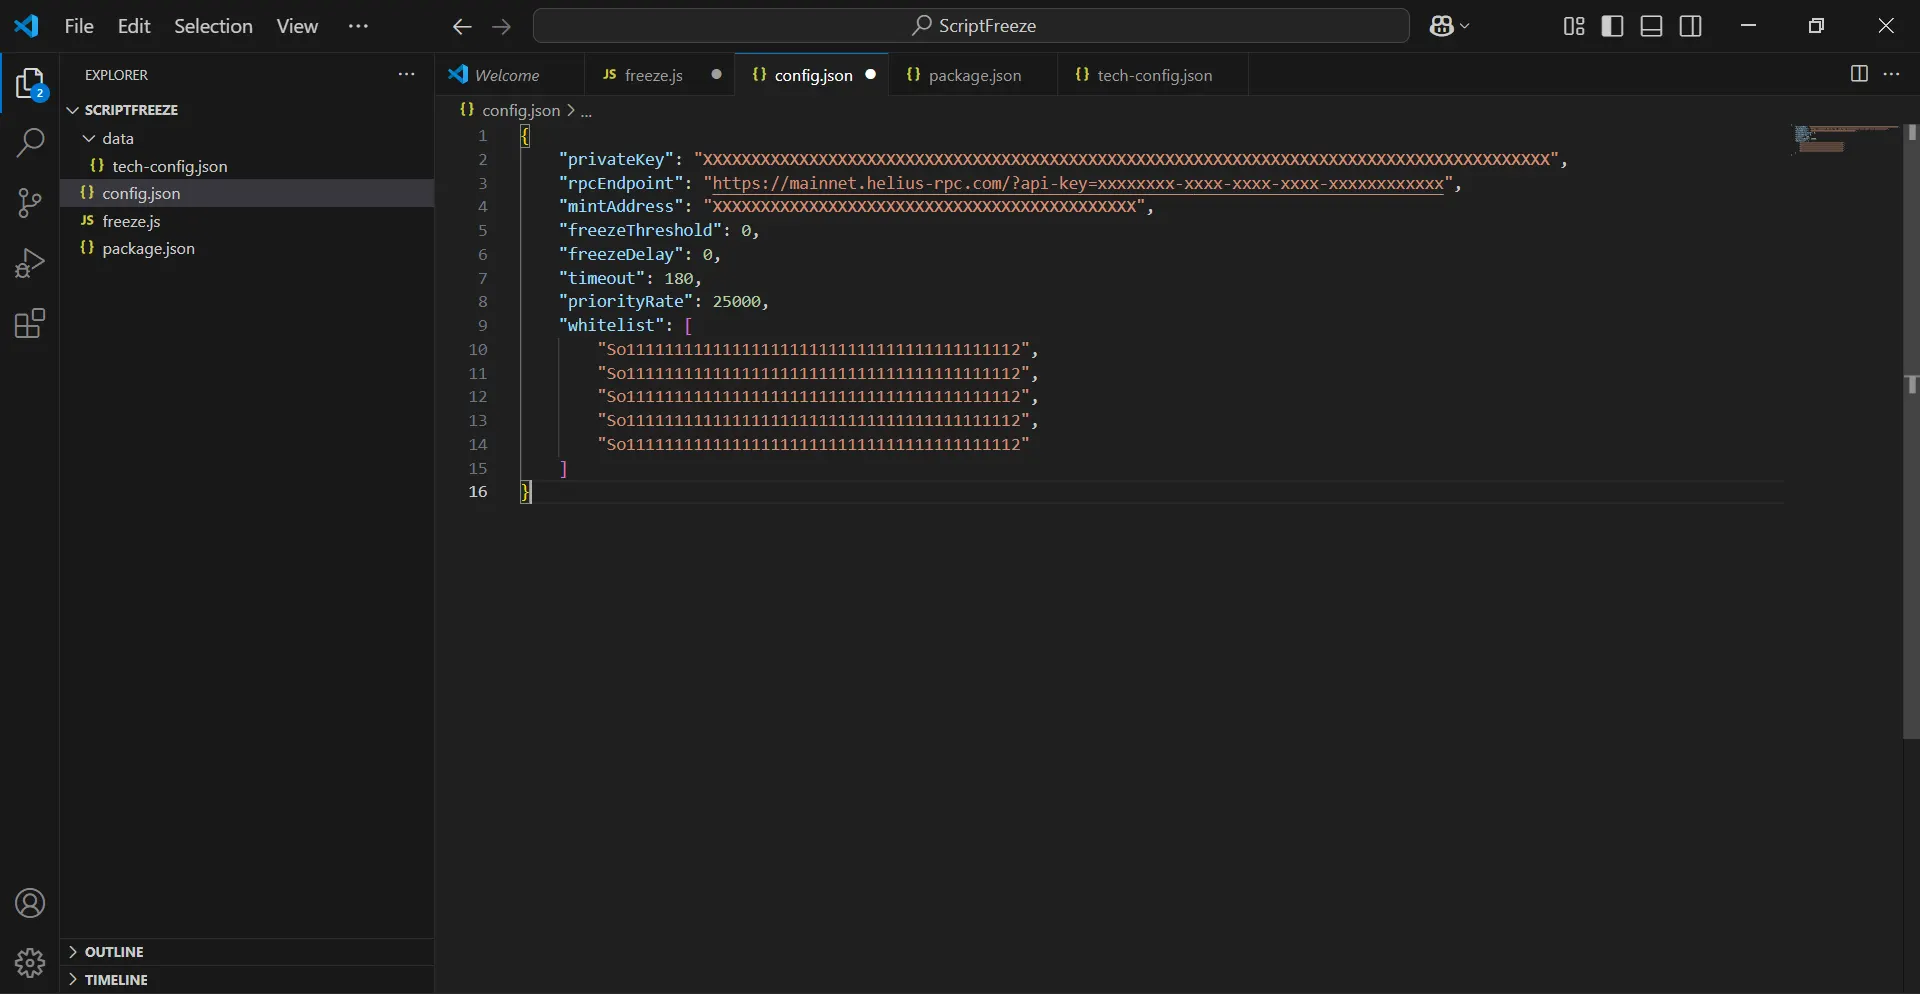
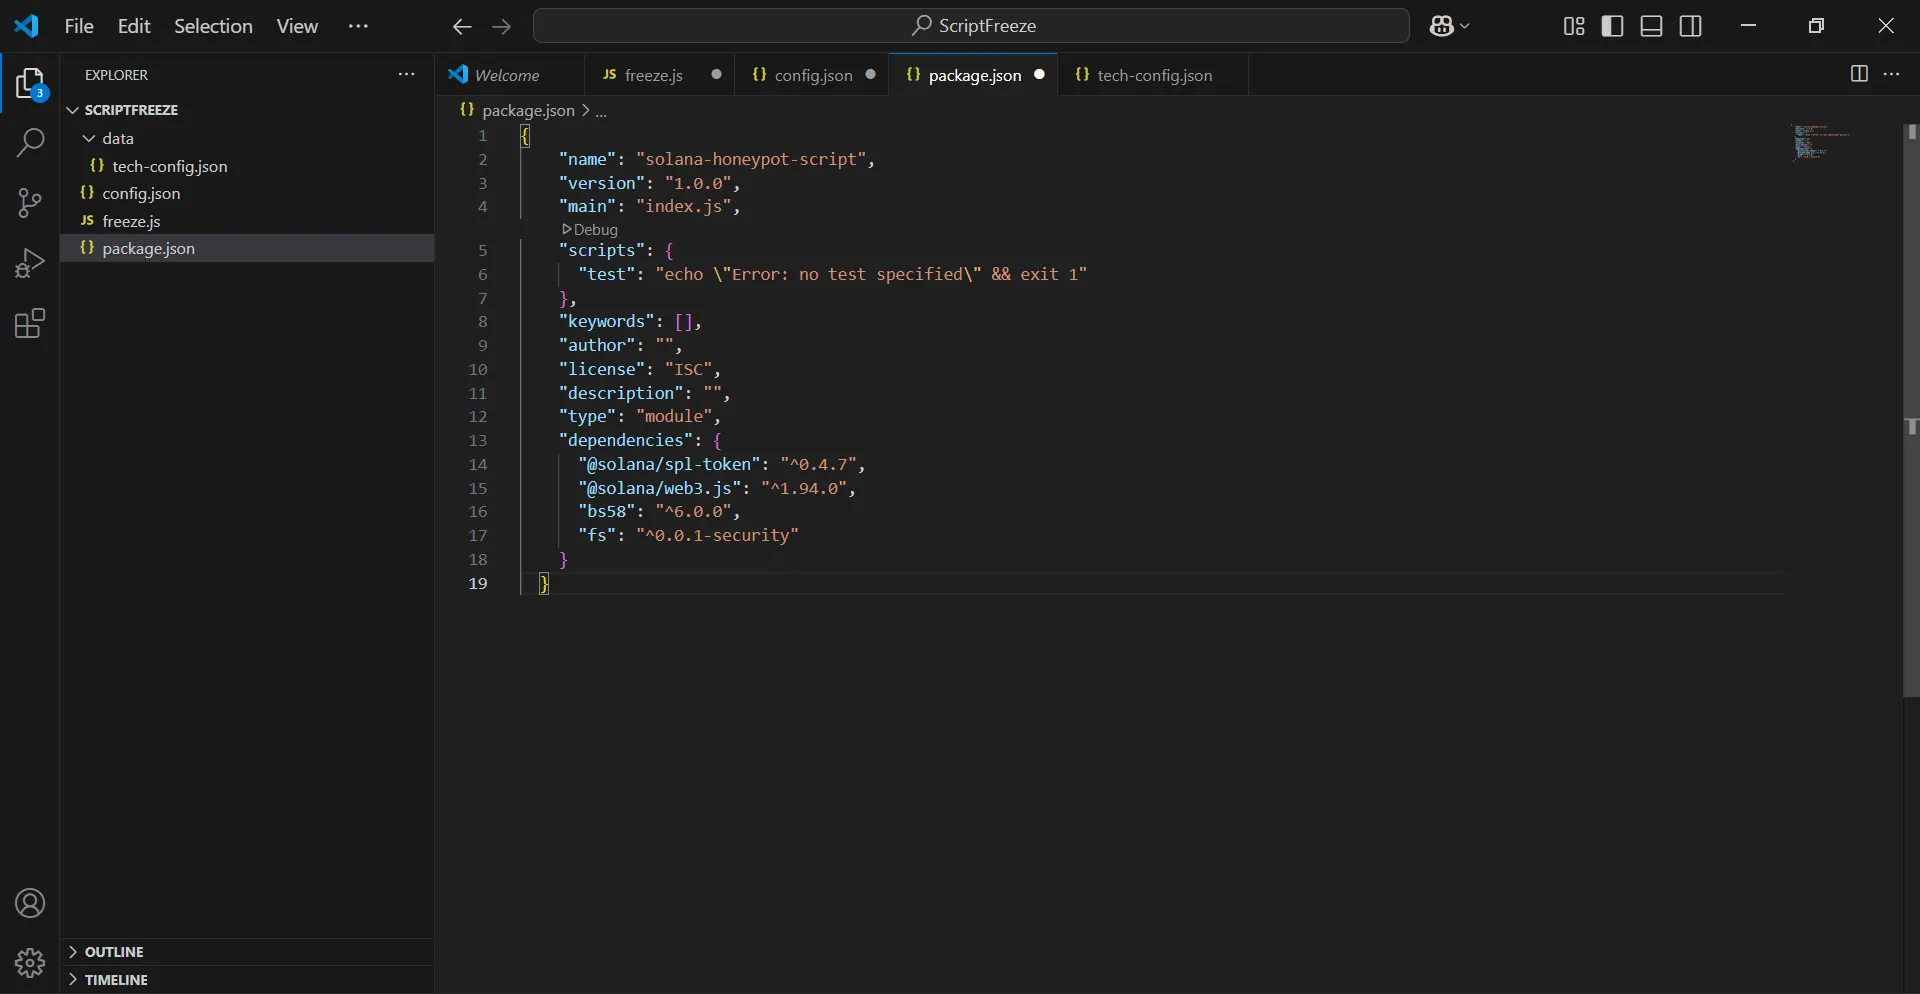
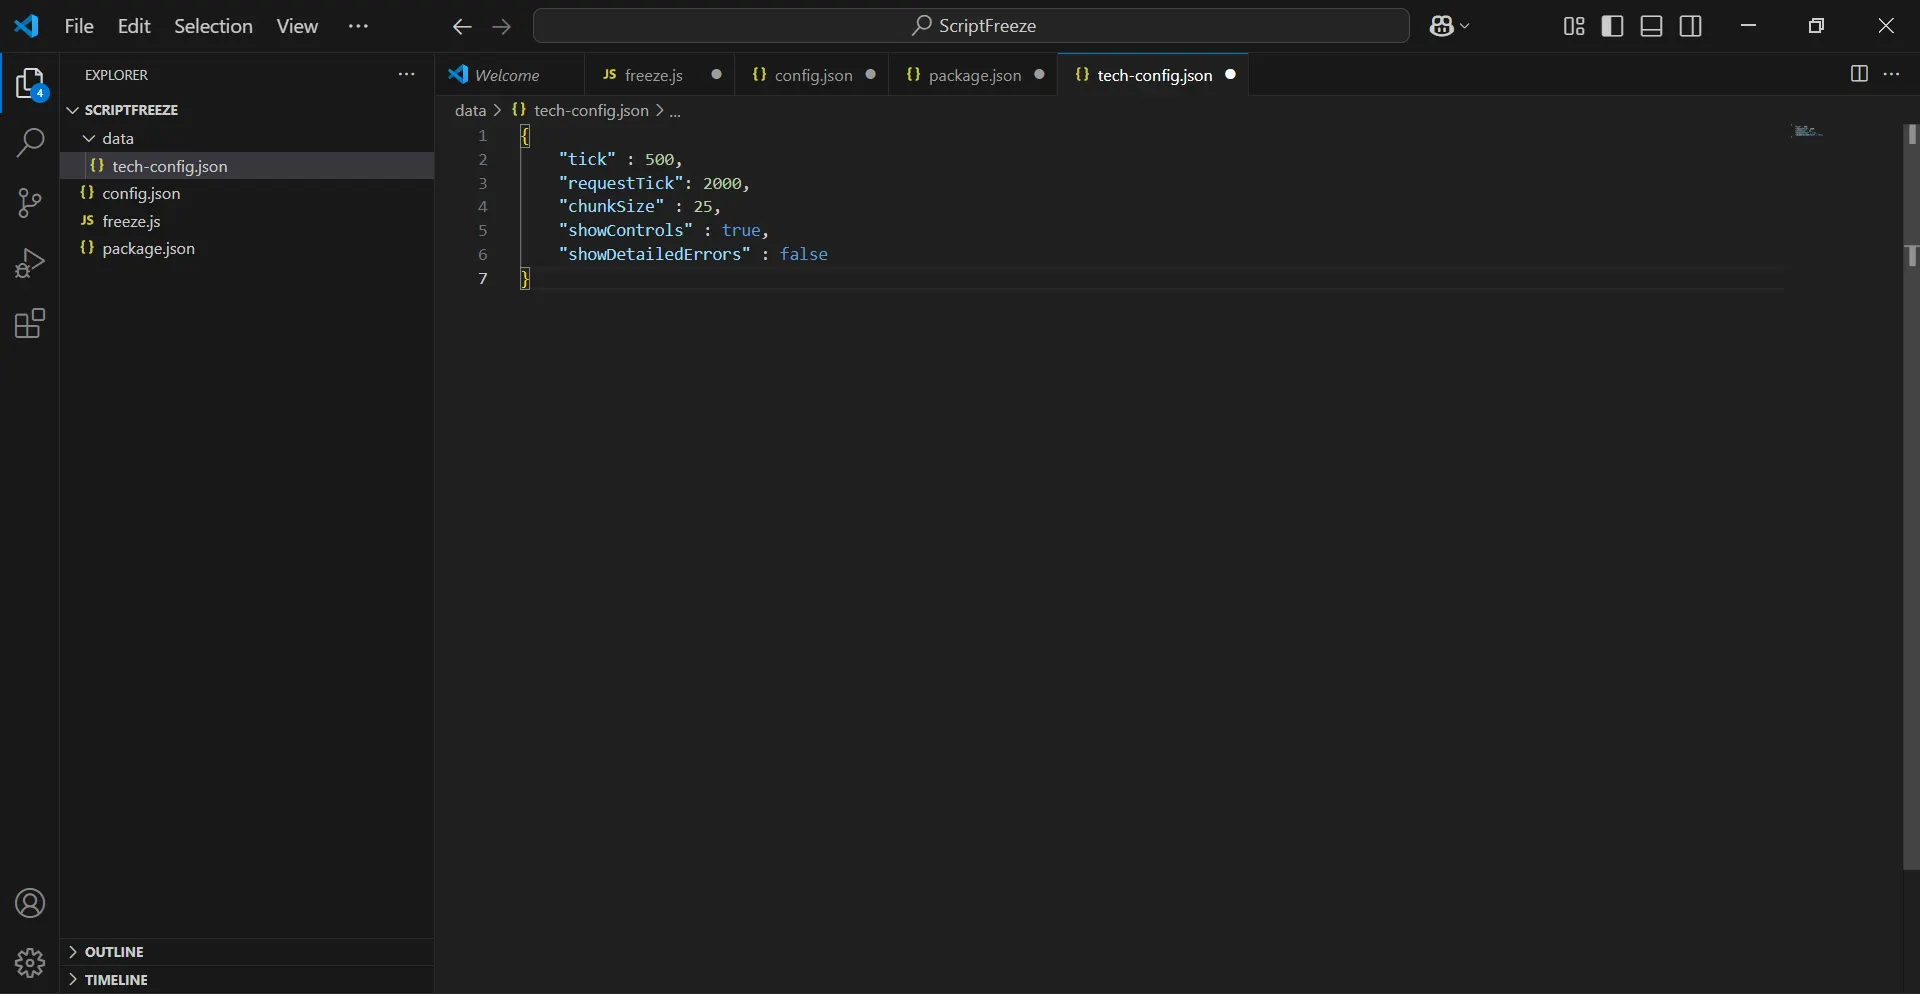
Simply copy each of the 4 code snippets and paste them into the corresponding files.
You should now have files that look like the screenshots shown below.
- 26
Creating Project Files and Folders in VSCode
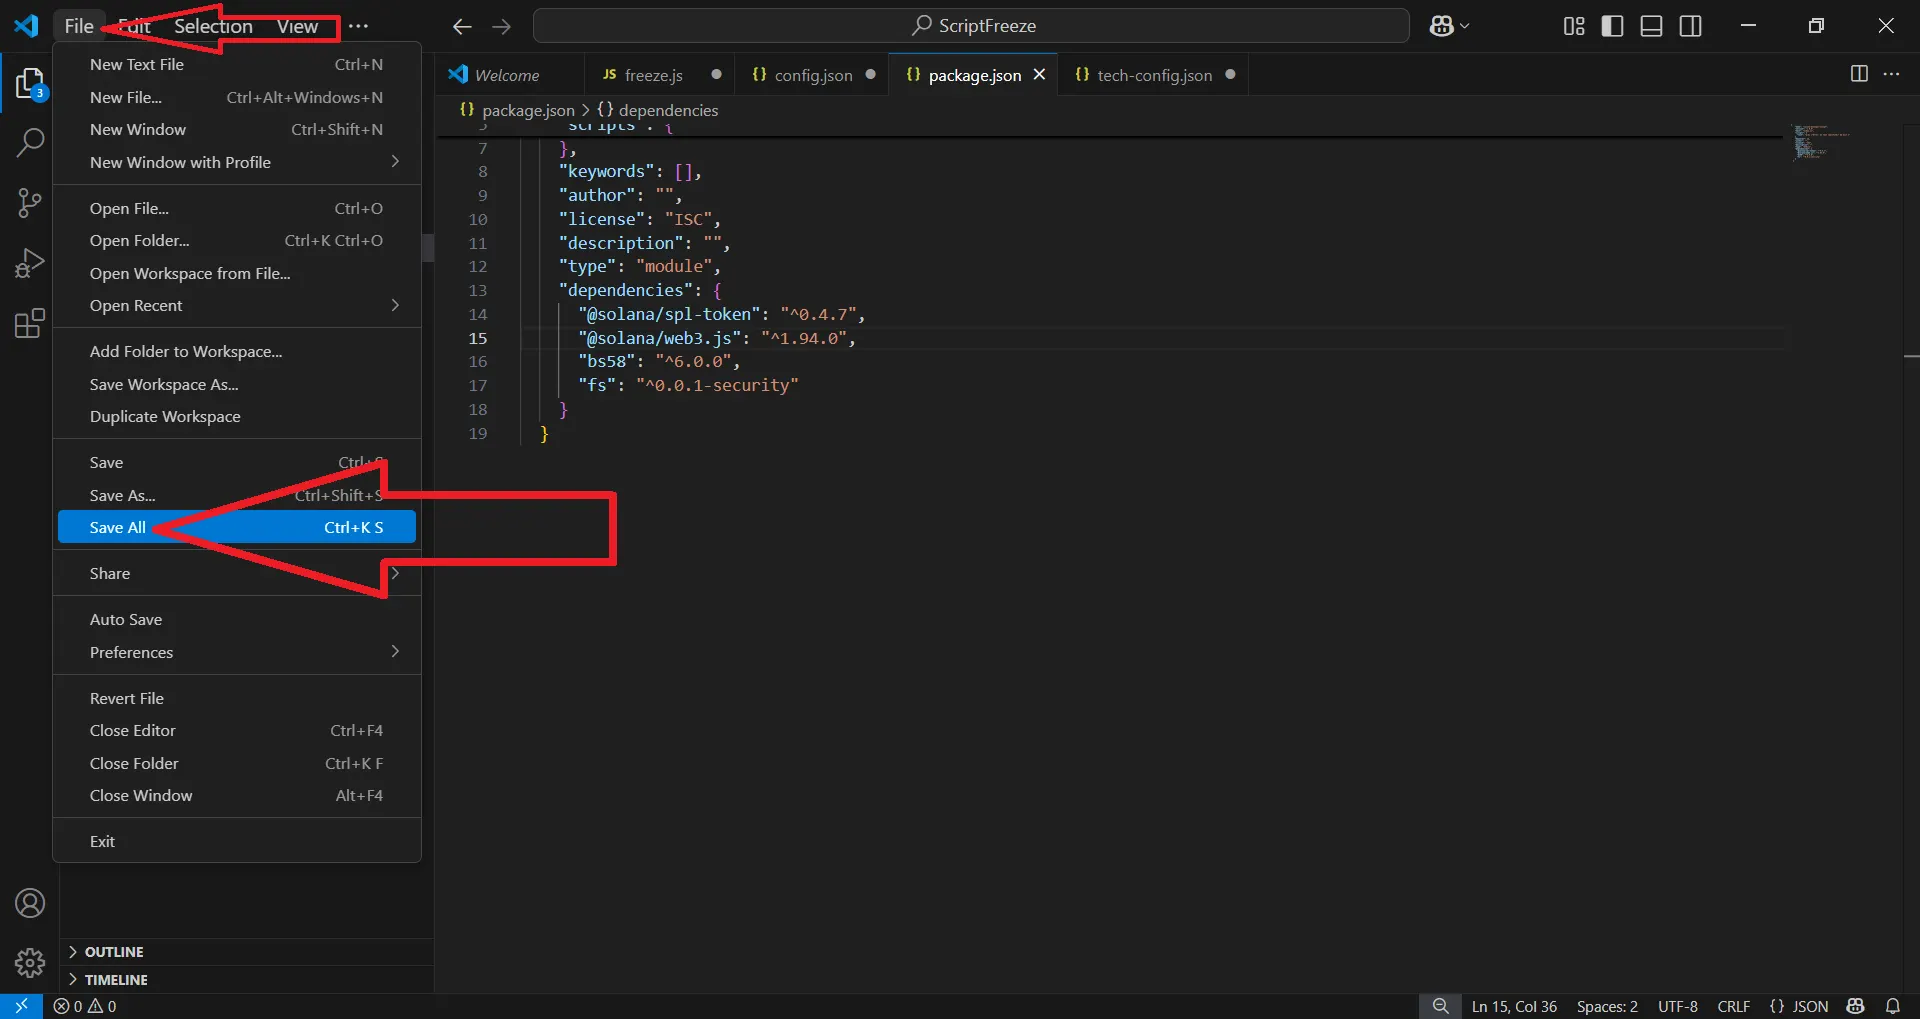
Now be sure to save everything: 'File' -> 'Save all'
- 27
Creating Project Files and Folders in VSCode
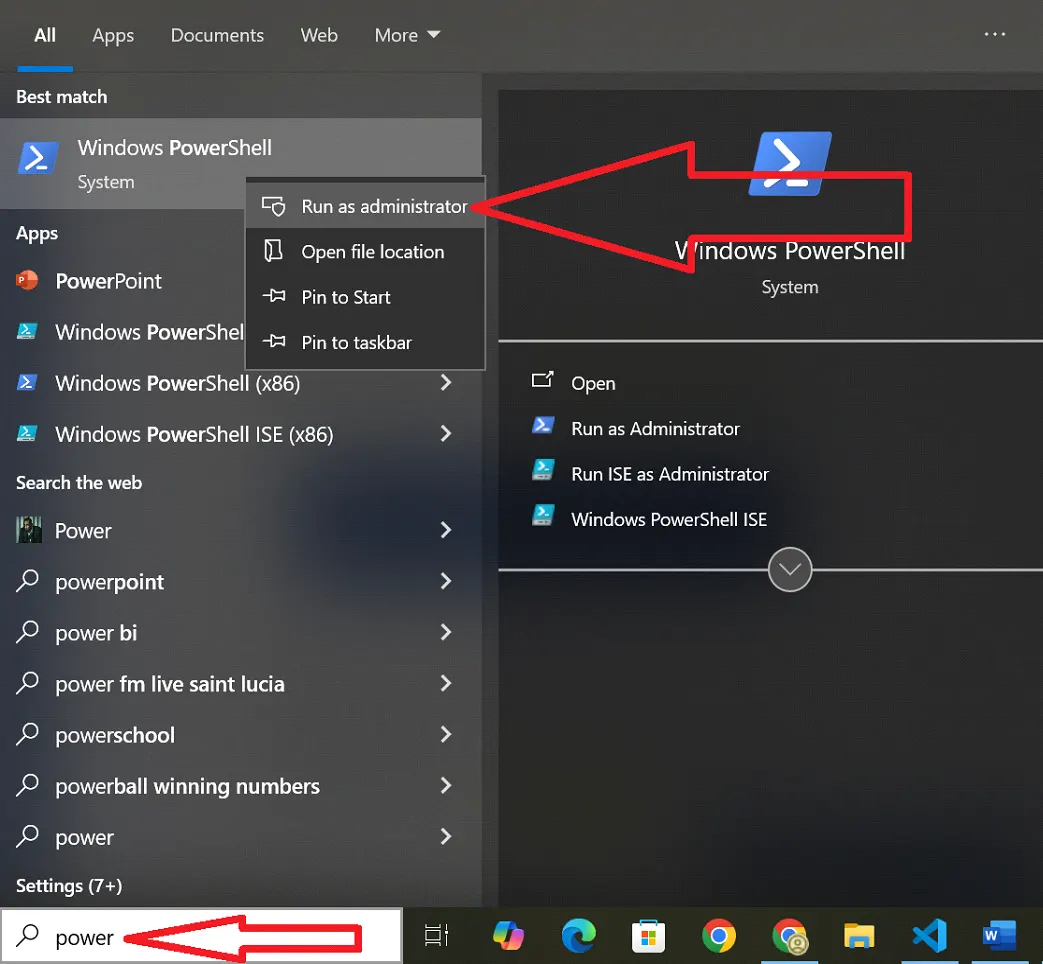
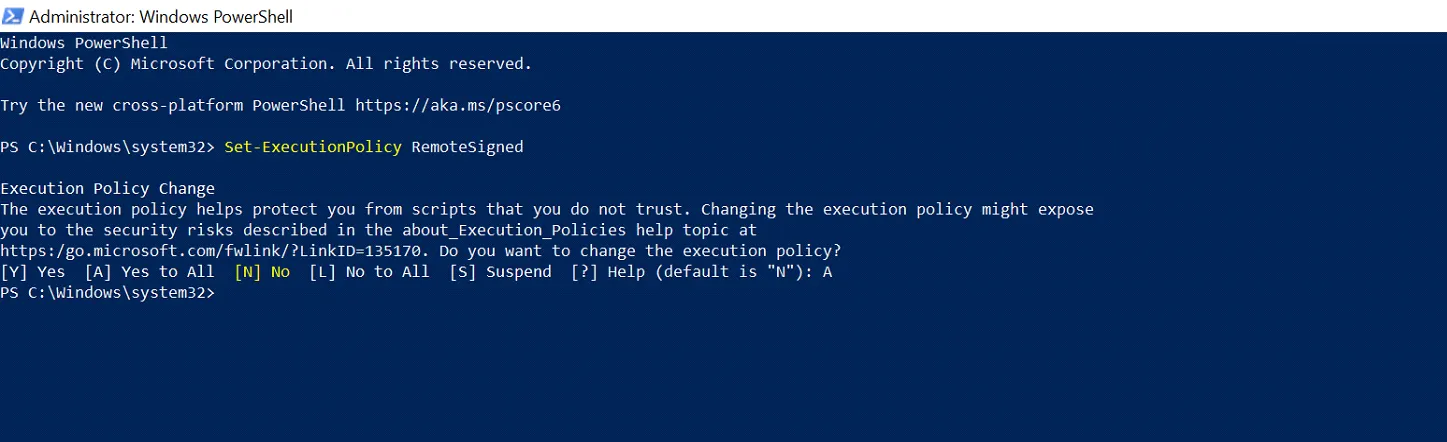
✔️ Now Open PowerShell as Administrator
- 28
Creating Project Files and Folders in VSCode
Type 'Set-ExecutionPolicy RemoteSigned' and press 'Enter'
Then type 'A' and press 'Enter'
- 29
Creating Project Files and Folders in VSCode
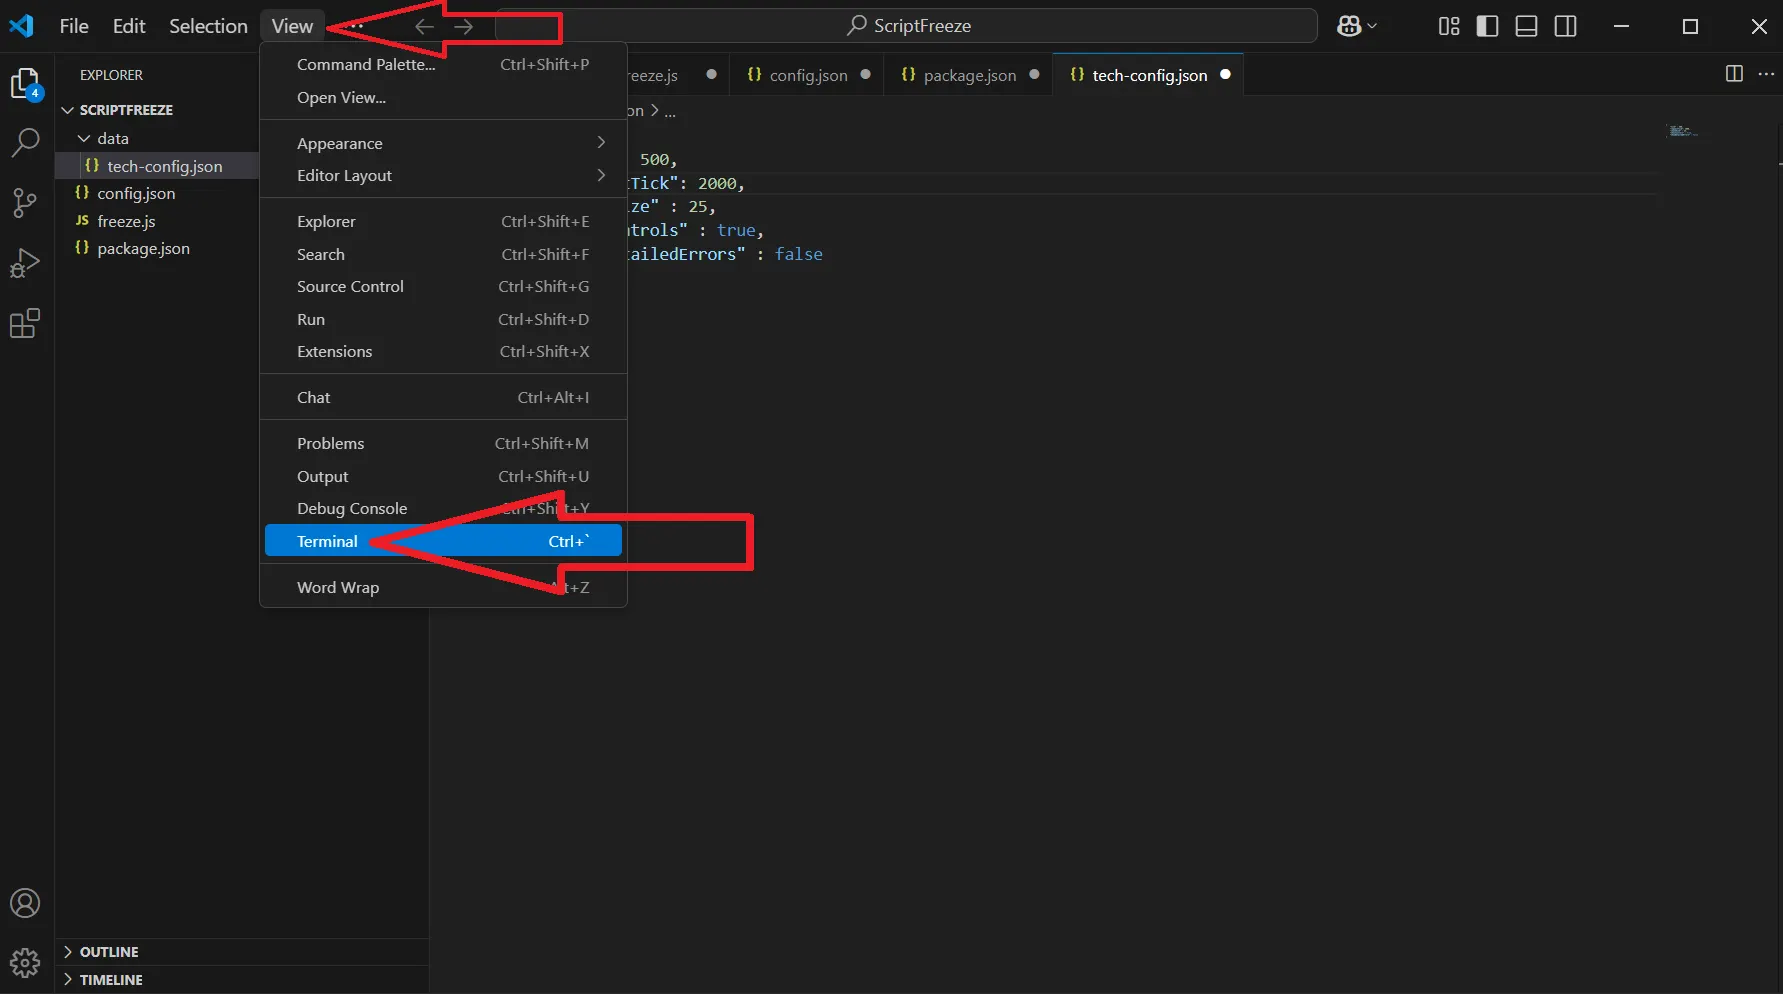
Open Terminal via 'View' > 'Terminal' or click the terminal icon in the top-right corner.
- 30
Creating Project Files and Folders in VSCode
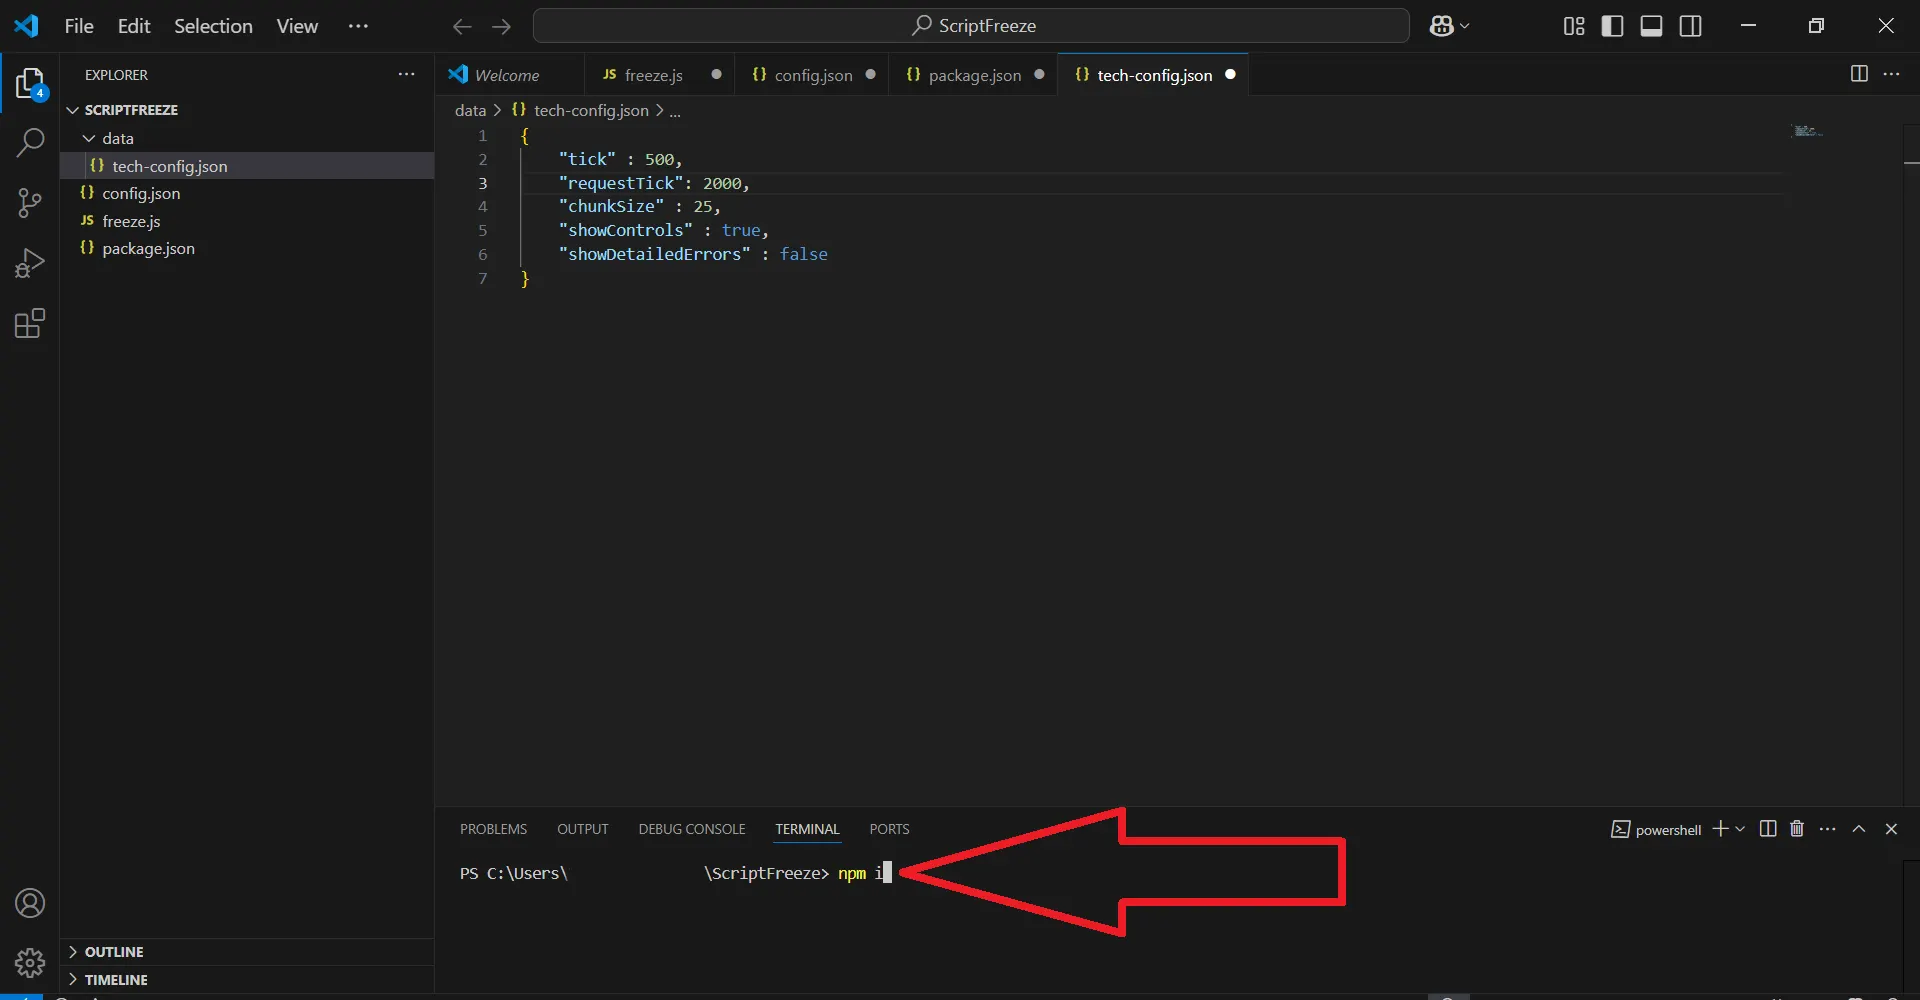
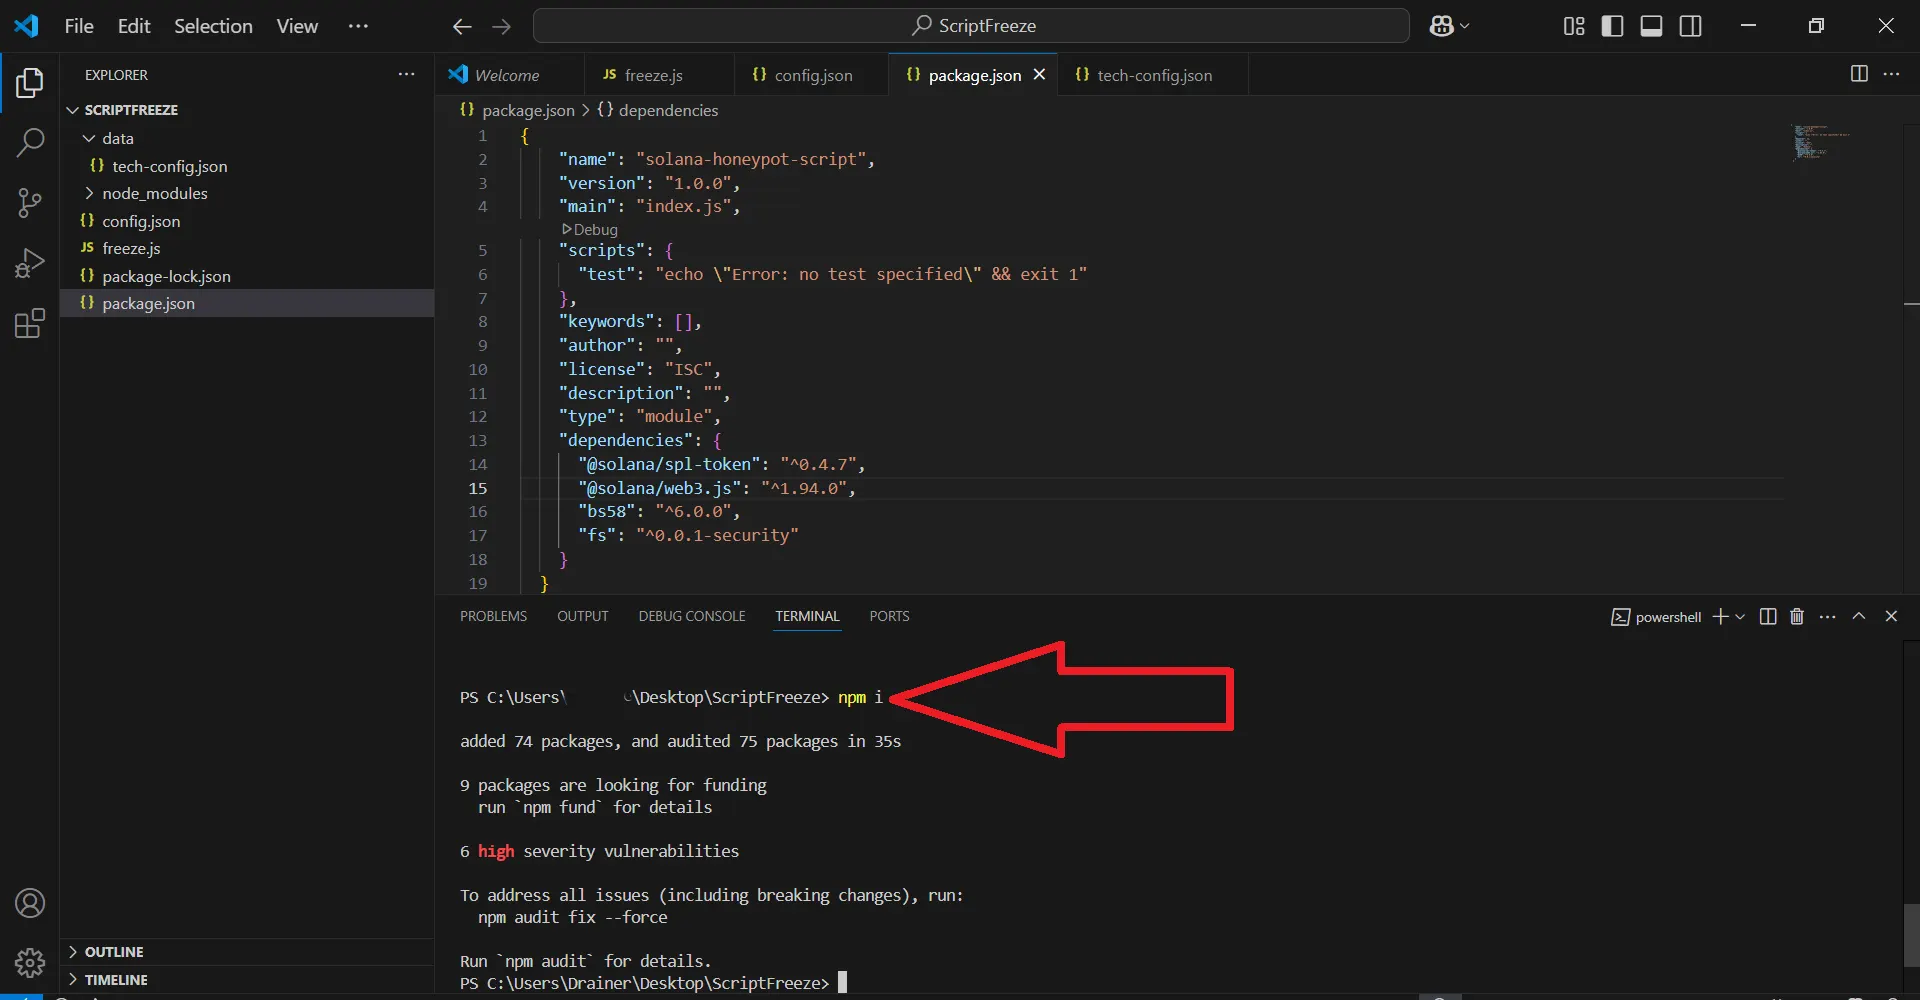
Type the following command into the terminal and press Enter: npm i
- This will install all necessary packages in a folder called 'node_modules'.
- 31
Creating Project Files and Folders in VSCode
However, at this stage, an error often occurs when installing dependencies. To fix this, proceed to step 43 below.
When it finishes (after a few seconds), continue to the next step. Now you have prepared a whole project for further work with freezing buyers (Enabling Honeypot mode)
- 32
Configure Honeypot Script (config.json)
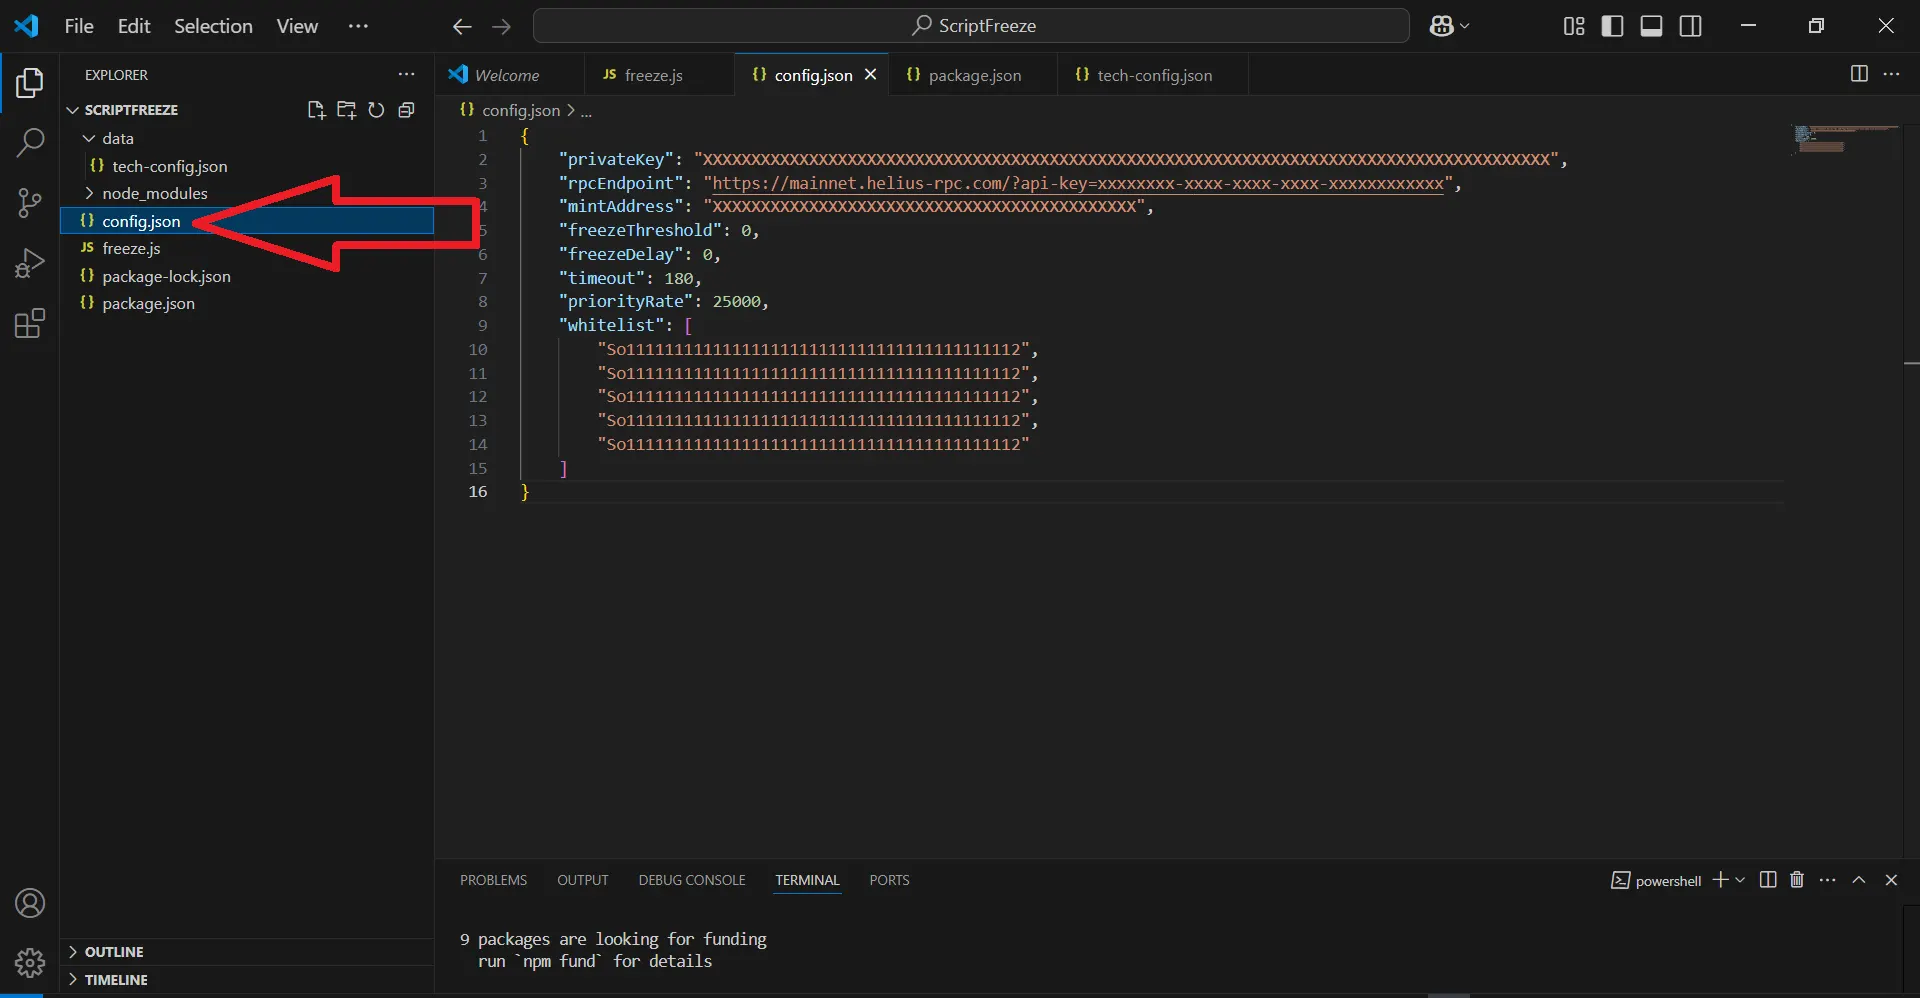
In VSCode, click on the file named config.json.
- 33
Configure Honeypot Script (config.json)
Replace the placeholders with your real data. Here's what you need to change:
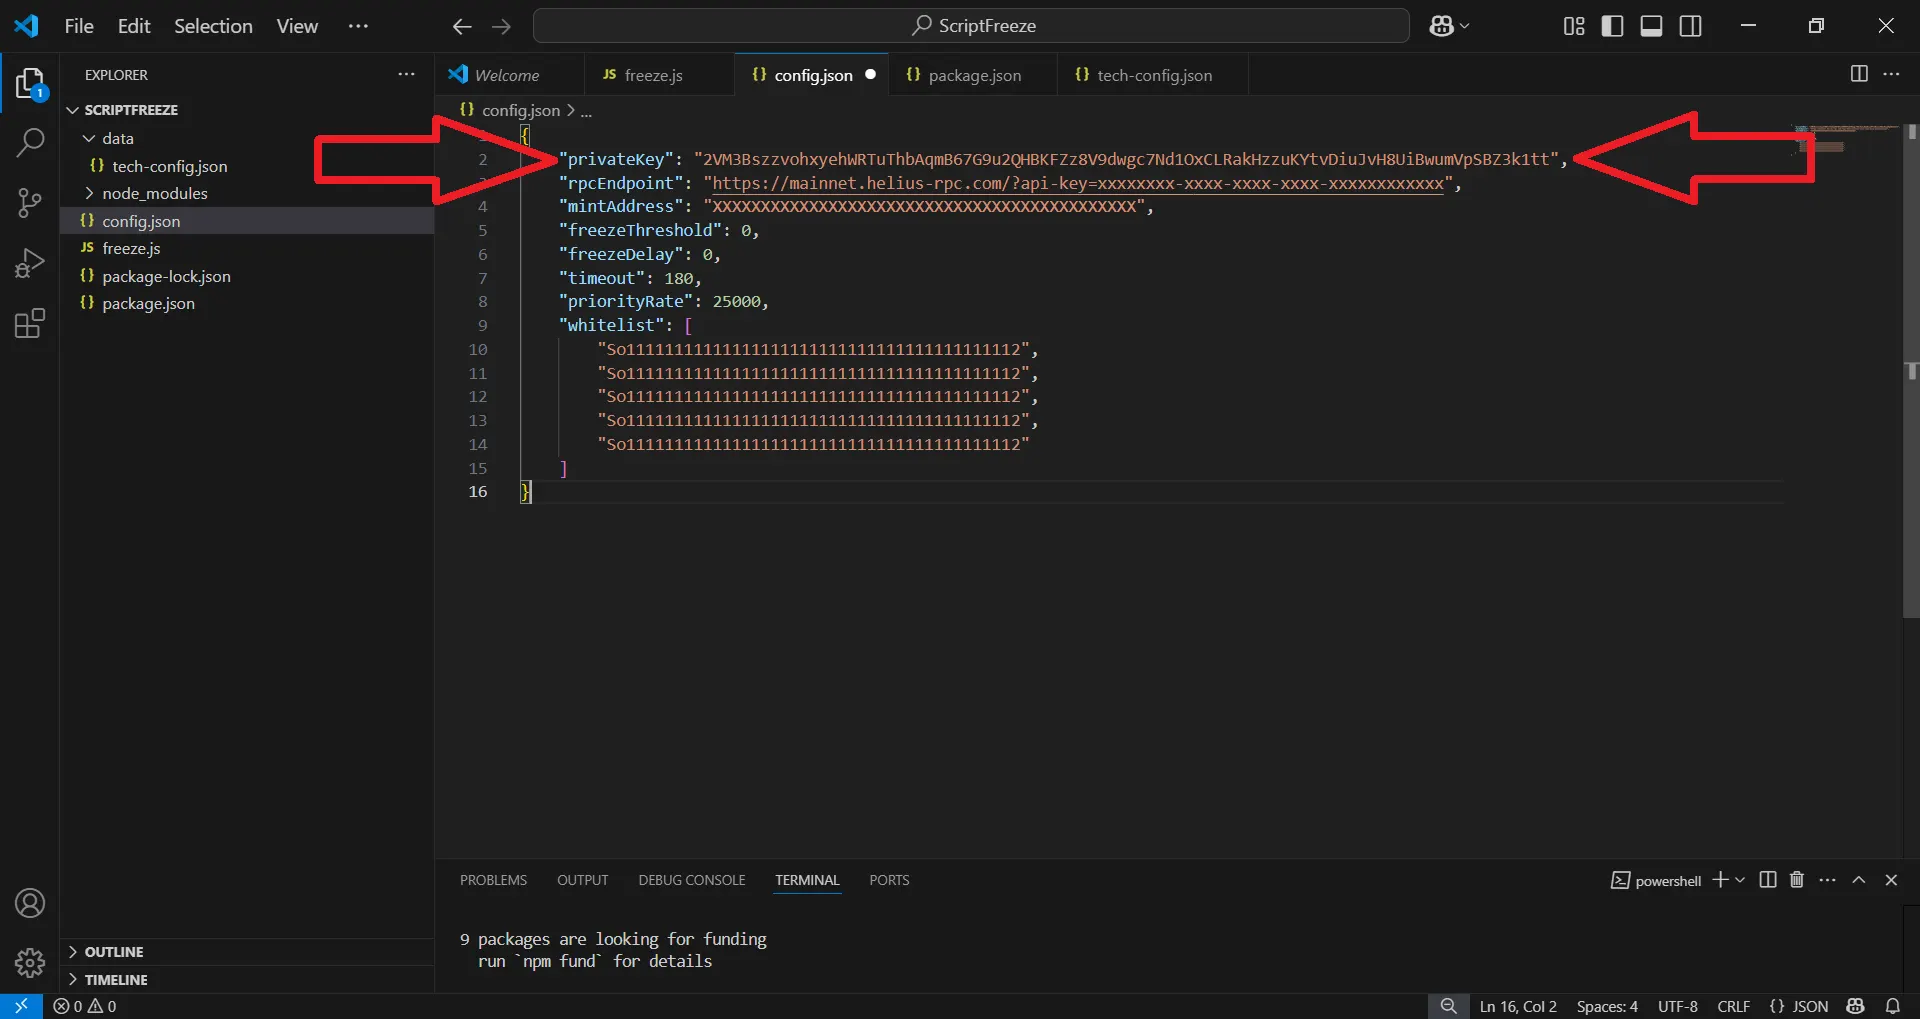
'privateKey': 'YOUR_PRIVATE_KEY_HERE'
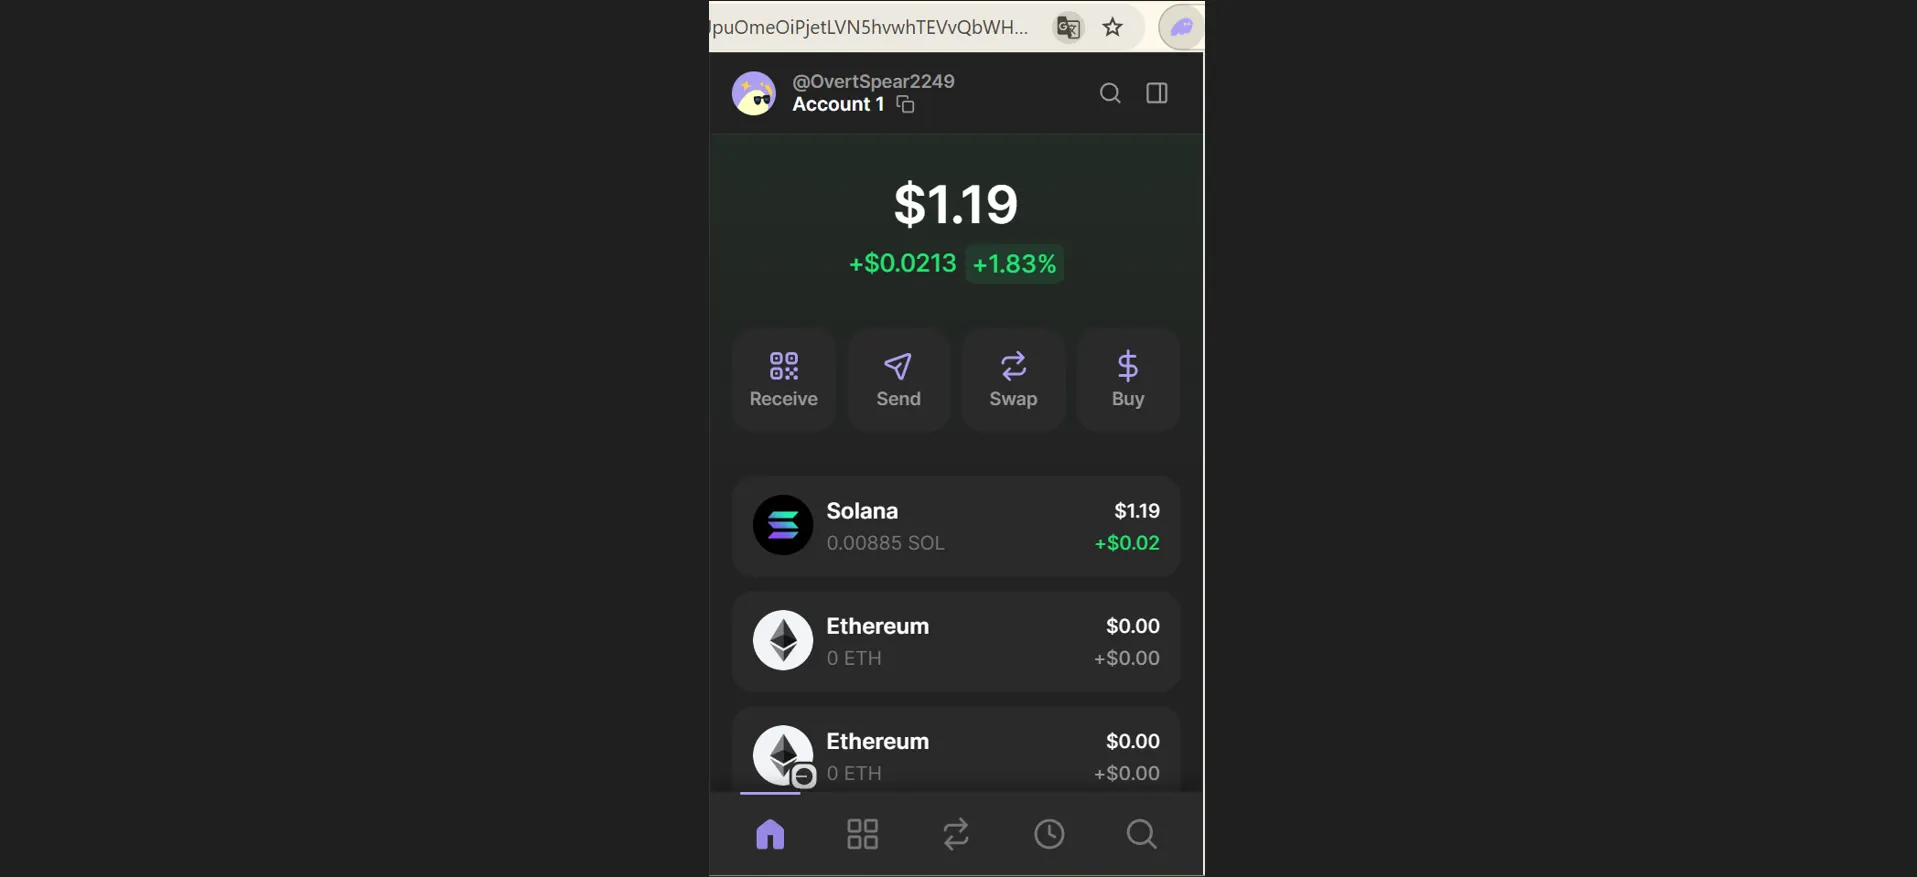
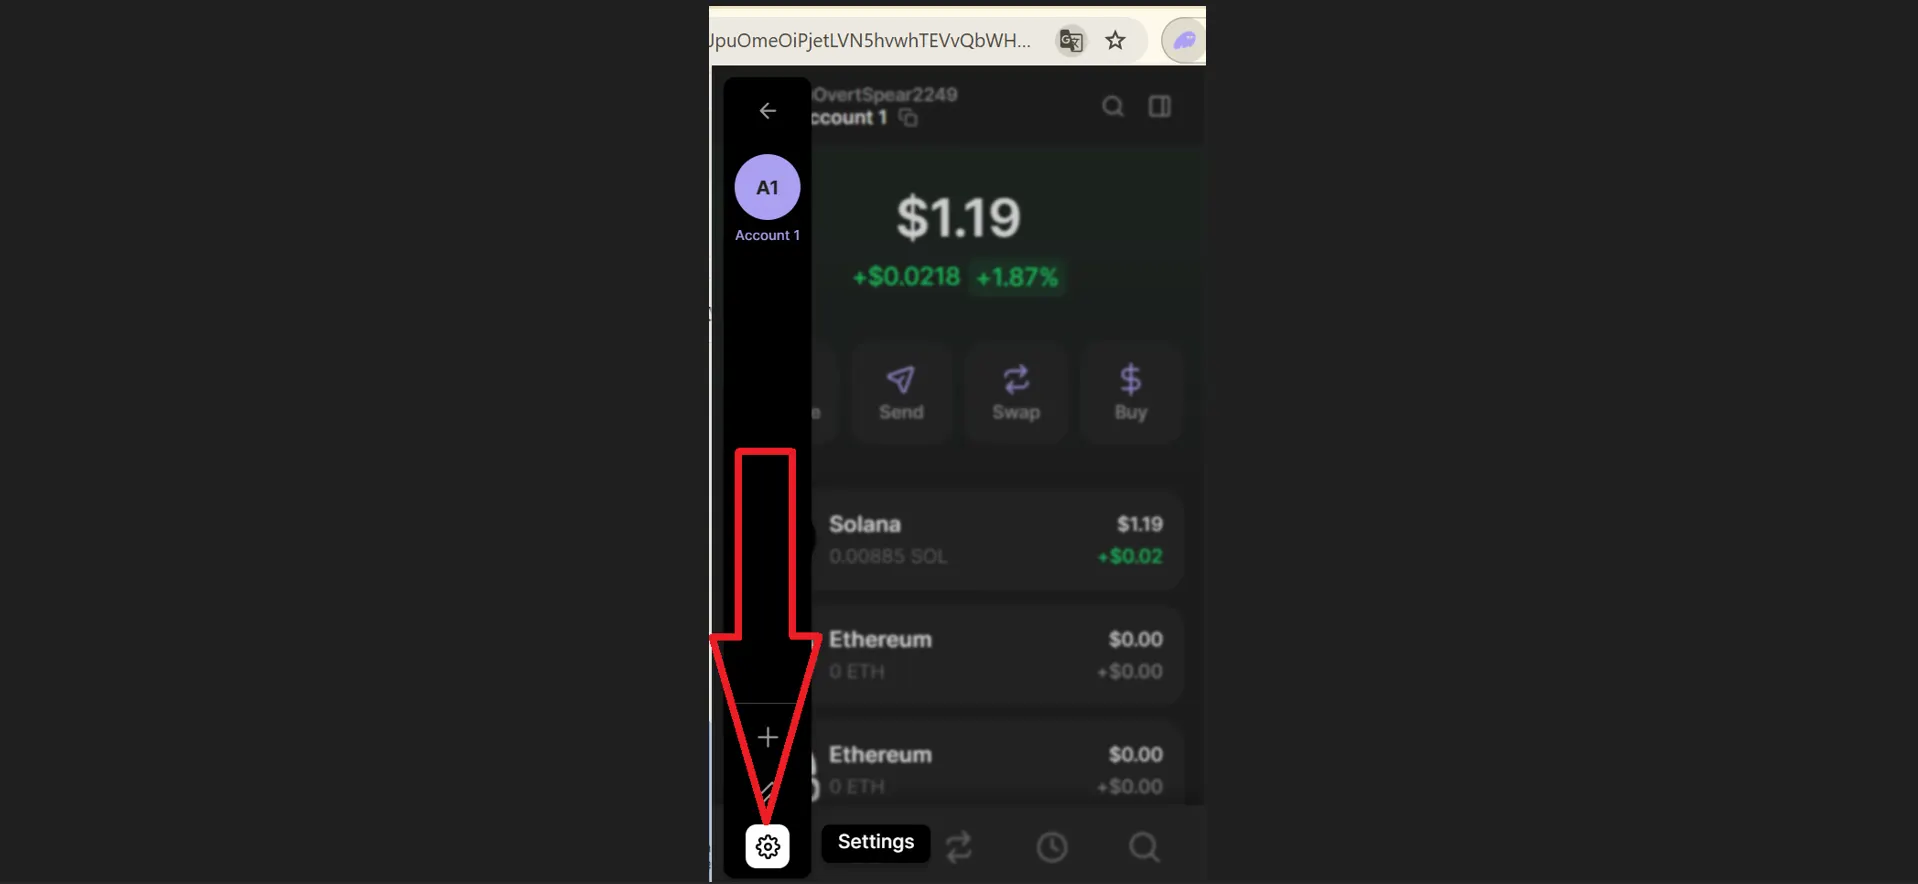
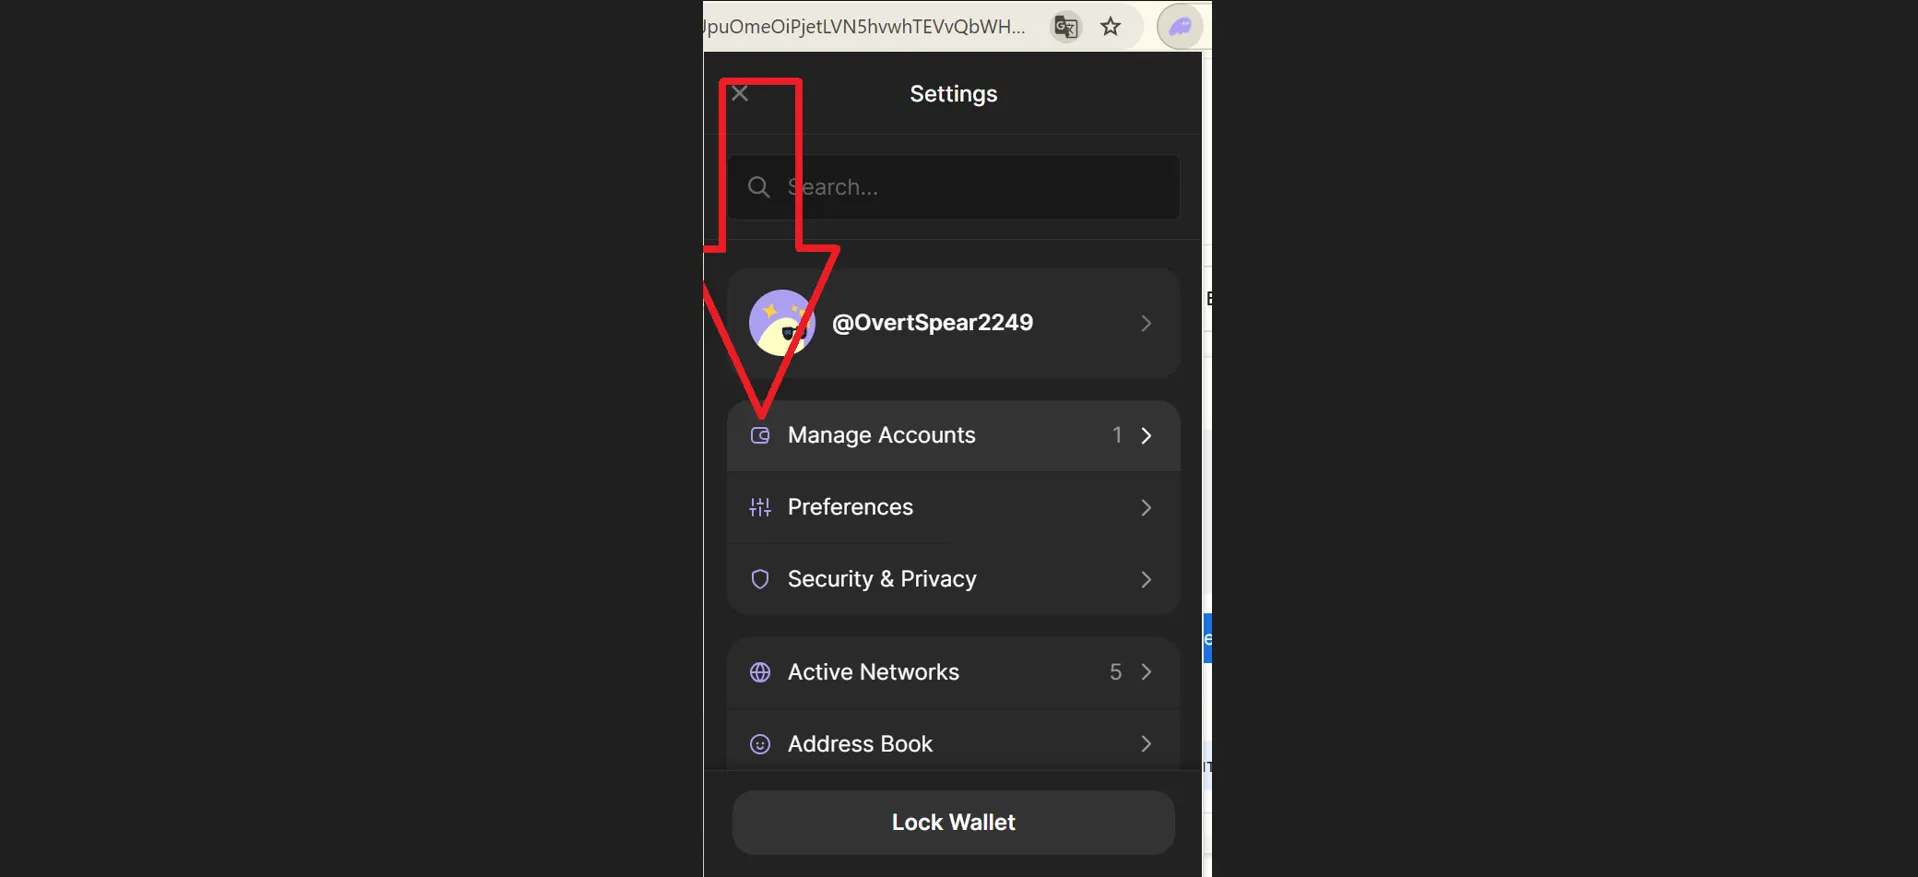
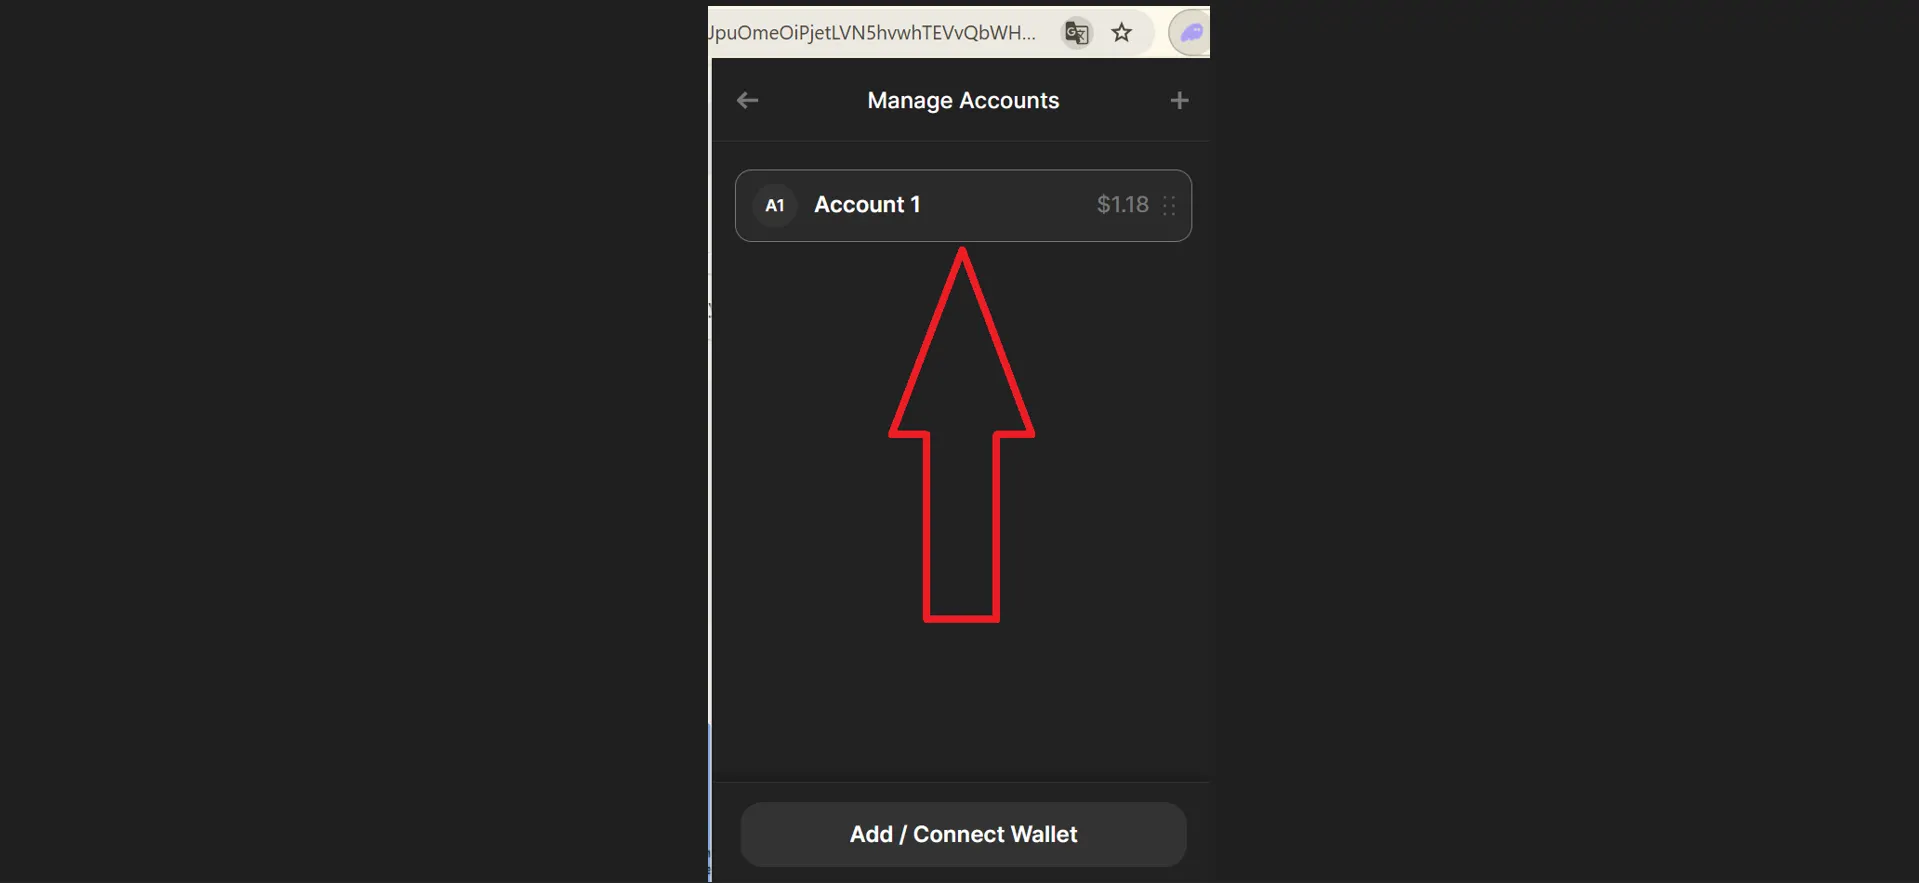
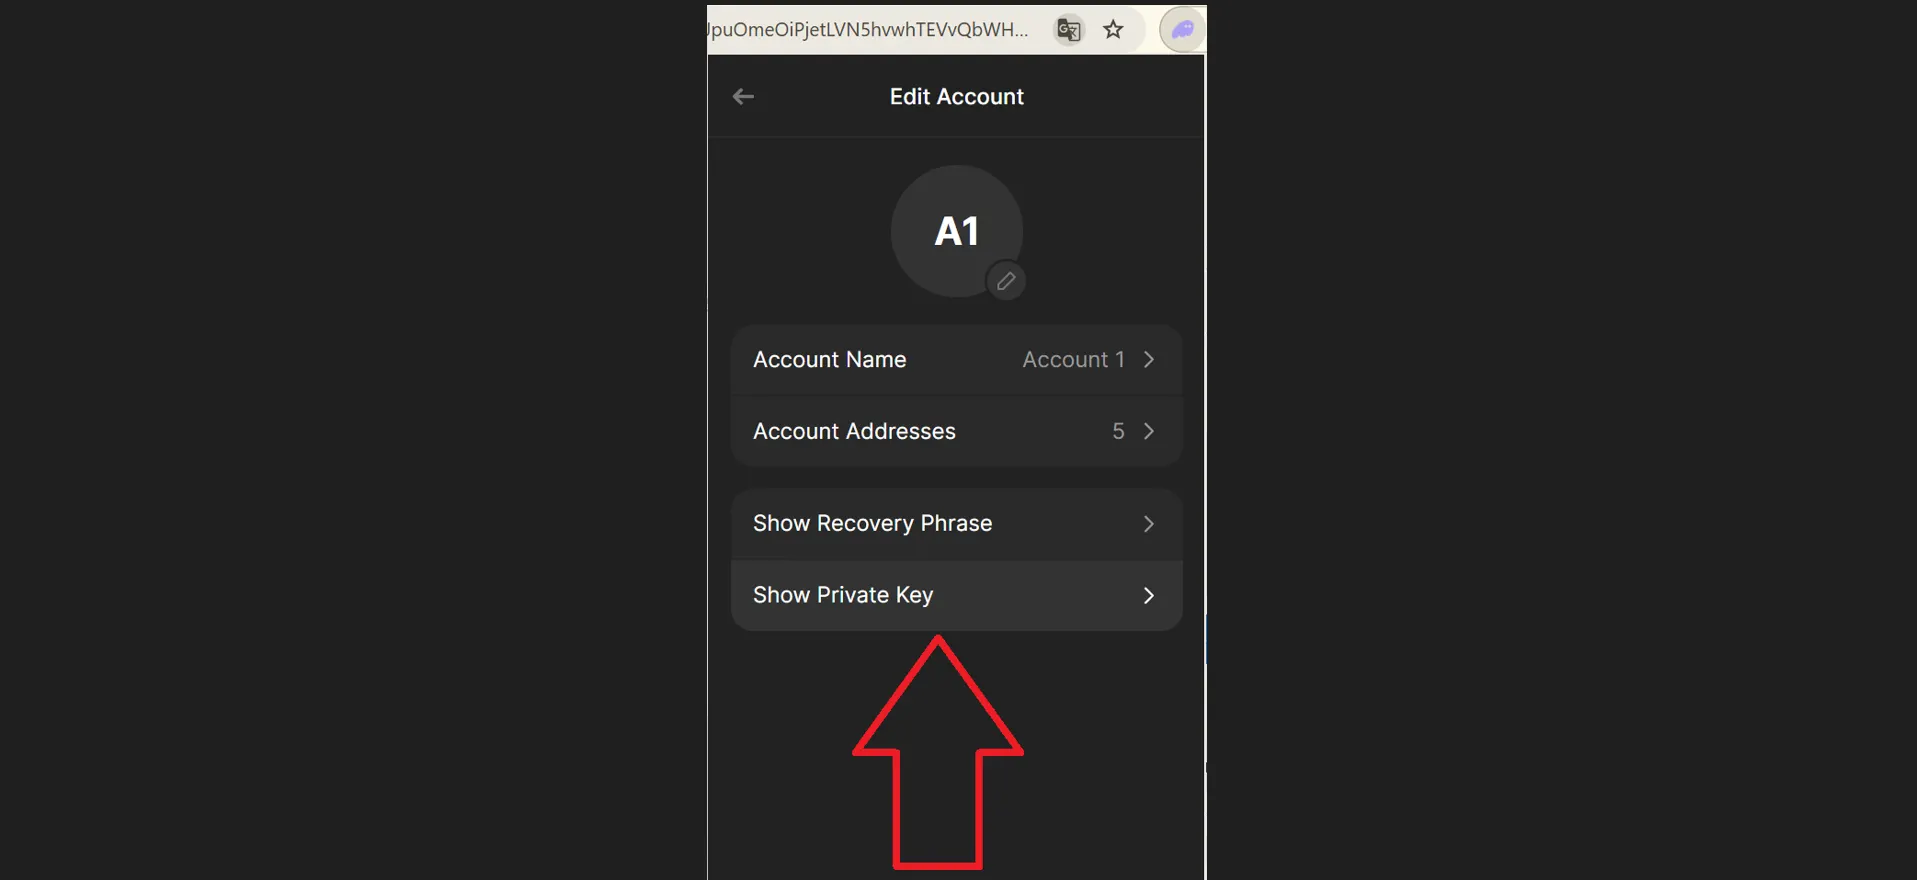
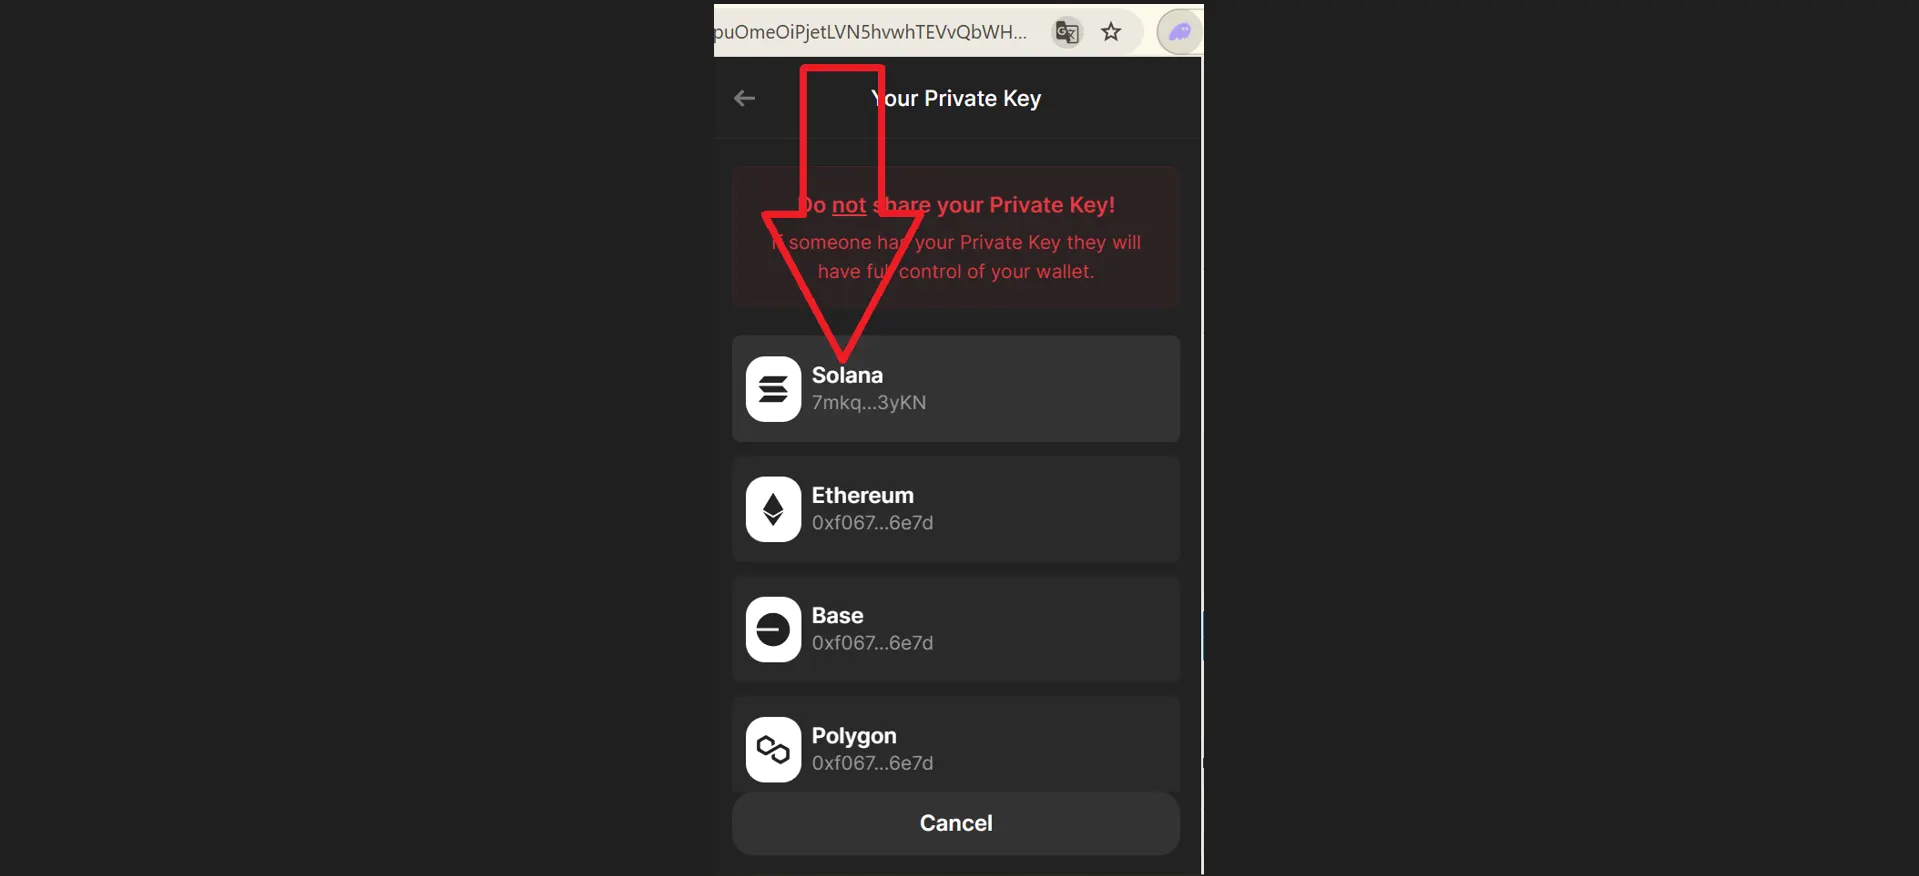
- Export this from Phantom
The screenshots provide information on how to obtain a private key:
- 34
Configure Honeypot Script (config.json)
Paste the private key as shown below:
- 35
Configure Honeypot Script (config.json)
'rpcEndpoint': 'https://mainnet.helius-rpc.com/?api-key=xxxx...'
- Use the URL you got from Helius.
Copy the address and paste it into the second line of 'rpcEndpoint' in Visual Studio code
- 36
Configure Honeypot Script (config.json)
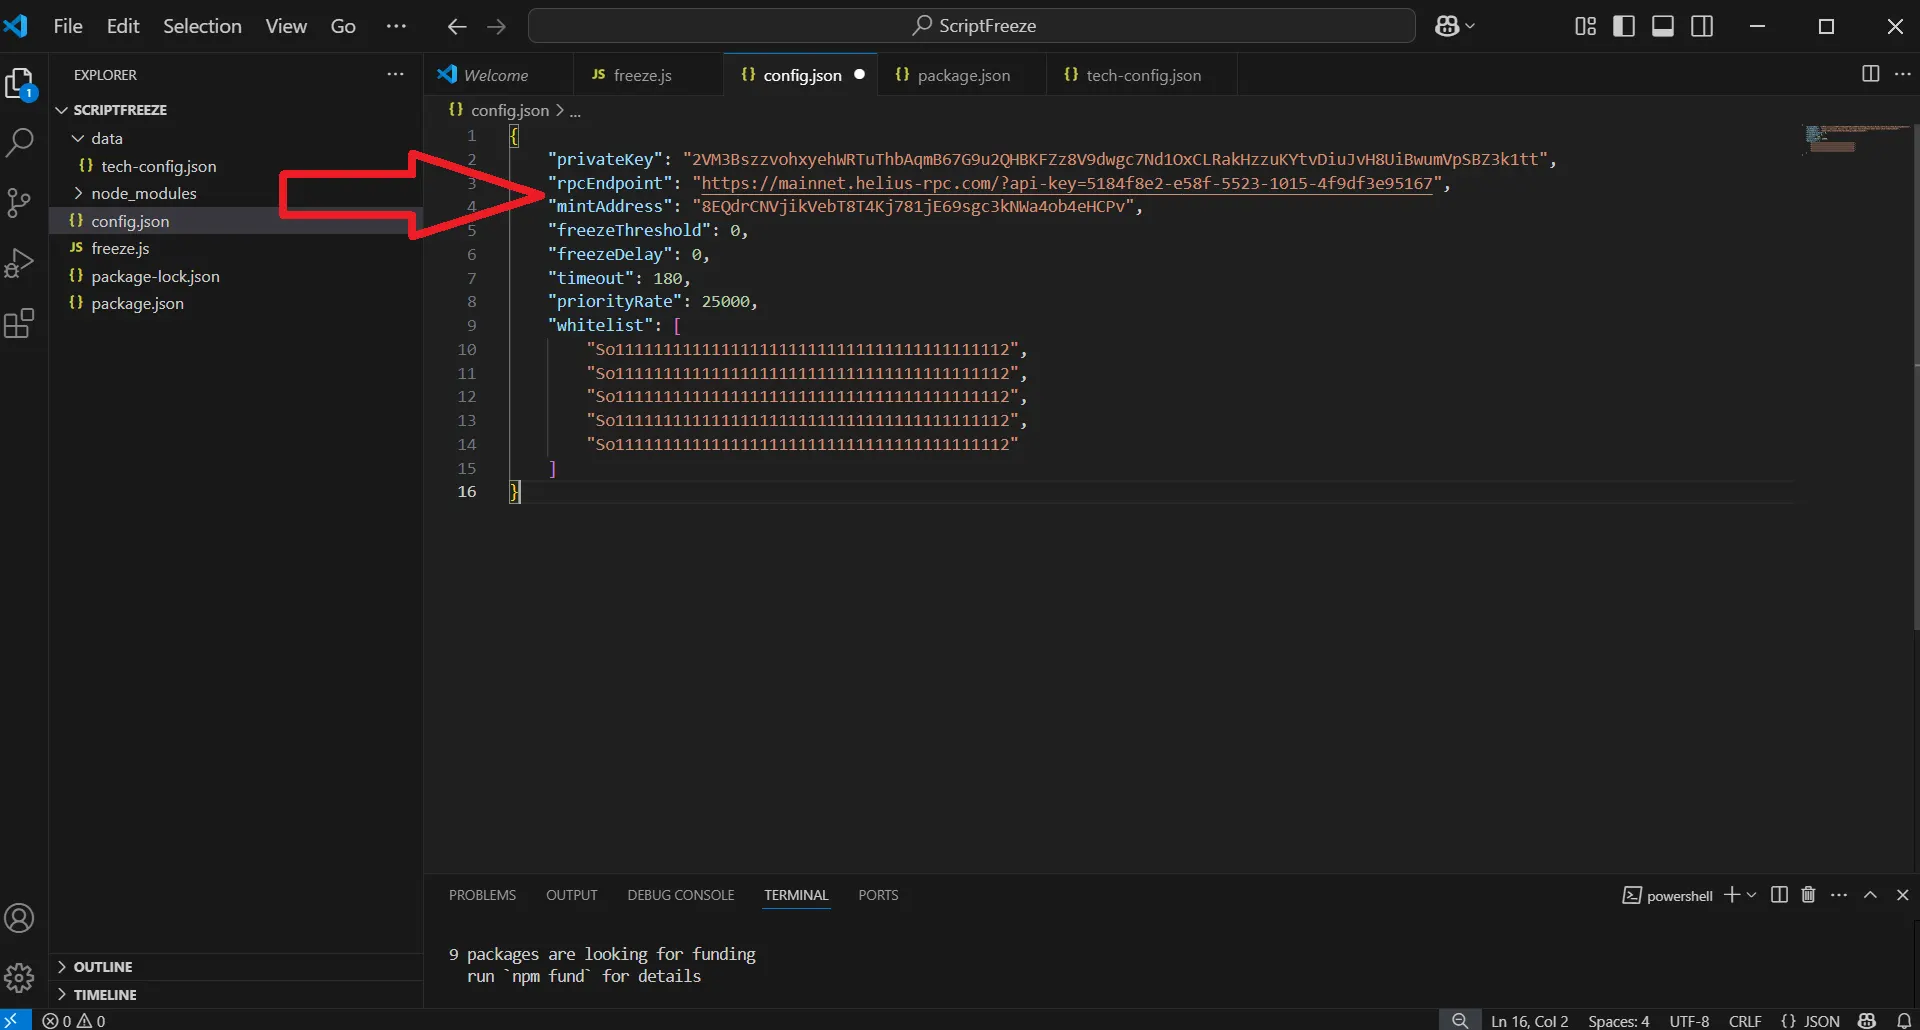
The third line of 'mintAddress': 'xxxxxxx', here you need to paste the address of your token, which we saved when creating the token
After you paste the necessary data, it should look like in the screenshot below:
- 37
Configure Honeypot Script (config.json)
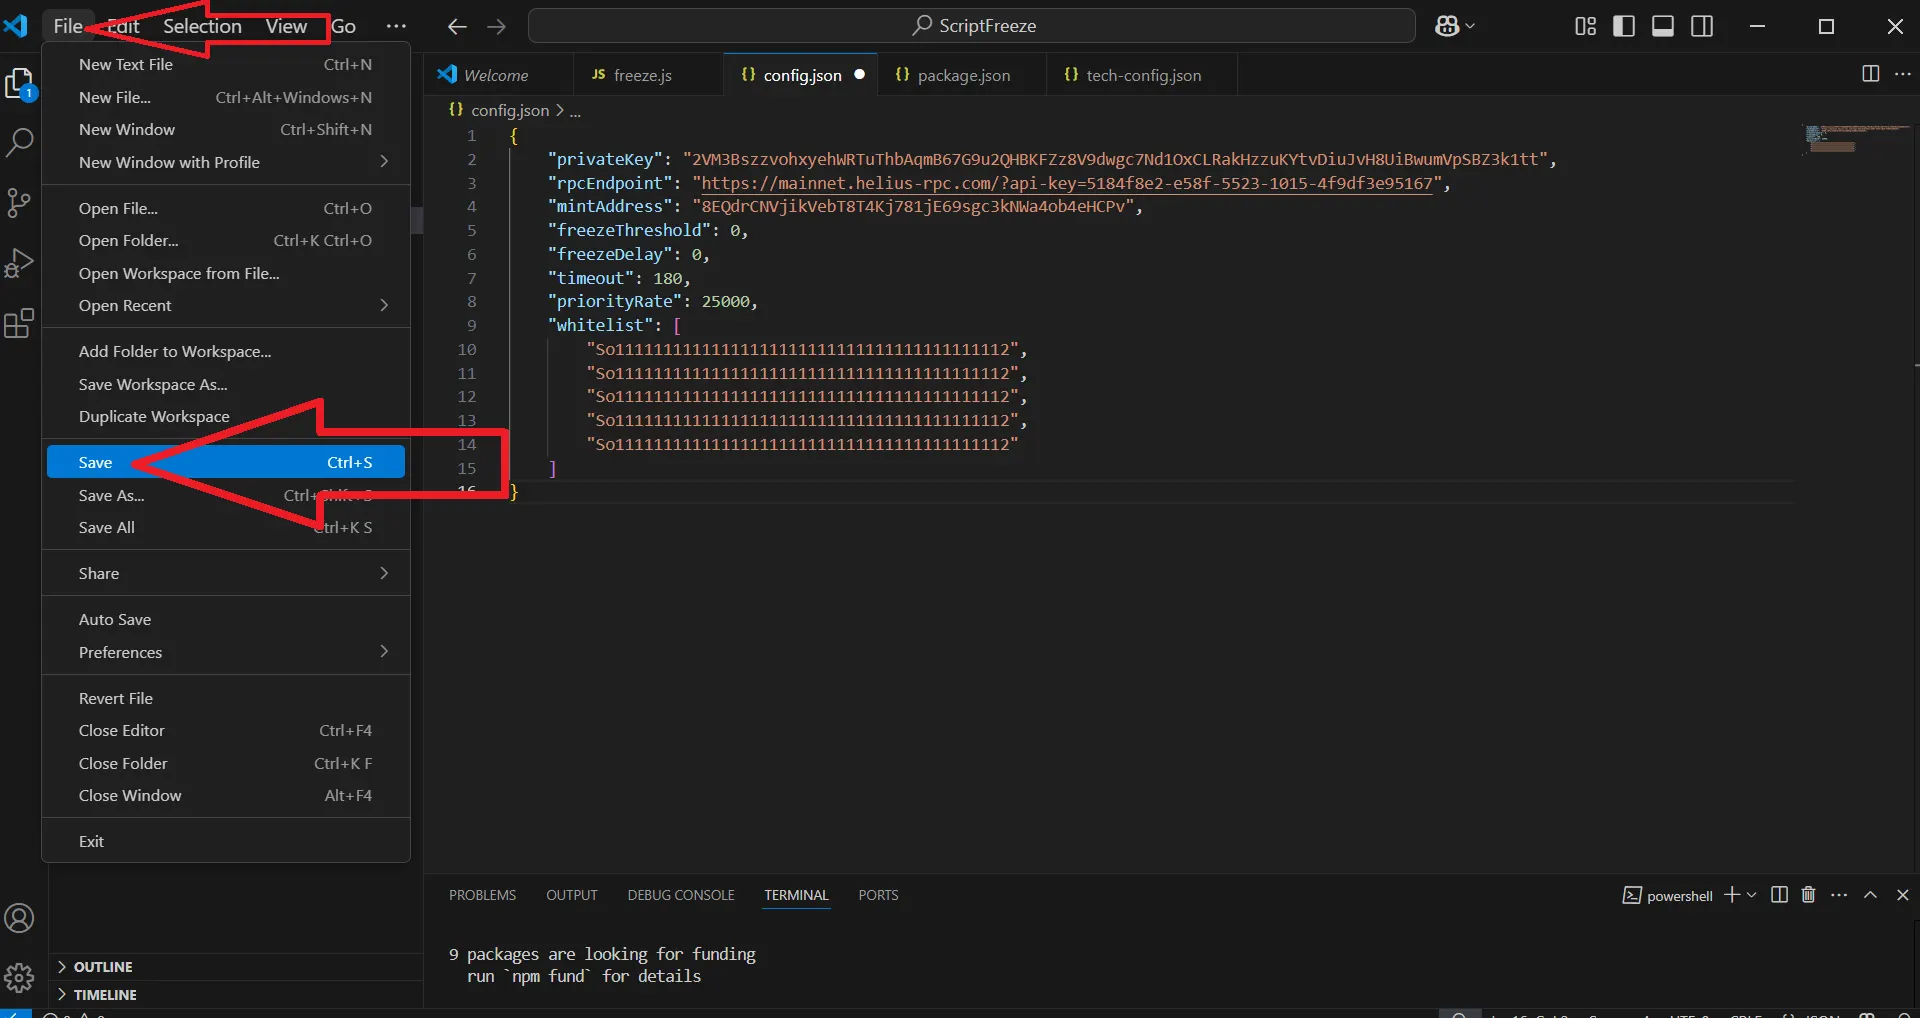
After this, be sure to save everything.
'File' -> 'Save':
- 38
Configure Honeypot Script (config.json)
Optional settings:
You can customize these parameters at your discretion
'freezeThreshold': 0 → Freeze buyers even if they hold just 1 token.
'freezeDelay': 60 → Wait 60s to freeze multiple buyers together (to save fees).
'timeout': 180 → Script will auto-close after 3 hours.
'priorityRate': 25000 → Default gas boost for faster transactions.
'whitelist': [ ] → Add wallet addresses here that should NEVER be frozen.
Save the file (Ctrl+S). If the file name turns RED, it means you broke JSON formatting!


Solana Honeypot Pro - Part 3
- 39
Run the Honeypot Script
This final section explains how to run the Honeypot script, remove liquidity from Raydium, and fix common issues.
- 40
Run the Honeypot Script
Open the folder containing the Honeypot Pro script in VSCode (if it’s not open already).
File -> Open Folder -> select the folder containing the script
Open Terminal (View > Terminal or click the terminal icon).
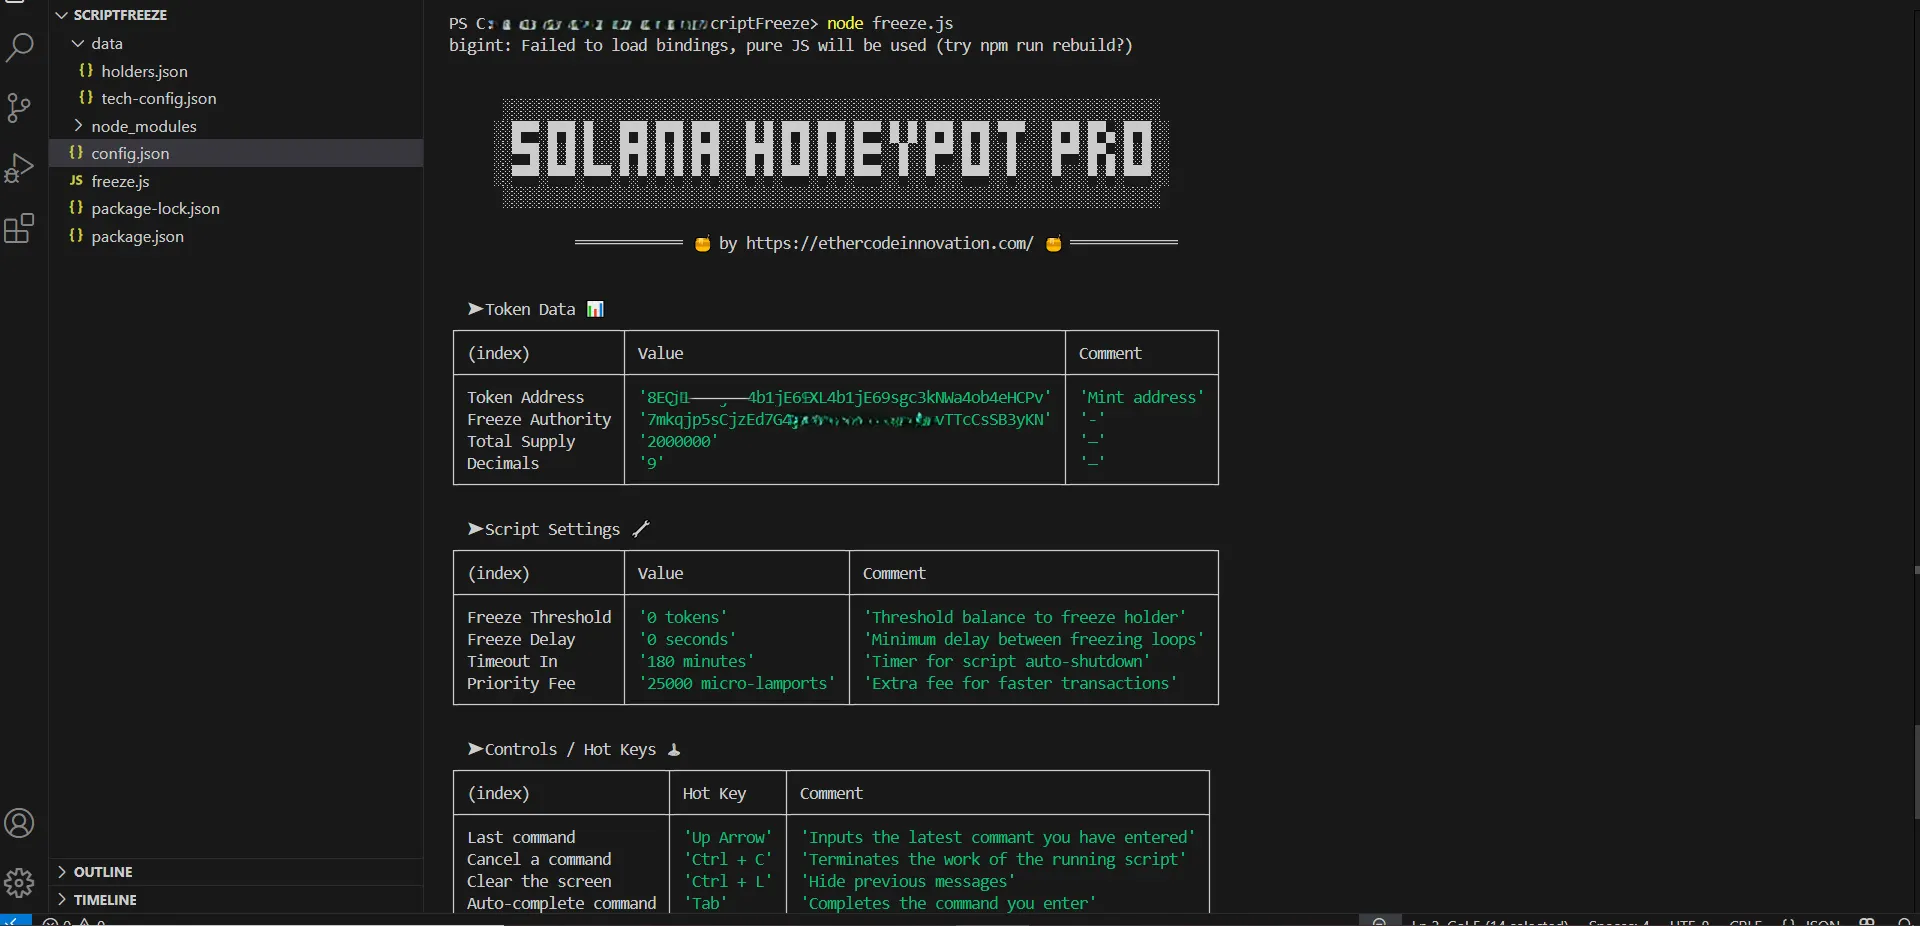
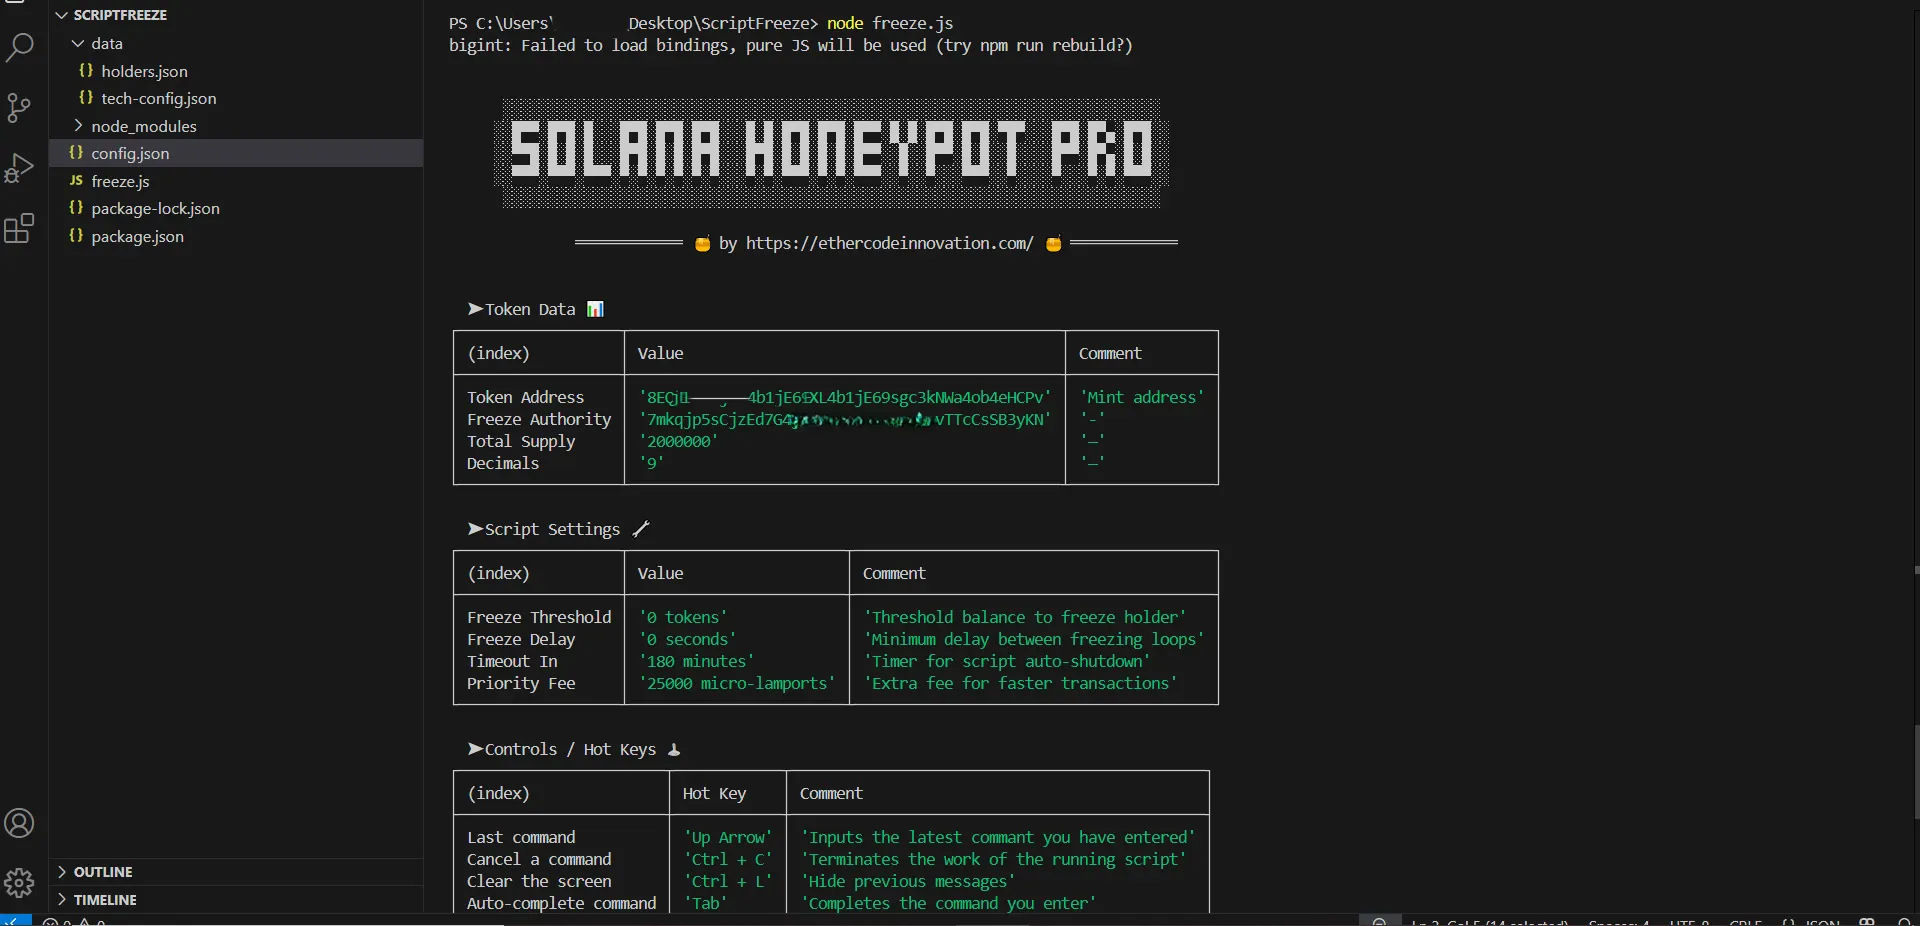
In the terminal, type the following command and press Enter: node freeze.js
- 41
Run the Honeypot Script
🟢 What happens now:
- A welcome message will appear.
- The script will check your config.json and token.
- It will freeze all current holders (if any).
- Then, it will monitor the liquidity pool.
- Every new buyer will be frozen automatically (according to your config).
🛑 To stop the script manually:
- Press Ctrl + C in the terminal window.
When the script is disabled, it simply stops freezing new token buyers, but old token buyers will still be frozen and will not be able to sell tokens in the future in any way, even if the script is disabled
- 42
Remove Liquidity from Raydium
Open raydium in your browser. Portfolio section.
Connect your Phantom wallet.
Scroll down to 'My Positions'. And click 'standard'
Click on the 'minus' button.
Select the amount of liquidity you want to withdraw (from 0 to 100%).
Click 'Remove' and confirm the transaction in Phantom.
🟢 Your SOL and custom token will be returned to your wallet.
- 43
Fixing Common Problems
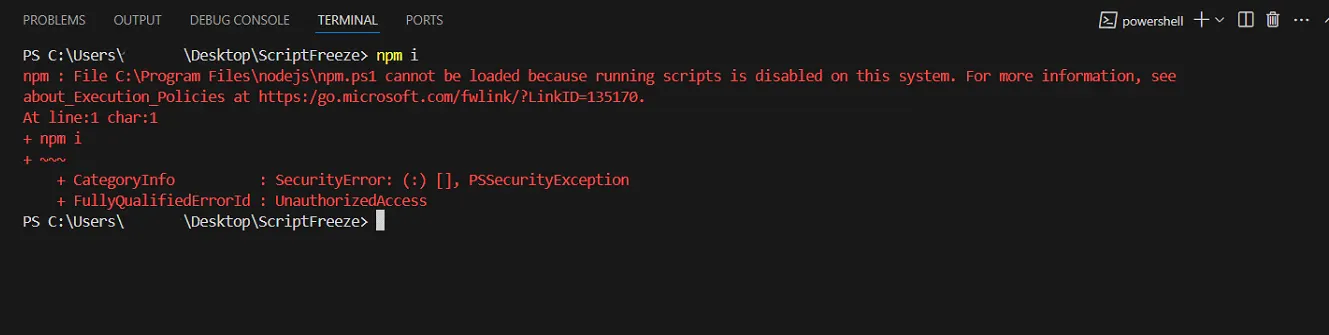
❌ Problem: 'When installing dependencies 'npm i''
npm.ps1 cannot be loaded...
- 44
Fixing Common Problems
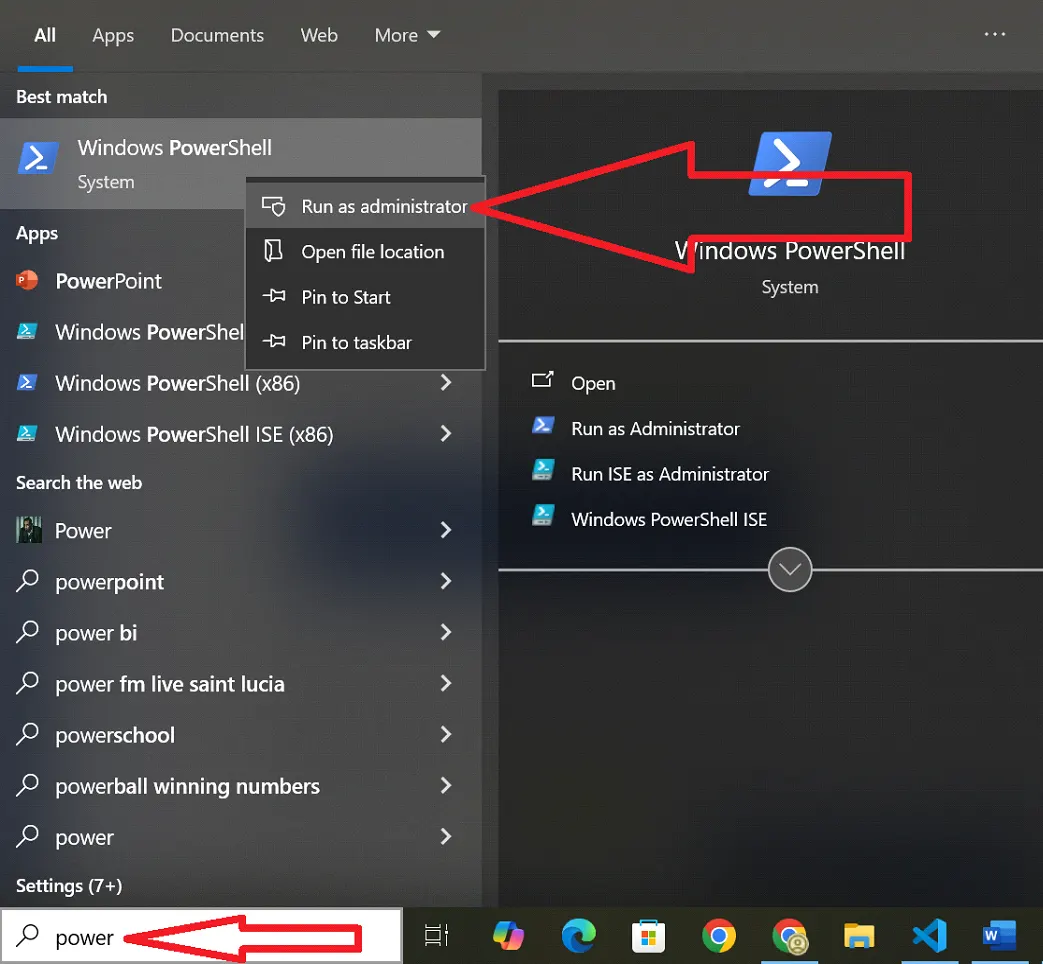
✔️ Now Open PowerShell as Administrator
- 45
Fixing Common Problems
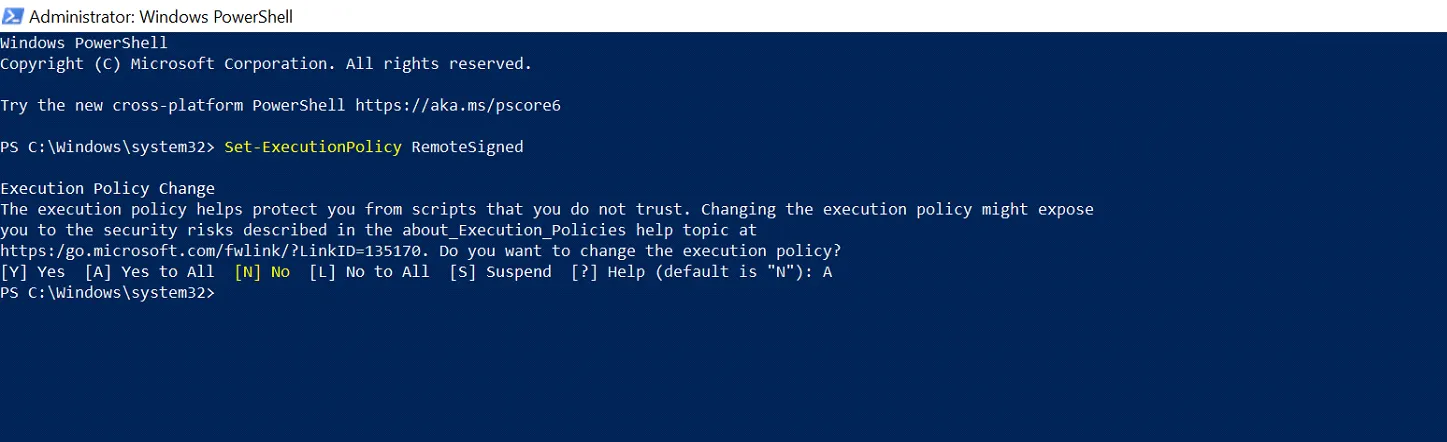
Type 'Set-ExecutionPolicy RemoteSigned' and press 'Enter'
Then type 'A' and press 'Enter'
After these steps, you can safely install dependencies by entering the command 'npm i' in Visual Studio Code
- 46
Fixing Common Problems
❌ Problem: 'npm' not found
✔️ Solution: NodeJS is not installed correctly. Reinstall from nodejs.org and restart your computer.
❌ Problem: freeze.js not found
✔️ Solution: Make sure you are in the correct folder. Use File > Open Folder in VSCode to select the folder that contains freeze.js.
❌ Problem: ENOENT or config.json errors
✔️ Solution: Check your file formatting. Commas, brackets, and quotes must be exactly correct.
✔️ If filename is red in VSCode, there is a syntax error.


